Credit goes to…
Getting there
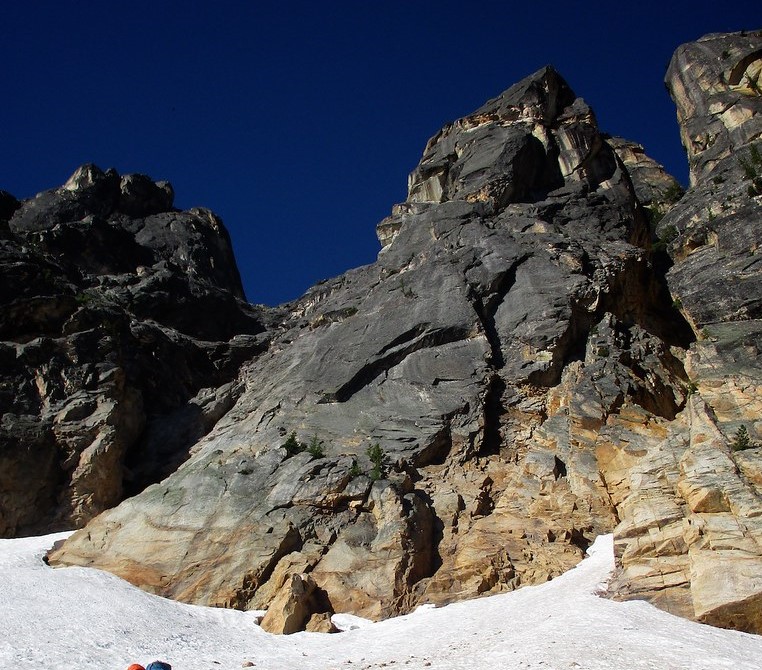
Park at the pond (south side of highway) that is located approximately 1.2 miles east of the pass. Hike up the trail for 30-45 minutes to the base. There are a couple of options depending on the condition of the snowfield at the base. Option 1 is to go up gully to the left of the east face and get on the rock. Option 2 is get on the rock from the right hand side.
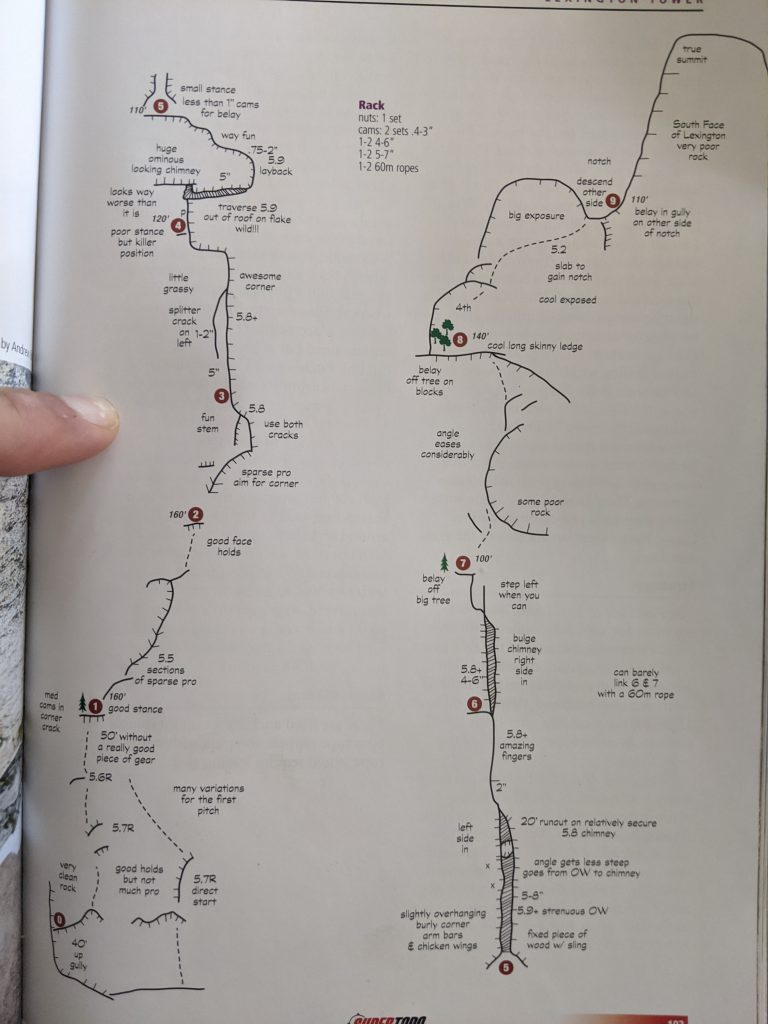
Gear
- MP: Standard rack with gear to 6″. We brought and used a #4 quite a bit as well. You could probably get by with out the 6″ cam if you feel solid in the wide stuff. It was much easier than I had expected, especially with 2 new bolts.
- Bryan: I wouldn’t recommend a #6. The “crux OW” is sport bolted, easy, and has lots of face holds so you don’t even need to get in it.
- Rafe: If I’d had a #6 I would have placed it I think. #6 isn’t terribly necessary, but if someone had one, and they asked my opinion I’d say bring it.
- Erroneous: I’d recommend bringing the #6 too. The off width is not that fierce, but it is really runnout without the big cam
- Mike: The #6 Camelot fits perfectly and makes you feel comfy. Without it, you are a little exposed above your belay
- kevinoh: Whatever you do, don’t bring a #6 (We used a 5 a few times but you could definitely get away without it)
- Firenze: I didn’t necessarily feel like the #6 was all that critical, but the climbing was darned awkward, with nothing useful for feet in a couple particularly rough spots. a friend recommended doubles in fingers/hands; it was very occasionally nice to have these pieces at belays, but I had basically a full rack on my hip after each lead. Stick with a single.
- Nick: We took a double rack, but also strung a couple pitches together. I think if you held true to the route you could easily do it with a single
- Natalie: Brought a #5 and #6 and was definitely happy to have brought them. Left behind the #4. There are places to use it but it is not necessary.
- Dasherton: We climbed this route without a #6. Doubles from .3-3, plus a single 4 and 5. Could use either 5 or 6.
- J: As someone who feels solid in moderate wide stuff, I felt comfortable without a 6 and would say if you’re not going to bring a 6 not to bring a 5 either, and if you’re debating between a 5 or 6 just go with the 6.
- Max: We brought the #6, and with it were able to protect the wide sections really nicely. We brought a #4 as well that was pretty unnecessary in hindsight, so I wouldn’t recommend the 4.
- Steve: bring doubles .5-1 or 2 next time, singles to 3 and a 6 for comfort
- Sunny: Maybe singles on small, doubles of #1-#3, #4, #5.
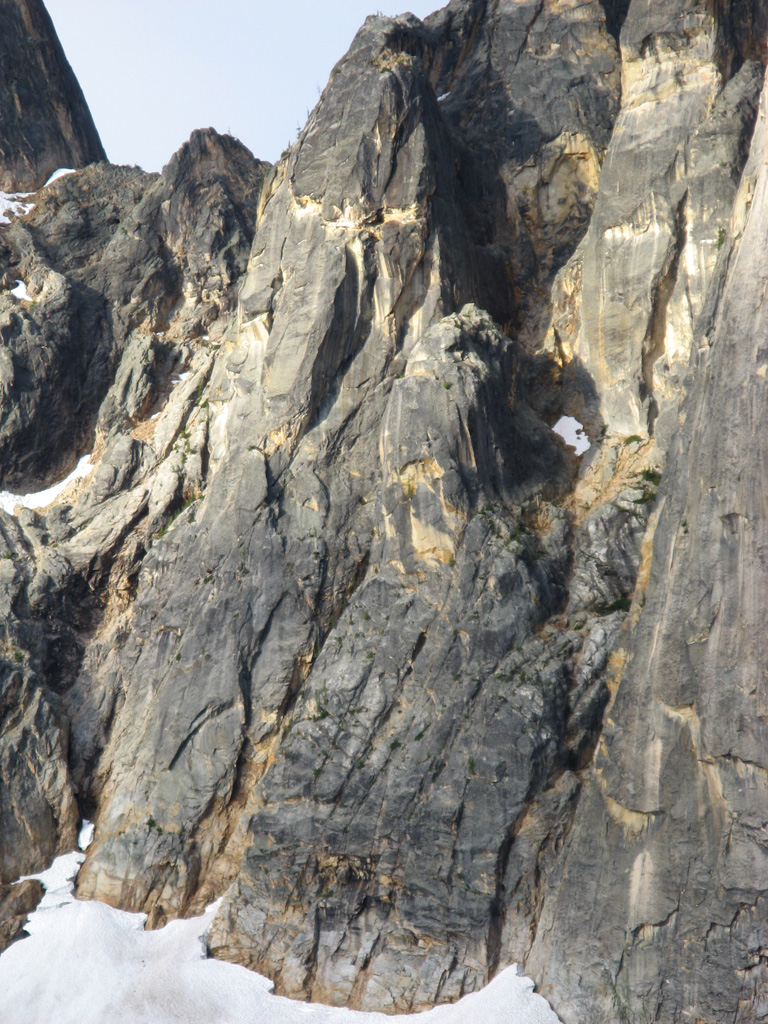
Route
Approx route?


Pitch 1 – 5.7R, 160′
Climb up a crack system and traverse left into slopey climbing with difficult protection. Belay where convenient.
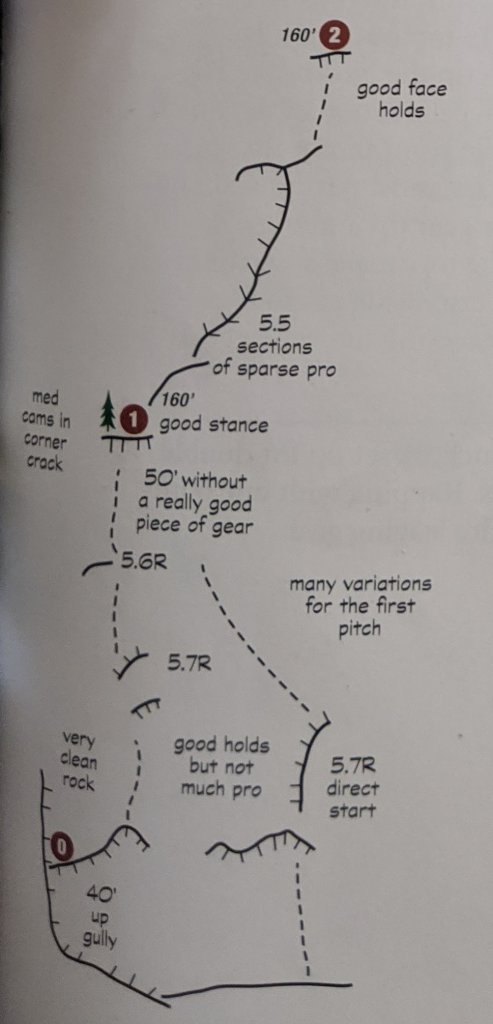
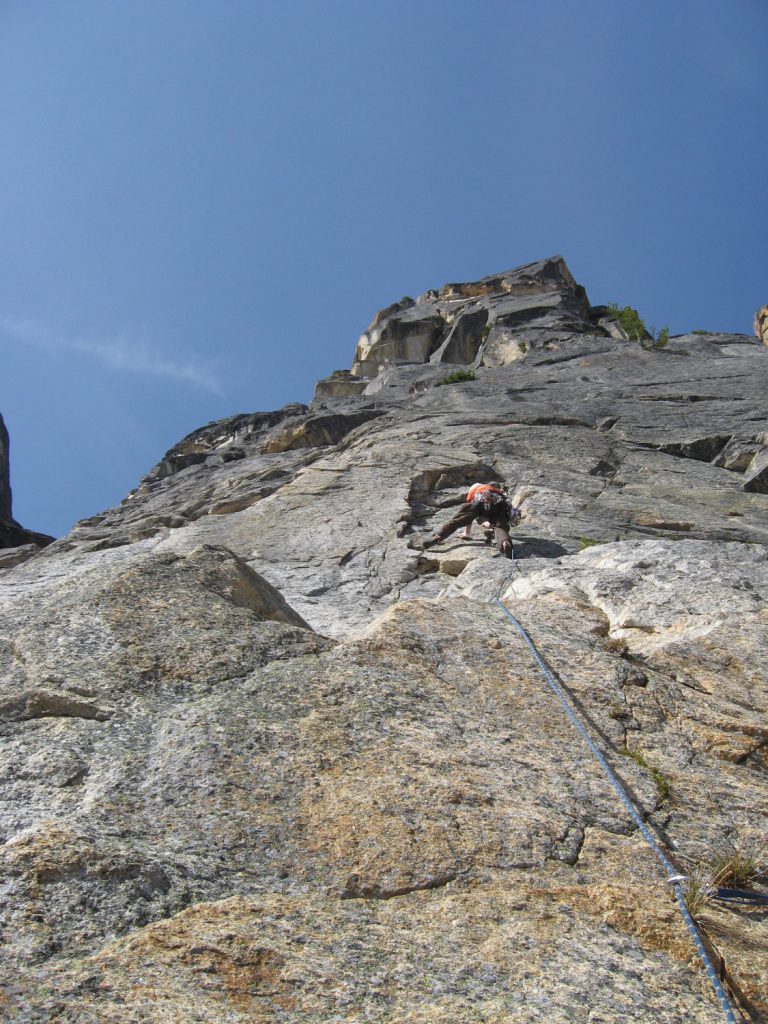
Start of P1. Just above climber is where it traverses left onto difficult to protect terrain. 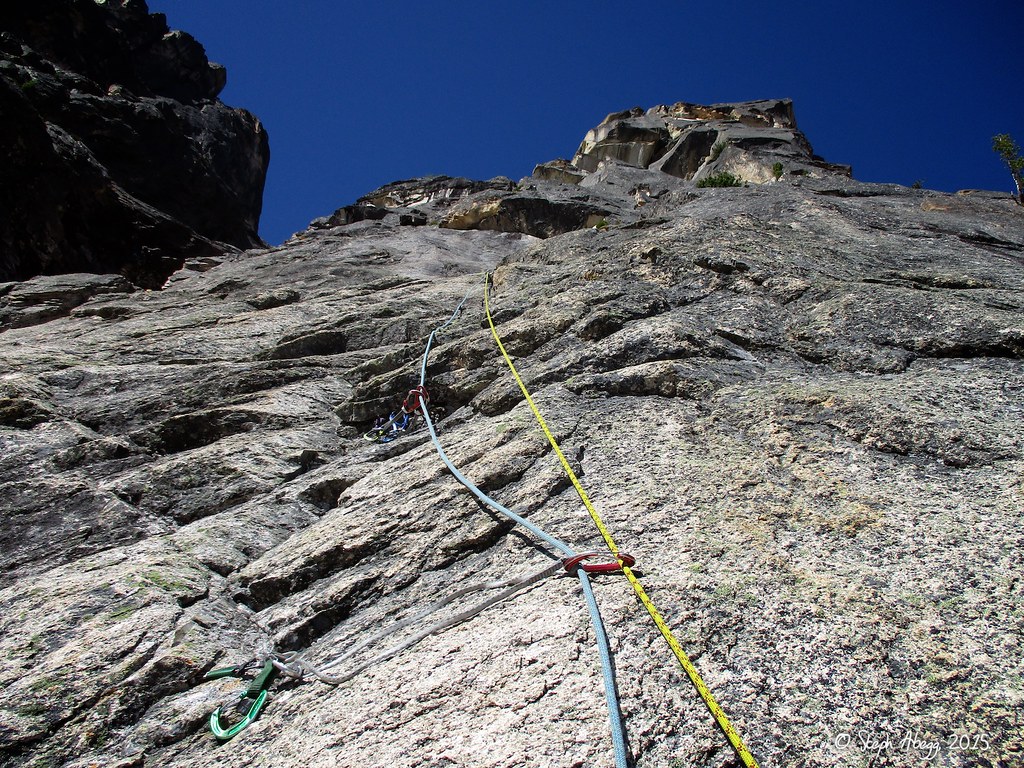
Pitch 2 – 5.5 PG13, 160′
Continue up and slightly right to the base of the obvious left facing corner. “Significant runouts on this section keep things interesting.” Belay from a small tree.
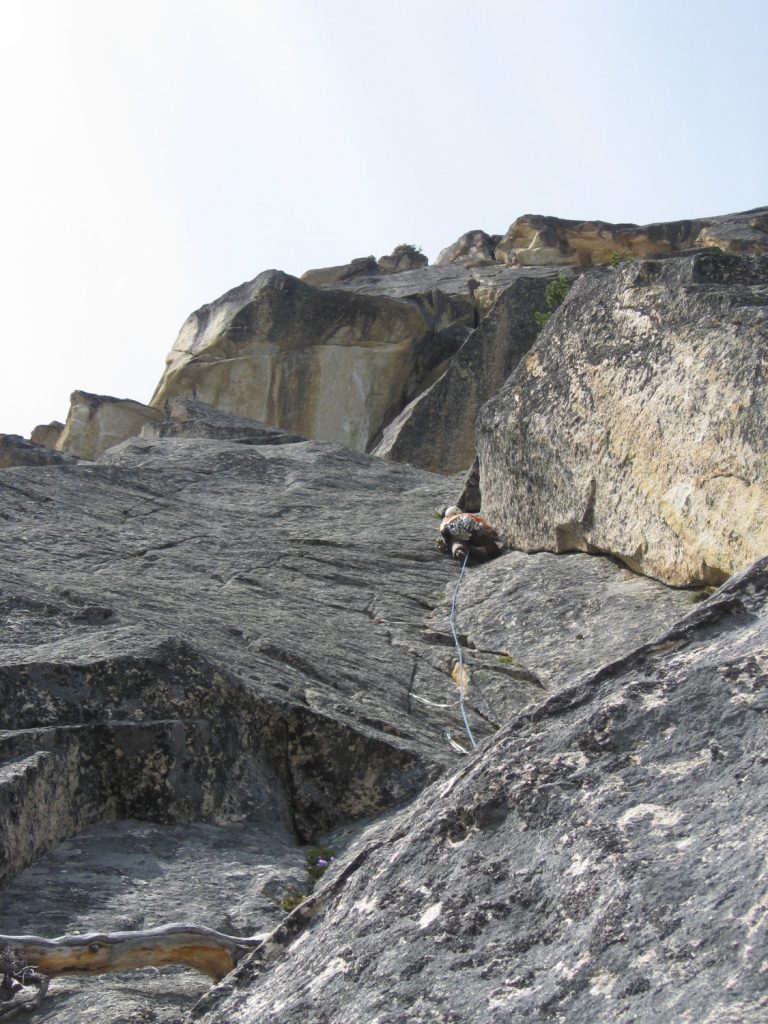
Midway up 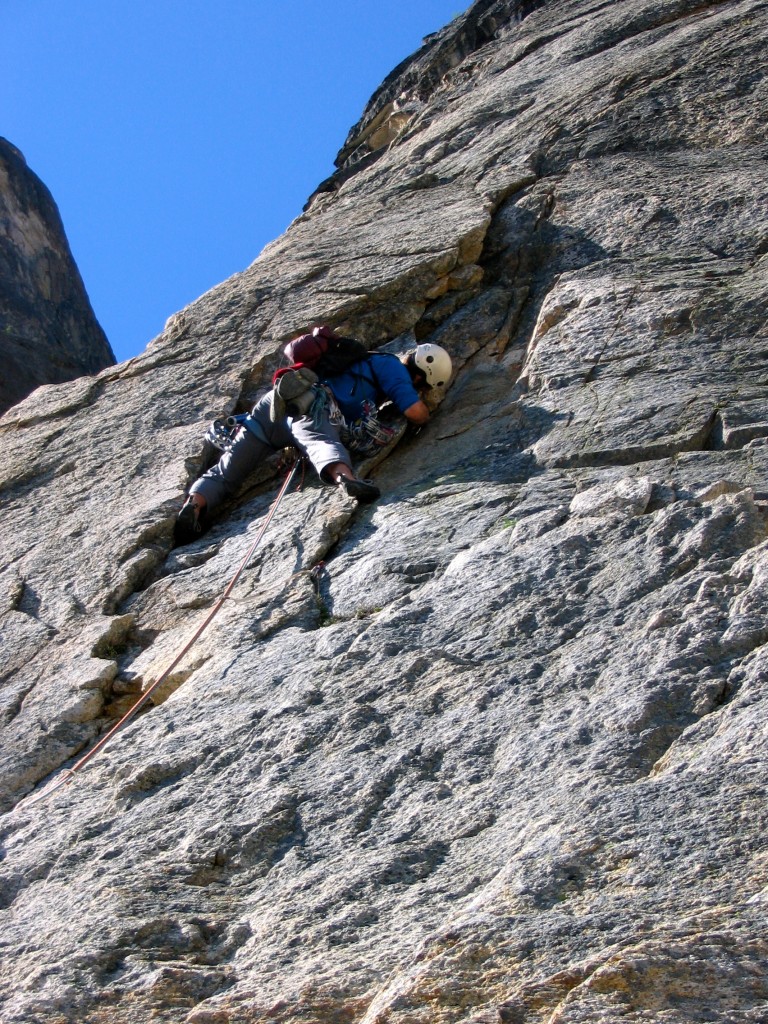
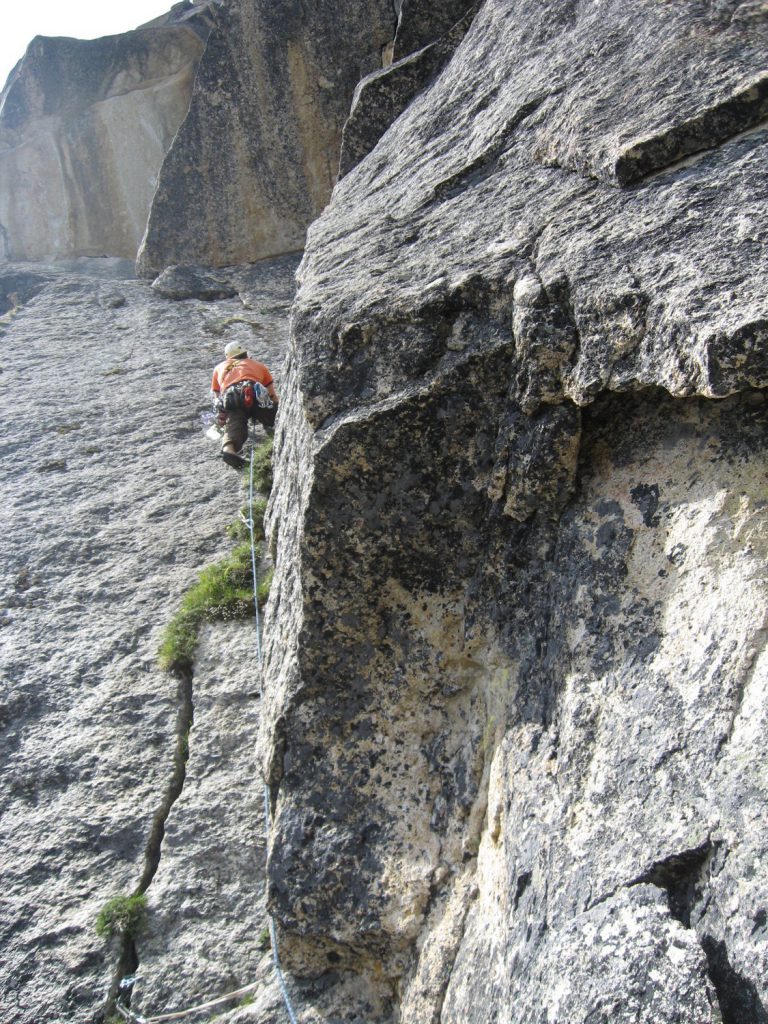
At the corner 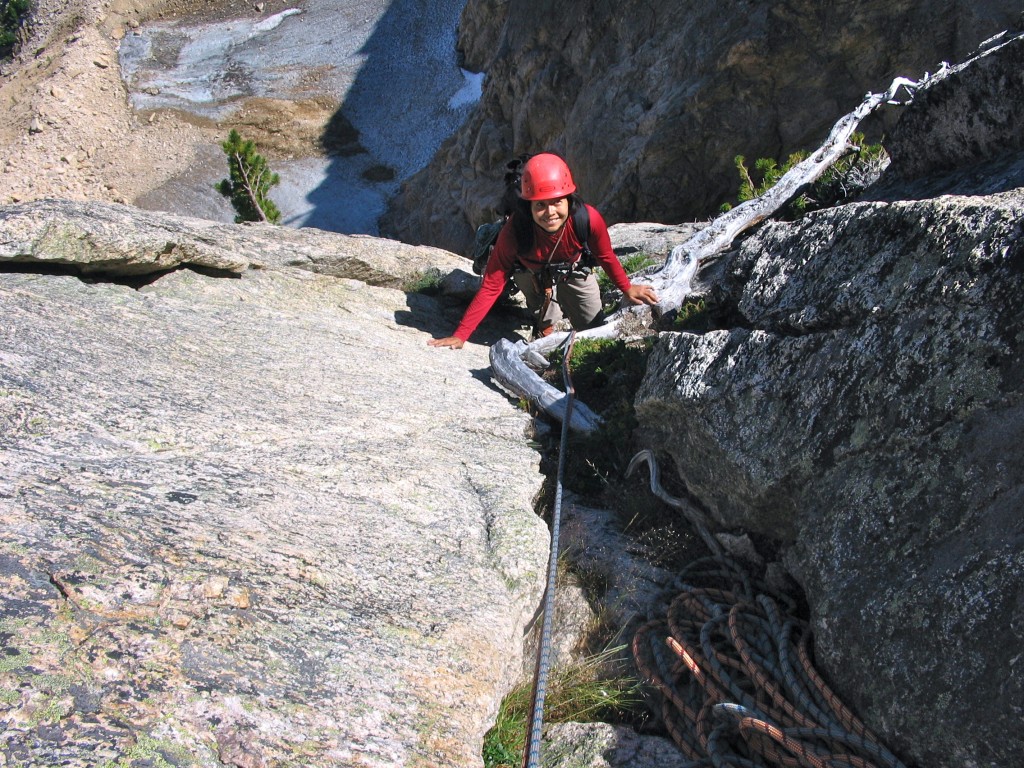
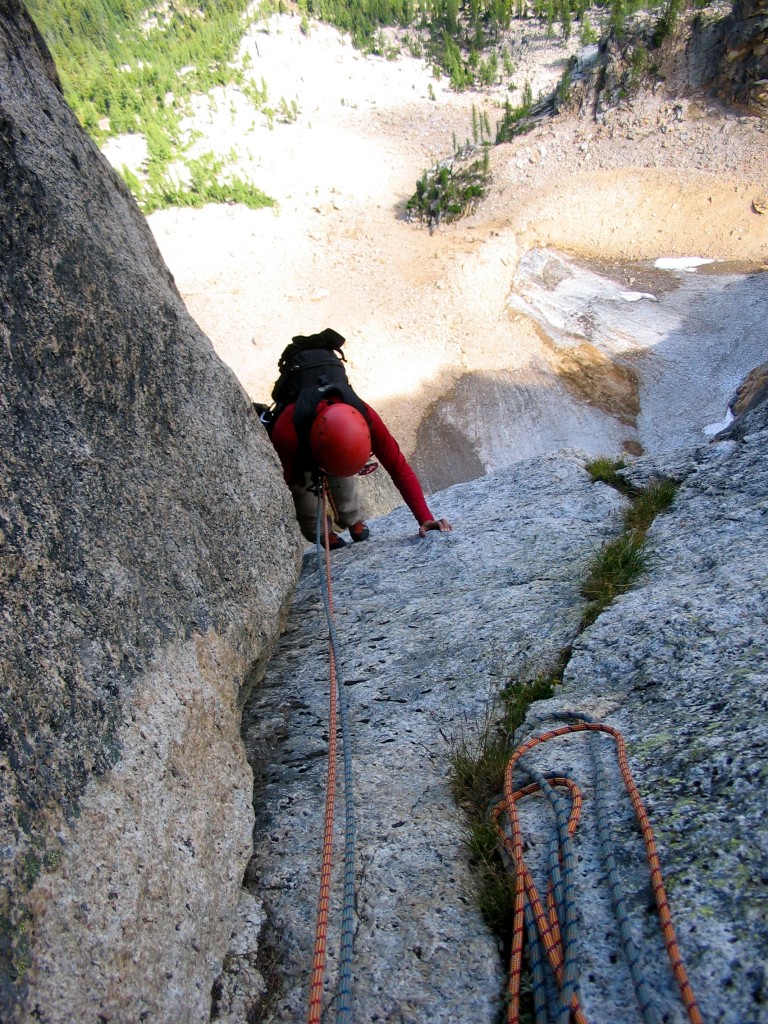
End of P2
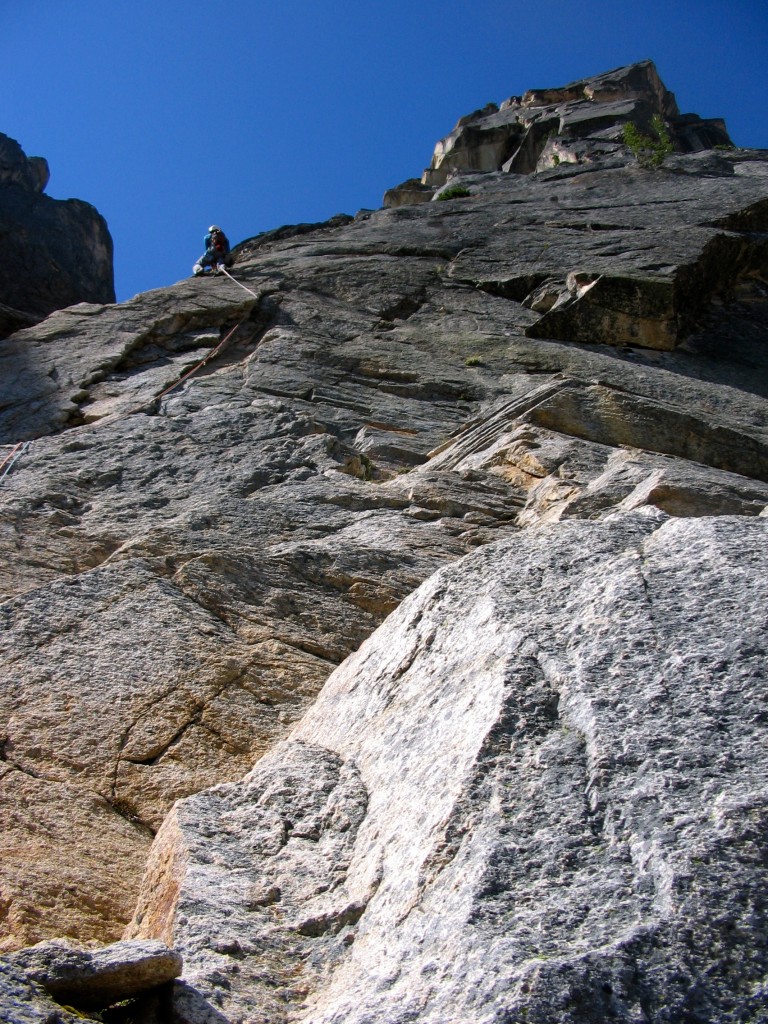
Pitch 3 – 5.8, seems shorter
Climb the left facing corner to a nice ledge with a tree belay.
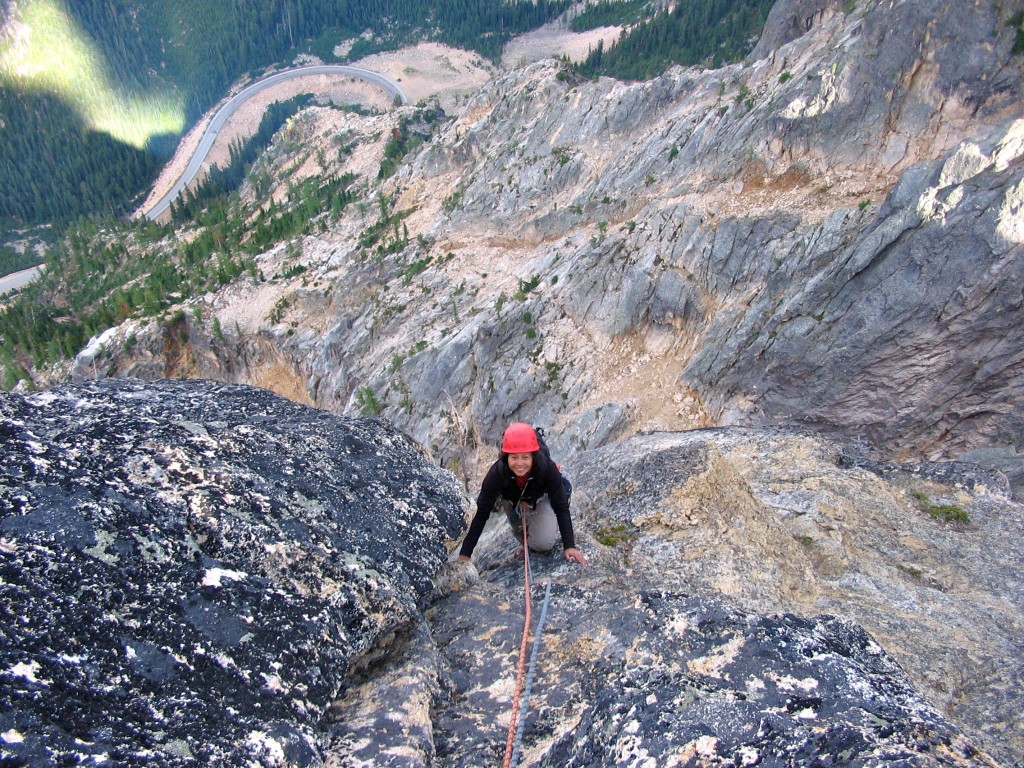
Start of P3 
Start of P3
Pitch 4 – 5.8+, 120′
Climb up and left through cracks ranging from hands to fingers and belaying at a stance below the roof with a deadend chimney. This is not the chimney you’ll be climbing.

End of P4
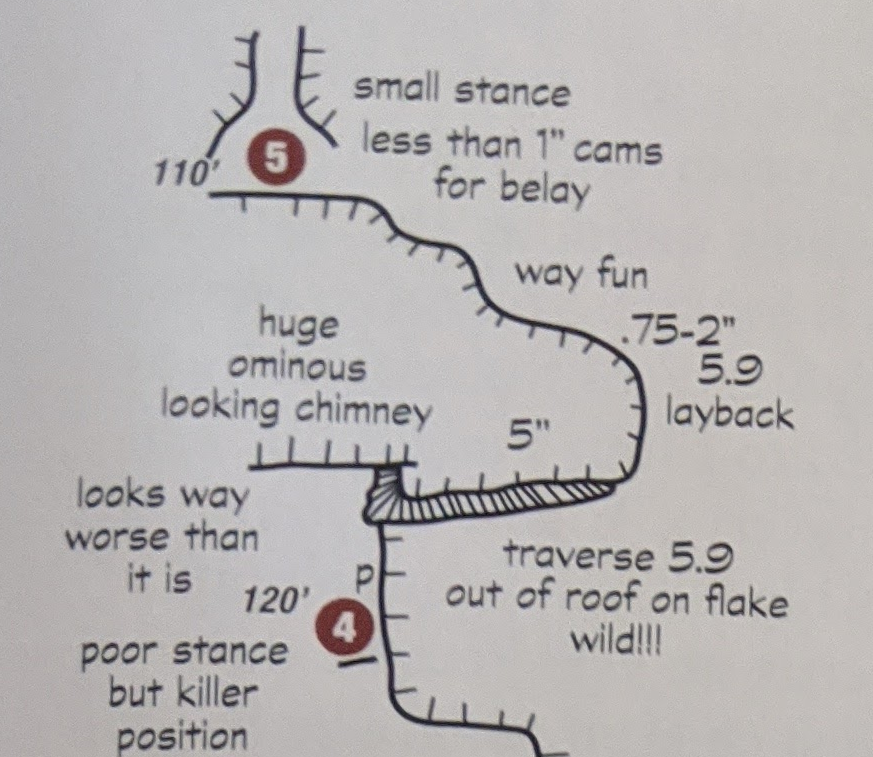
Pitch 5 – 5.9, 110′
Once at the deadend chimney, traverse right on a small ledge (exposed). This ledge can be climb as a handrail, or walked along like a Thank God Ledge, or both – making a transition from one climbing style to the other mid way through the traverse. At the end of the traverse, pull a difficult lieback (one could jam this) and continue up the hand and finger crack. Crux. Belay with <1″ cams.
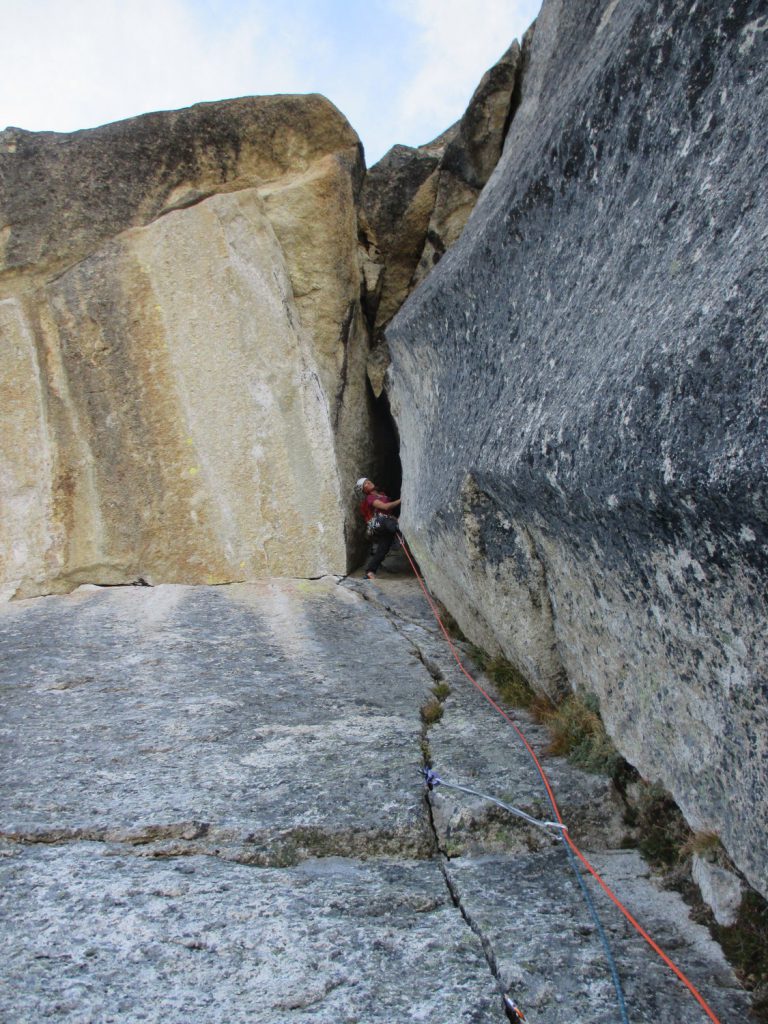
Start of P5, just before traverse 
End of traverse, about to go up 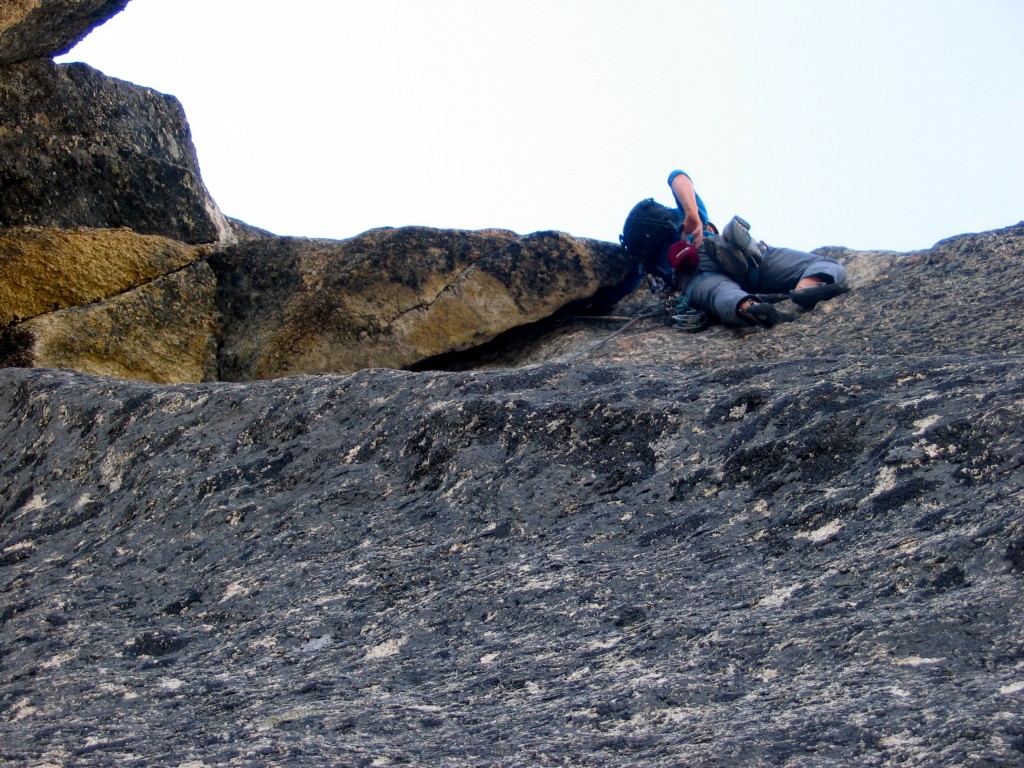
Flake then finger crack 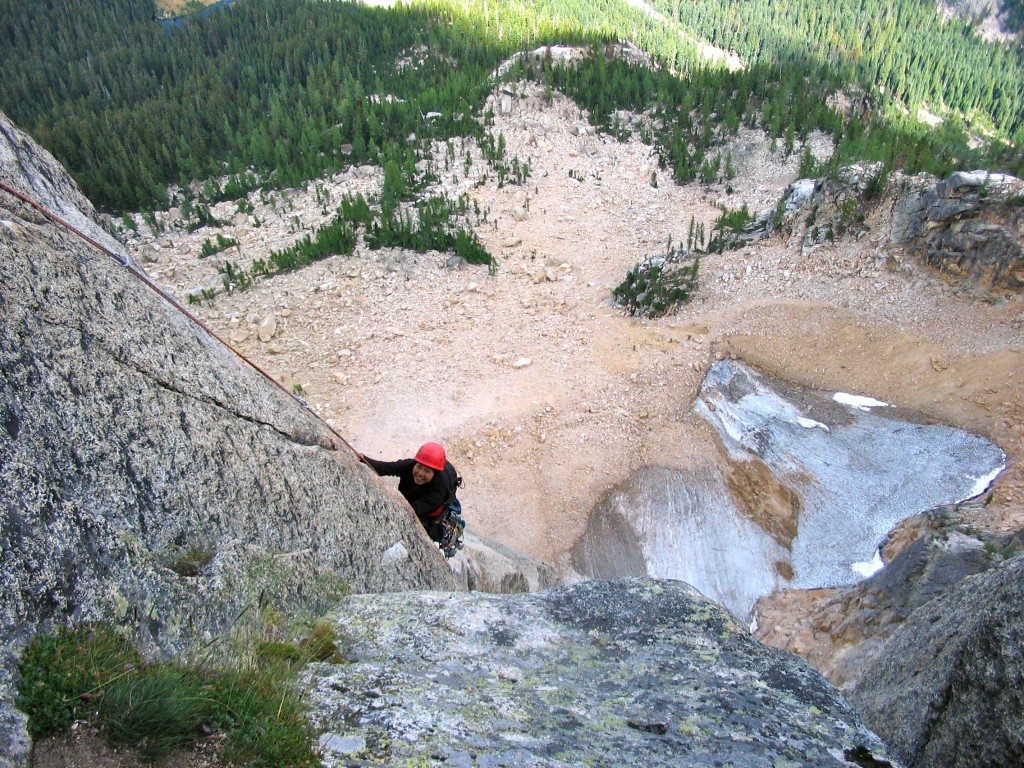
Ending finger crack
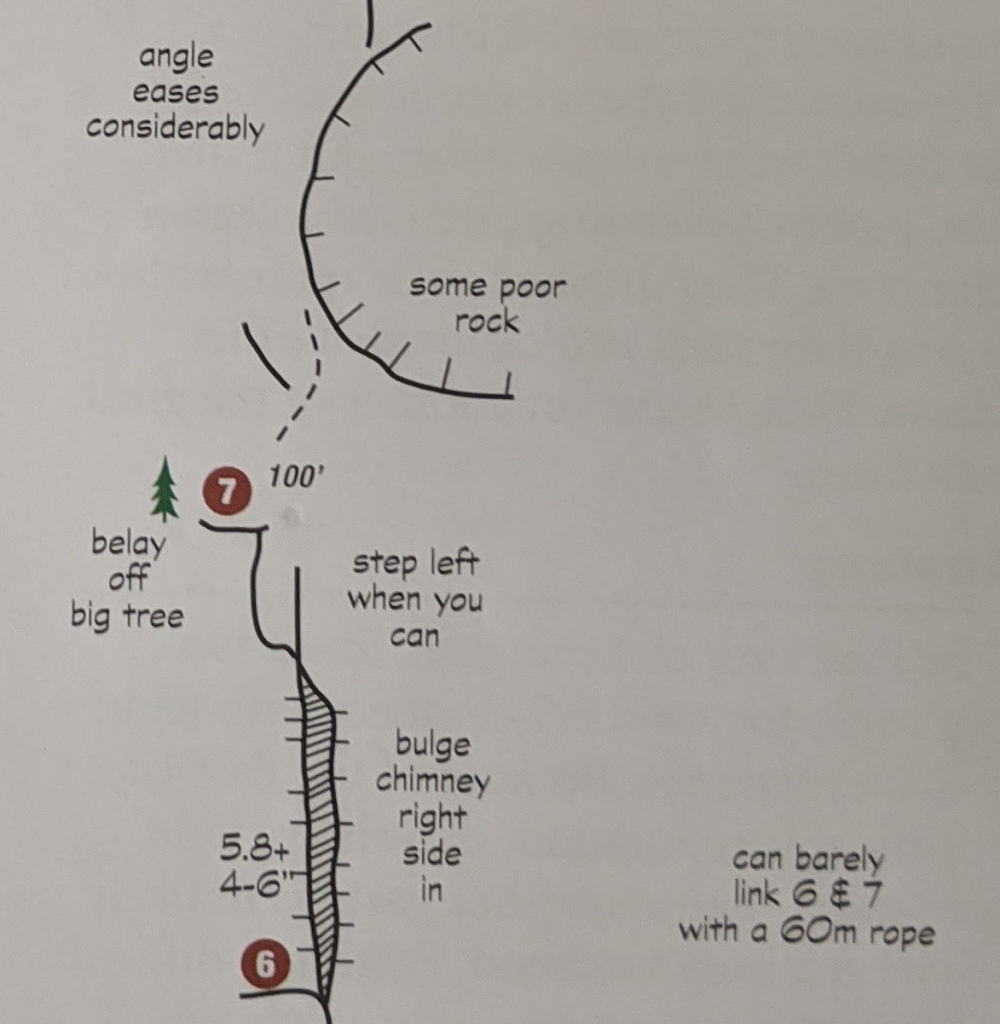
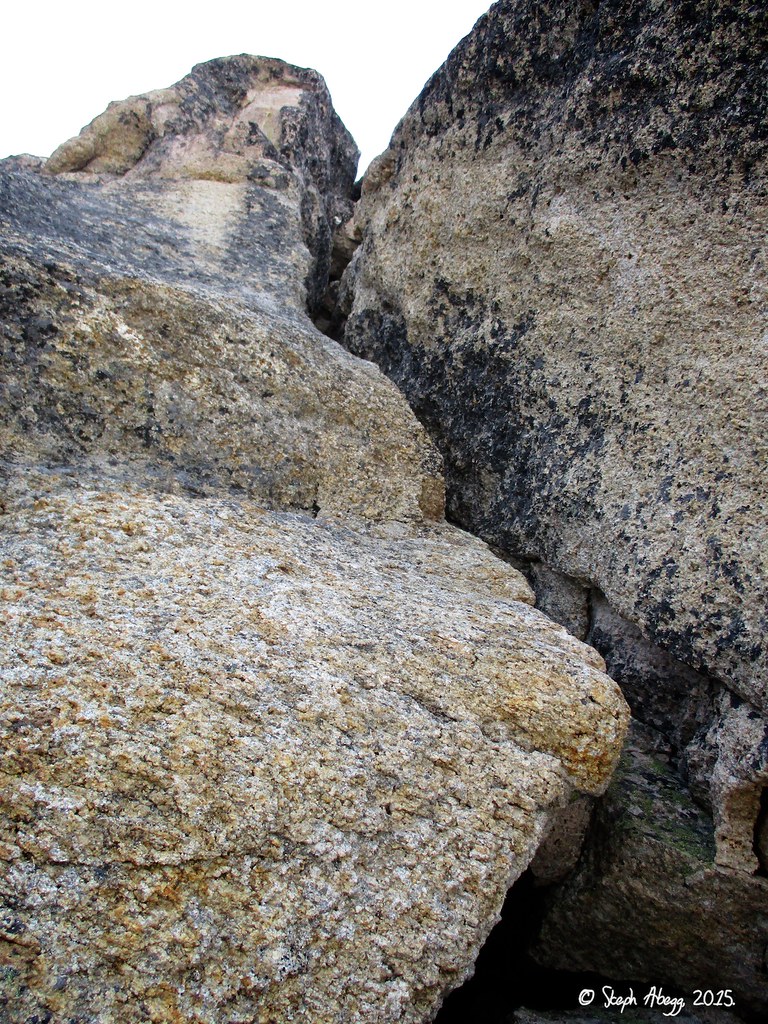
Pitch 6 – 5.9+
Climb the offwidth above, clipping the a jambed 2×4 for pro and passing two bolts to an alcove above.
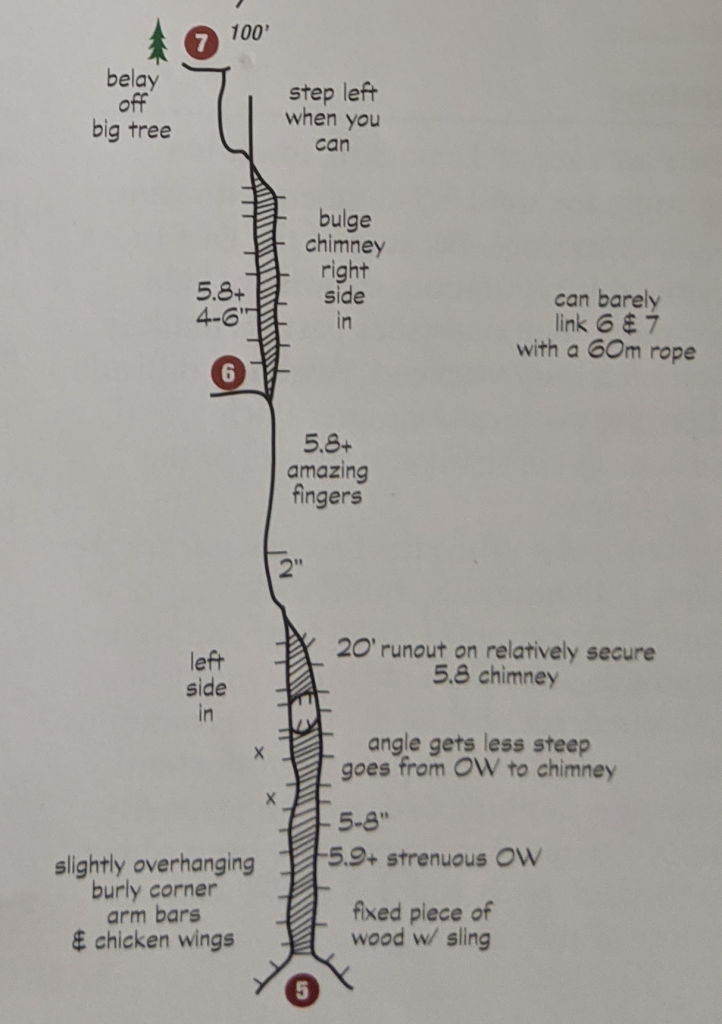

Start of P6 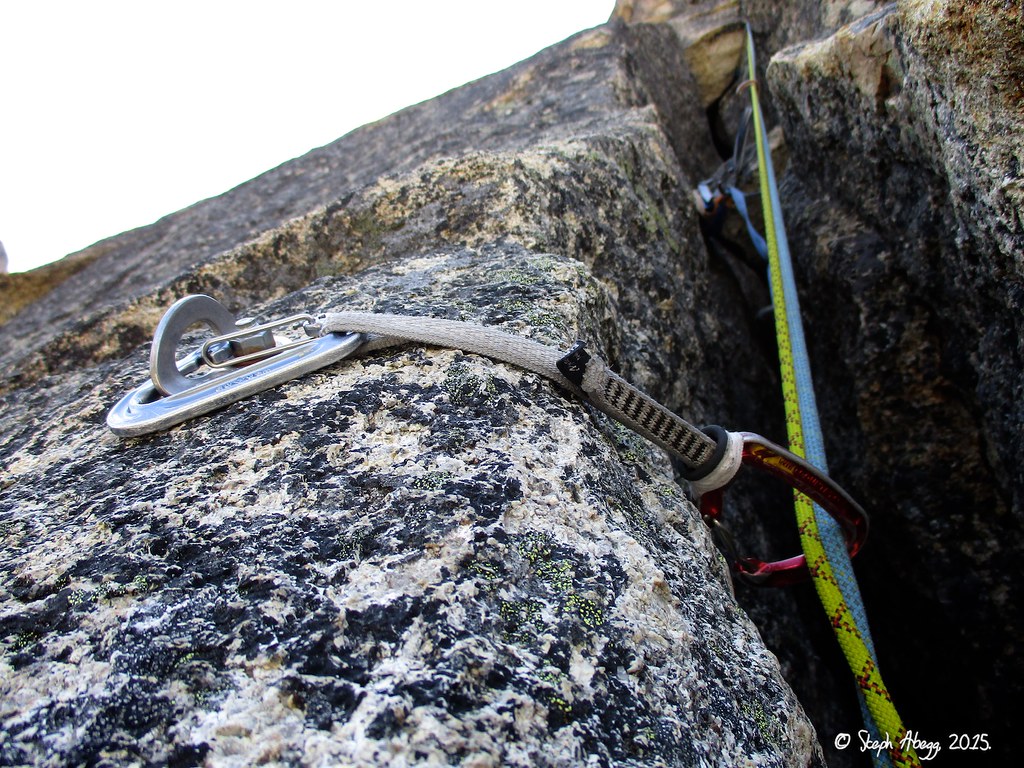
Bolts 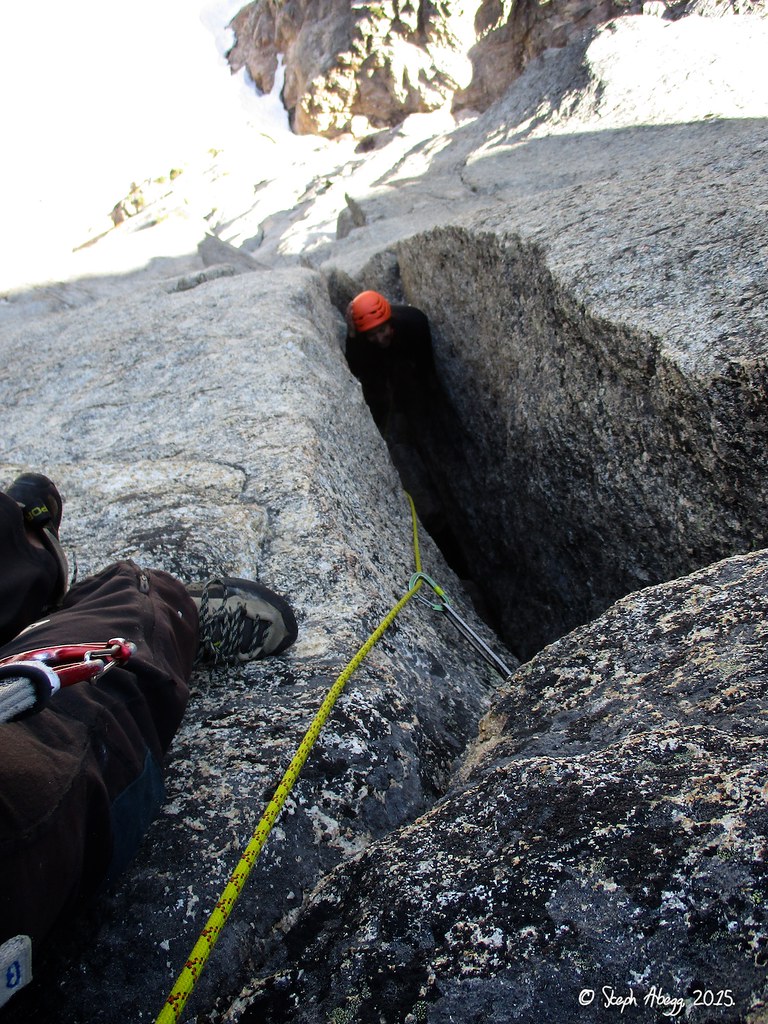

Top of P6
Pitch 7 – 5.8+, 100′
Continue up the short chimney, which leads to blockier terrain and another offwidth. Belay off big tree.
Pitches 8-10
Easier ground leads up and left to a tree belay. Continue up to the top of the formation. A 4th class traverse pitch across a catwalk takes you to the unroping notch.
Descent
People seem to recommend continuing to the top and then rapping around the back side towards Blue Lake Trailhead and then walking all the way back around.
West (opposite side) descent
Essentially, you follow the Liberty Traverse for a bit in the south direction and then walk down a gully.
The topo below is the Liberty Traverse… For descending people say to “traverse south along the ridge line, aiming for the little tree covered knoll between the spires (Island in the Sky bivy ledge, obvious flat ledge), and find a rap station on a tree at the far side of the knoll (one person says you can scramble down on the right/west side just before bivy ledge to bypass rappel). After a short 20m rappel, continue traversing south towards NEWS until at the gully above the start of NW Corner & West Face. From there, it’s a simple scree surf to the main trail down”.


Dasherton: …belayed her to a large sandy ledge from which the rappel route begins. One last pitch of enjoyably exposed definitely-not-fourth-class-but-solo-anyway-because-there’s-no-pro traversing saw us back at the bottom of the rappels for the Lexington Tower’s West Face. We took a page from the Liberty Bell Traverse guidebook and traversed south along the ridge line to a short rappel, then continued traversing south towards North Early Winter Spire until we were in the gully above the start of the NW Corner & West Face. From here it was a simple scree surf to the main trail down, and avoids all the unpleasantness of the normal Lexington descent.
MP comment: The guide book recommended descent is really loose. You can avoid it by following the beta for the Liberty Traverse: Scramble toward NEWS on the ridge, aiming for the little tree covered knoll between the spires. There’s a rap station on a tree at the far side of the knoll. From the bottom of that rap, scramble toward NEWS and pick up the main descent trail there.
Mike: From the col between the top of the E Face route and the summit block, look SW and you will see the “Island in the Sky” bivy ledge. It is an obvious flat ledge with some small trees – looks like a very cool place to camp. Traverse some 3rd class gullies to get over toward this bivy, and before getting up onto the bivy platform, take the 2nd class gully down to the right (W). OR, if there is snow/ice, you can get up on the bivy ledge and look for rap slings off the SW side of the ledge. Short rap into 2nd class or snow terrain. Enjoy.
Steve (July 29): walk off other side (West) very loose, probably faster to rap off t&c (East)
Supertopo (from Liberty Traverse): Look to the south to a large flat area on the ridge crest: that’s your destination. From the top of the route, head due west a short distance down a steep scree gully. Until you can cross over a few short 3rd class ribs and traverse down and left aiming for the large flat section in the ridge. Once on the large flat section, head to the far south end and rappel 20m off a tree to a scree-covered slope. Walk along the crest for a short distance until you can drop down a gully that angles toward the northwest edge of North Early Winters Spire and the start of the West Face and the Northwest Corner.
Reports
Lexington - East Face - 2020
Gear Cams of 0.3-5 (plus Trango Big Bro equivalent to #6), with doubles of 0.5-1, and nuts, worked perfectly! Used #5 on four pitches, #6 only on the two chimney pitches, I’d bring the same gear next time! If anything maybe leave the #6, but I was happy to have it. Radios – They were…
Plans
Lexington East Face 2020
Weather Twilight: 5:54 AM, Sunrise: 6:26 AM, Sunset: 7:32 PM, Dusk: 8:04 PM Climbing elevation starts at ~6,500. Sun should hit the cliff close to immediately after sunrise since it’s east face. Hourly forecast at 6,800. For Saturday… 6am: 44, 13mph gusts 9am: 52, 9mph gusts 12pm: 62, 10mph gusts 3pm: 67, 10mph gusts 6pm:…