Credit to Mountain Project!
Gear
- 60m rope (or 70m if need to bail route)
- 17 quickdraws, including 3-6 alpine
- Radios: Probably not needed?
Beyond Redlining runs straight up the West Face of the Vega North Tower on excellent rock for 11 pitches (8 of them are 5.10). It finishes on the same summit as Mile High Club. The mountain views and ambience are outstanding.
This route is significantly longer, harder, more sustained, and more committing than Mile High Club. It has typical mountain hazards, including steep snow in early season, multiple rappels on the descent, loose rock on a few ledges, difficult retreat at times, and potential for party-inflicted rock fall. Climbers up to the challenge will find a varied and outstanding line with lots of 5.10 climbing.
Name: Why “Beyond Redlining”? In climbing, redlining might mean being pumped, an anaerobic state preceding muscle failure, or otherwise pushing beyond our physical limits, but it also has an important historical meaning. Redlining was used by the Federal Housing Administration, cities, banks, and others to demarcate inner city areas, typically black neighborhoods, whose residents were systematically denied home loans, insurance, healthcare, and other services, even if they were more qualified than whites outside these areas. This practice deepened racial and socioeconomic inequalities between blacks and whites. Redlining started with the National Housing Act of 1934 and continued until the Home Mortgage Disclosure Act of 1975 required transparency in lending practices and revealed the discriminations of redlining. Thankfully, we have moved beyond redlining, but we still have a long way to go before we live in a country that lives up to its founding principle that “all men are created equal”.
Donations: Some people have offered to support our efforts in creating and maintaining routes like Mile High Club and Beyond Redlining. We appreciate this desire to give back, but we would encourage you to consider donating your money/time to an organization working to help people who face greater obstacles and hardships than we do. The American Civil Liberties Union and the Southern Poverty Law Center are two of our favorites. There are lots of other great ones. Thank you for doing your part.
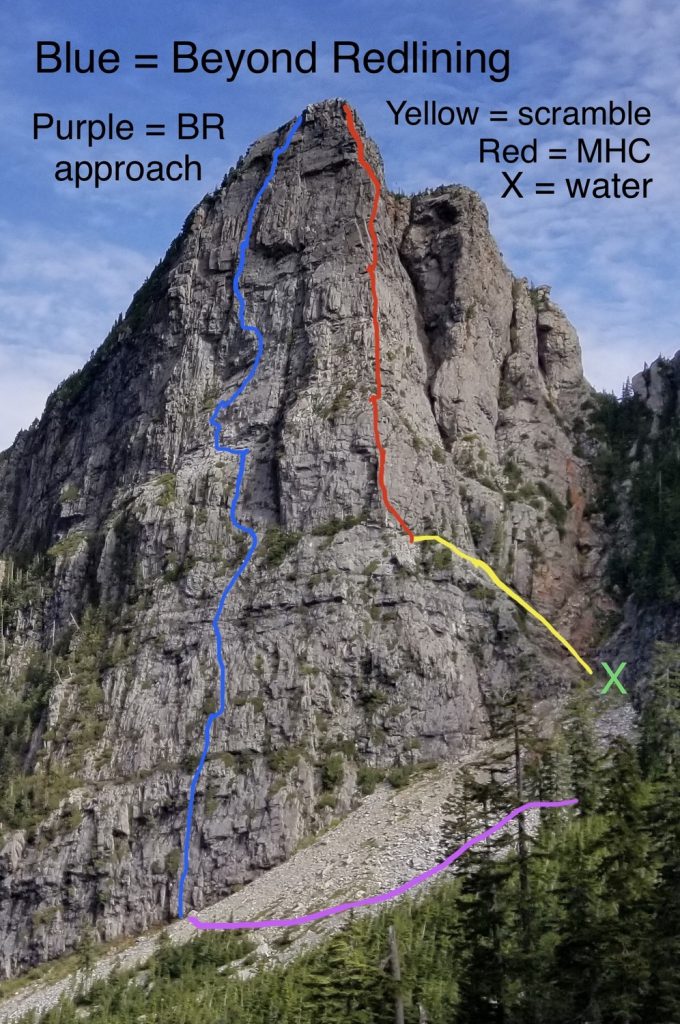
Route information (pitch lengths and bolt numbers are estimates):
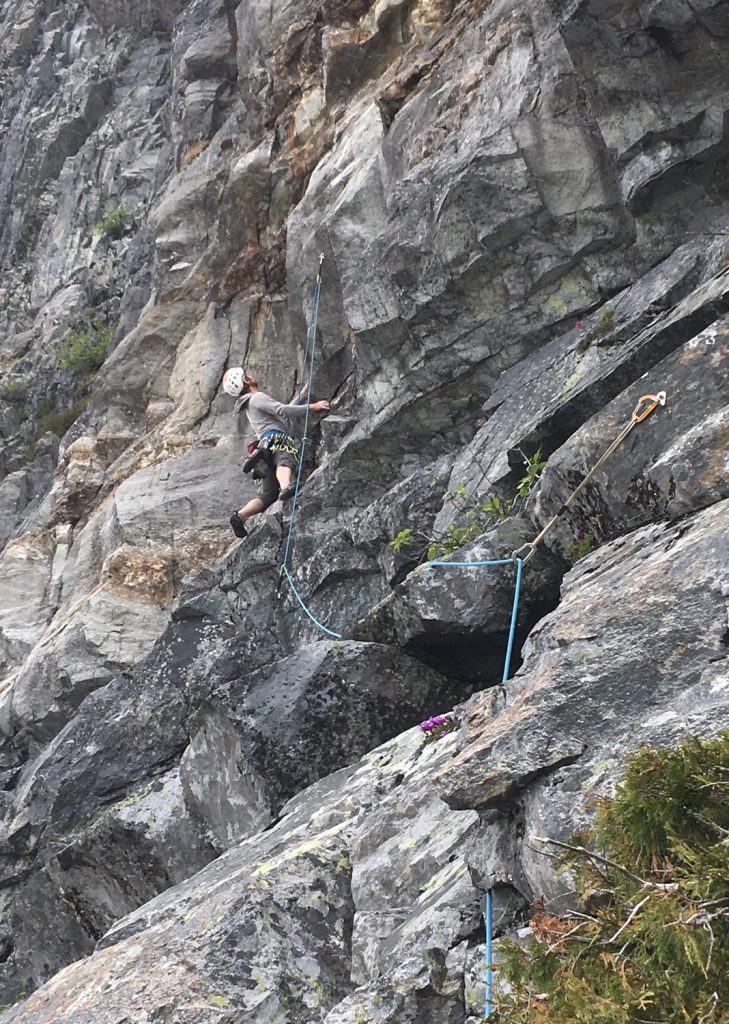
Pitch 1 – 5.10, 16 bolts, 55 meters
Climb a dark gray face above the largest boulder in the talus slope. Multiple 5.10 cruxes lead to a roof that is breached on its right side. This excellent pitch could be climbed on its own, though you’ll need two ropes to get down. If you find yourself redlining on this pitch consider bailing and returning another day.


Pitch 2 – 5.9, 11 bolts, 32 meters
Surmount the bulge directly above the belay, ascend the rib, and move right onto a fun steep slab, then continue on easier rock to the anchor. Watch out for loose rock in the gully right of the line.
Pitch 3 – 5.8, 8 bolts, 40 meters
Follow a left-trending ramp past several bolts before gaining a steepening face in the black band. Some bolts may be hard to see from below. The polished nature of the rock here, distance between bolts, and lack of positive holds combine to make this pitch a more serious endeavor than the grade would suggest.
Pitch 4 – 5.6, 6 bolts, 25 meters
Head straight up to a bolt above the belay and then move right on low angle terrain. Gain the large ledge with a dead snag, traverse left above it, and move around the corner above a live tree to the belay.
Pitch 5 – 5.10, 10 bolts, 35 meters
Climb up and left, solve three fun cruxes, and finish on a featured vertical face that ends at a large ledge system. This pitch is about 40 feet left of a giant, left-facing corner visible from the ground.
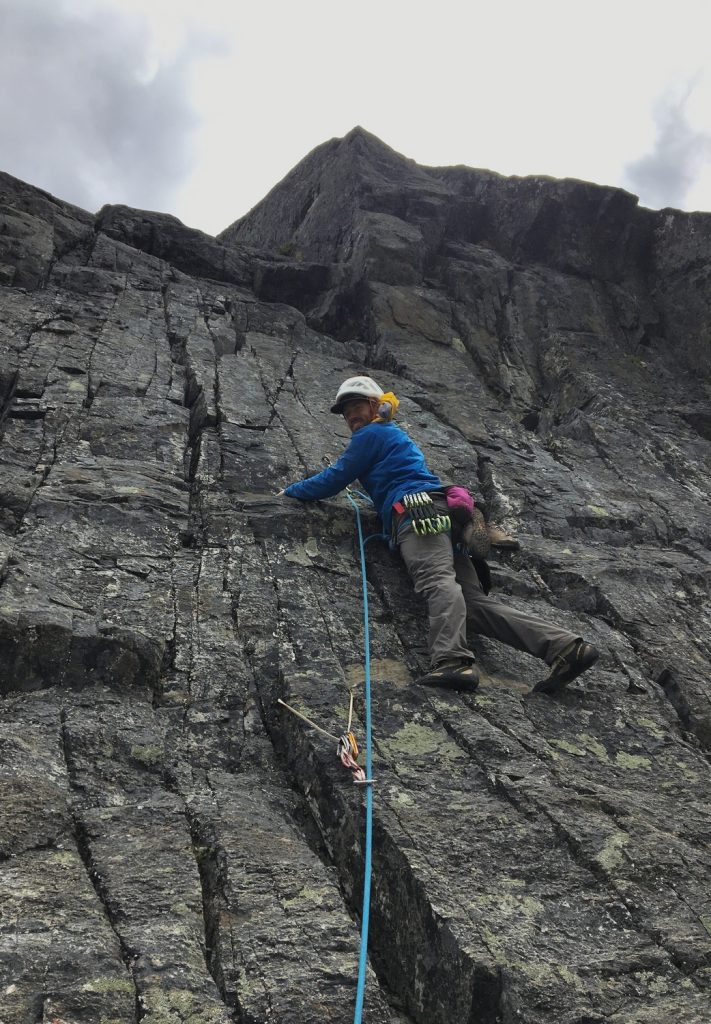
Pitch 6 – 5.10+, 12 bolts, 35 meters
Climb up to the first bolt, traverse straight left about twenty feet on a large ledge, and move up to the second bolt. Consider moving the belay to this spot to reduce rope drag on the pitch. Ascend the steep face and move left past a tricky bulge at the orange band. Slightly easier climbing on excellent stone leads to lower angle terrain and the belay. Use a few long slings or back clean to reduce rope drag.
Crux of P6 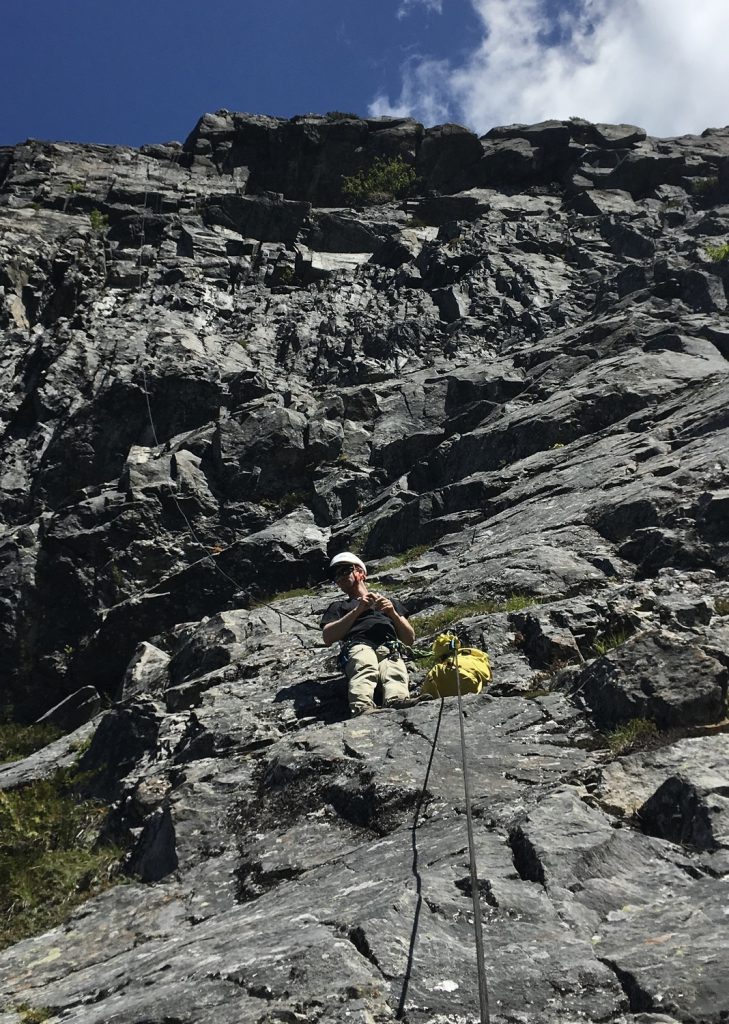
End of P6
<Pitch 6 Direttissima> – 5.11+?, 35 meters – Double dihedral pitch.
This variation is unfinished and dangerous as currently bolted. After the slab, it ascends a corner 15 feet right of the Pitch 6 version described above before moving up into a steep, right facing lieback above. We will let you know when this pitch is ready to climb…
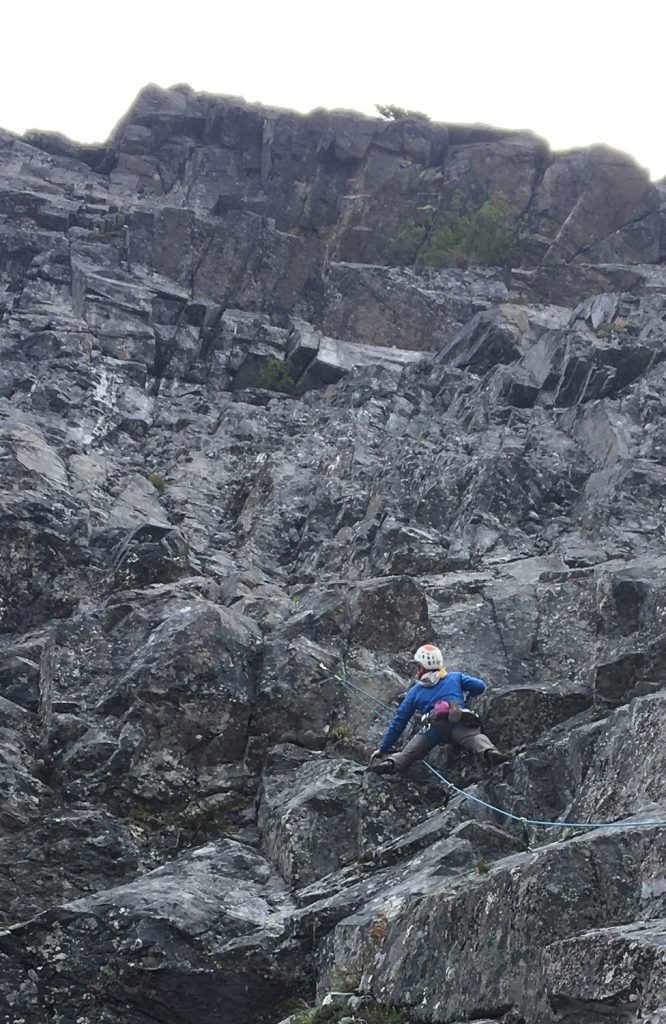
Pitch 7 – 5.10-, 9 bolts, 30m
The first headwall pitch starts by stepping right from the belay onto a fun gray slab. An easy runout gets your attention, and a few steep, athletic moves and a punchy crux at a bulge lead to the belay.
P7
Pitch 8 – 5.10+, 10 bolts, 32 meters
Continue up the looming headwall. Climb up and left on light colored stone, traverse left below an overhanging corner, climb the wild corner past a couple of roofs and ascend to a belay just above a large roof. Be sure to stop at the first anchor. A very airy pitch!
Link with P9 (avoids the uncomfortable belay at the top of P8).

P8
Pitch 9 – 5.10, 6 bolts, 15 meters
Climb up to the prominent horn above the belay (good sling placement), then use a series of steep jugs, side pulls, and even jams to ascend the overhanging face atop the headwall. Exit left to gain a small belay stance. This pitch is steeper than it looks. The anchor in the middle of the face will be removed. Do not belay here as one bolt spins and the stance is horrible. This pitch can be linked with either 8 or 10, but doing so will make those pitches less enjoyable and make it much more difficult to communicate with your partner.
Start of P9
Pitch 10 – 5.10, 9 bolts, 35 meters
Ascend the golden, featured slab to a crux bulge in a slot. Then move up and right onto an arête, pass the curious “Mouth” feature, and reach the belay on the pillar.
Pitch 11 – 5.10+, 10 bolts, 35 meters
It’s not over yet! Climb a tricky, thin boulder problem that guards the top of the pillar. Then step right, cross the gully at a snag, angle up and right on the face, and pass the final crux on the way to the anchor just below the summit. Head up to the Vega North Summit and sign the register (you’ve earned it!). Descend via Mile High Club, whose top anchor is just South of the summit.
Approach:
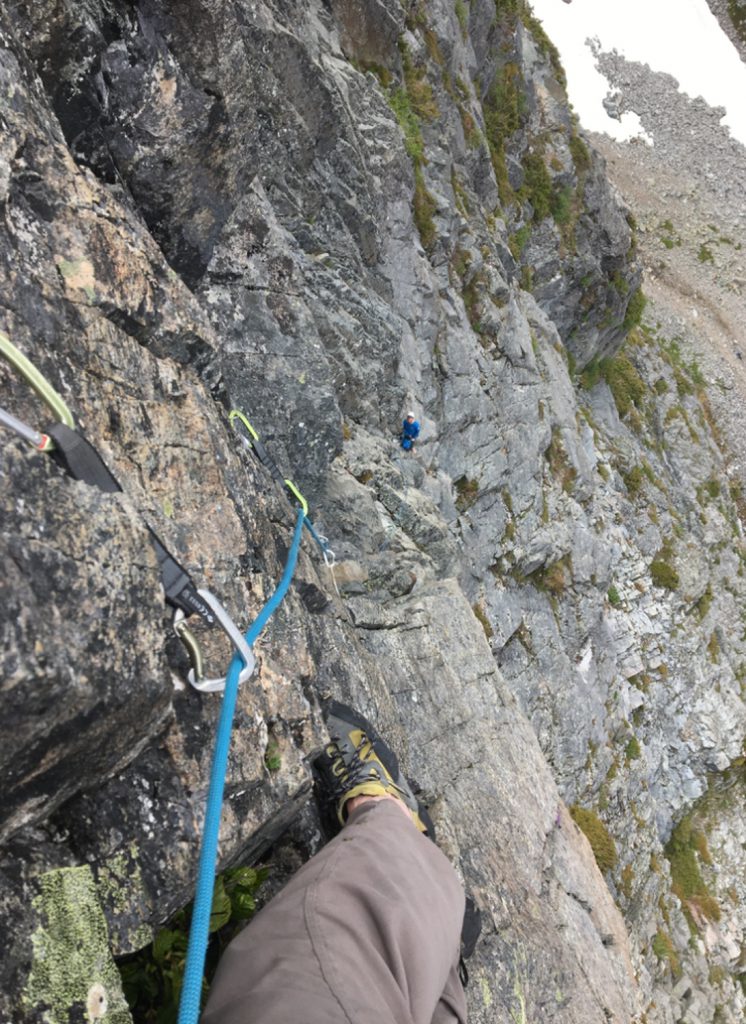
Same approach as Mile High Club: Follow the Sunrise Mine trail approximately two and a half miles to the last major switchback (~4300 foot elevation) before the trail begins zig zagging up to Headlee Pass. Leave the trail and begin a surprisingly easy traverse marked by cairns northeast across talus toward the Vega North Tower. Pass just above a large flat-topped boulder near the first set of trees. Follow a natural passage through the small stand of trees to a second open talus field. Continue across open heather and talus and cross a strip of trees near a rocky bluff. Fresh water is available, snow permitting, at the red rock in the Mile High gully. It disappears into the rubble just below that point, and there is no water near the base of Beyond Redlining. Consider leaving extra gear near the water and retrieve it on the descent. Talus along the base of the wall is loose and unpleasant, so if you’ve gone up for water, retrace your steps back toward the trees. Then traverse open talus just above the trees (see photo), to arrive at the base of the route. The first pitch starts on a dark gray face above the largest two boulders in the talus below the wall. When snow fills the lower basin in early season, it is possible to approach the route directly up a gully below the route. Once the snow melts the traverse mentioned above is the way to go.
Descent:
Although Beyond Redlining is equipped for rappelling, it is not recommended. If you have to rappel the route, you will need two ropes or use a 70m rope (tie knots!) AND have to do some angling rappels off of single bolts; many of the rappels only reach the next anchor with rope stretch. Use the belay stations on the route. There are no other rappel stations at this point.
The best descent is to rappel Mile High Club. This descent is possible with a single 60 meter rope. Use the rap rings set back from the top of the route. Put your rope over the least sharp part of the edge 8 feet South of the bolts and 4 feet off the ground. From the summit, toss your rope just left of the crest and go down and angle to the lower anchor at the base of MHC pitch 7. To rap MHC p6, toss your rope slightly left of the bolt line to avoid hitting anyone below you. Be careful not to knock off loose rock as it could hit climbers below you. Rap down the MHC p6 face and move to a rap anchor about 10ft skiers left and 10ft above the anchor at the top of the MHC dihedral pitch. Do not go to the top of the dihedral pitch. Make a short rappel to an anchor on a ledge to the side of the dihedral pitch (short free hanging rappel above ledge). Rap MHC p4 to one of the two anchors available, again making sure not to throw your rope onto other climbers. Rap the low angle upper section of MHC p3 (mostly walking), aiming for a 10ft tall tree about 15ft skiers left of the climbing line (we will flag this tree soon). Find the dedicated rappel anchor tucked in a nook just below the 10ft tree. This is 15 ft skiers left of the climbing line and just above the vertical section at the start of MHC p3. Do NOT rap down the vertical face unless you have two ropes as you won’t reach the next anchors. From the nook anchor, rap down to either of the anchors at the top of MHC p2. Rap to the MHC p1 anchor. Rap from there to the base of the route. The starting ledge is several hundred feet above the ground and rather exposed. Consider staying on rappel and walking back to the belay bolt at the start of the route. You can pull your rope from there. If there are climbers above you, keep your helmet on until you are clear of the gully.
Strategy/tips:
The first pitch is more than 50 meters long, and some pitches angle left or right substantially, so rappelling the route could be challenging, especially above pitch seven. It’s best to top out the route and use the rappel line on Mile High Club, which will work with a single 60 meter rope. See descent notes above. If you find yourself redlining on the first pitch consider bailing and returning another day.
The route faces west and stays in the shade until about 1PM. Start early to beat the heat. The bottom few feet are mossy and covered in snow from December to May; don’t let this dissuade you since the rest of the route is very clean for an alpine climb. On May 29th, 2020 there was 20 feet of snow at the base. On July 11th, there was 4 feet of snow there. The first two pitches can be wet from seepage in the spring or after hard rains, but the rest of the route dries quickly.
Plans
Beyond Redlining 2023
Gear 60m rope Extra 10m pull cord in case need to rappel Extra rap sling 17 draws including 6 single alpine Radios No jacket? Should be mostly 55 degrees Itinerary 4:30 AM – Leave home (1:45 hr drive) 6:15 AM – Trailhead (54 degrees) 6:30 AM – Hiking (2.5 miles, 2,788 ft gain, ~2 hrs)…
Beyond Redlining 2022
Gear 60m rope Extra 10m pull cord in case need to rappel Extra rap sling 16 draws including 6 single alpine Itinerary 3:30 AM – Leave home (1:45 hr drive) 5:15 AM – Trailhead 5:30 AM – Hiking (2.5 miles, 2,788 ft gain, ~2 hrs) 7:30 AM – At base (sunrise was 6:35 AM, sun…
Beyond Redlining 2020
Itinerary 3:30 AM – Leave home (1:45 hr drive) 5:15 AM – Trailhead 5:30 AM – Hiking (2.5 miles, 2,788 ft gain, ~2.5 hrs) 8:00 AM – At base (50 degrees and warming Tuesday, sunrise was 7:15 AM, sun won’t hit till around 1pm though) 8:15 AM – Climbing (11 sustained sport pitches, ~35 min/pitch,…