Resources
- http://www.supertopo.com/rock-climbing/Sawtooths-Idaho-Elephants-Perch-Mountaineers-Route
- Lots of photos: http://chossclimbers.com/testing/us/idaho/sawtooths/mountaineers-route-on-the-perch/
- Some good photos including a closer topo: http://www.piquaclimber.net/past/mroute/mroute.htm
Quick facts
- Supertopo says good route finding is a must, but it’s consistently fun and interesting climbing
Gear
- 60m rope
- Rack?
- Going with 0.3-3, with doubles of 0.5-3, and 9 single alpines, 3 double alpine draws
- Mountain Project: Standard rack to #3
- MP comment: Standard to #4, used #4 on almost every pitch and in quite a few anchors
- SummitPost: Cams mainly in <1.5″ range (doubles definitely are nice) and up to 3.5″ (might want doubles to 3″)
- ClimberKyle: Singles of 0.4-3 with doubles of 0.75-2, worked well, wouldn’t have wanted much less
- Radios? “It’s nearly impossible to communicate from top of P4 to belayer”
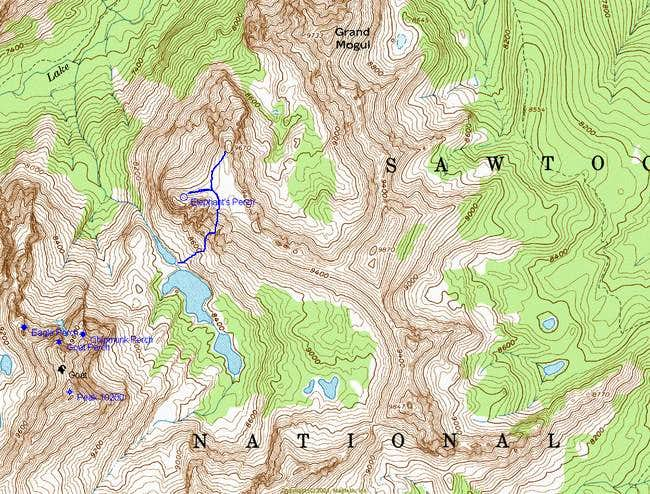
Approach
Camp
Steph took 20 mins from camp to base of climb, another said 10-15 mins
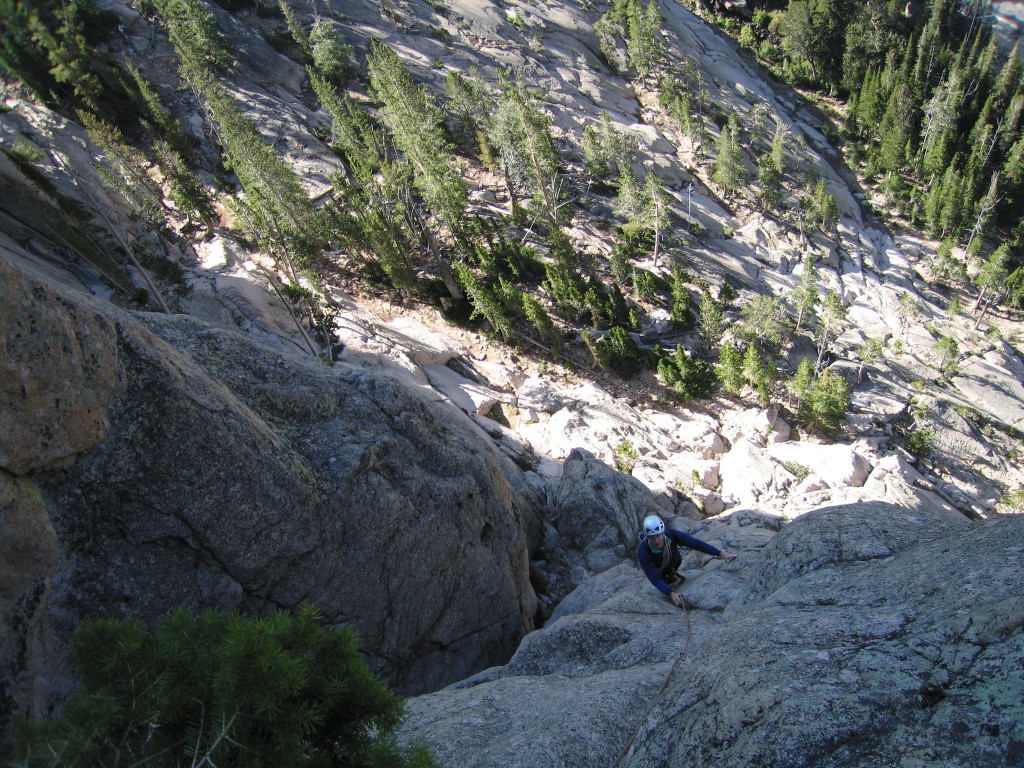
Climb
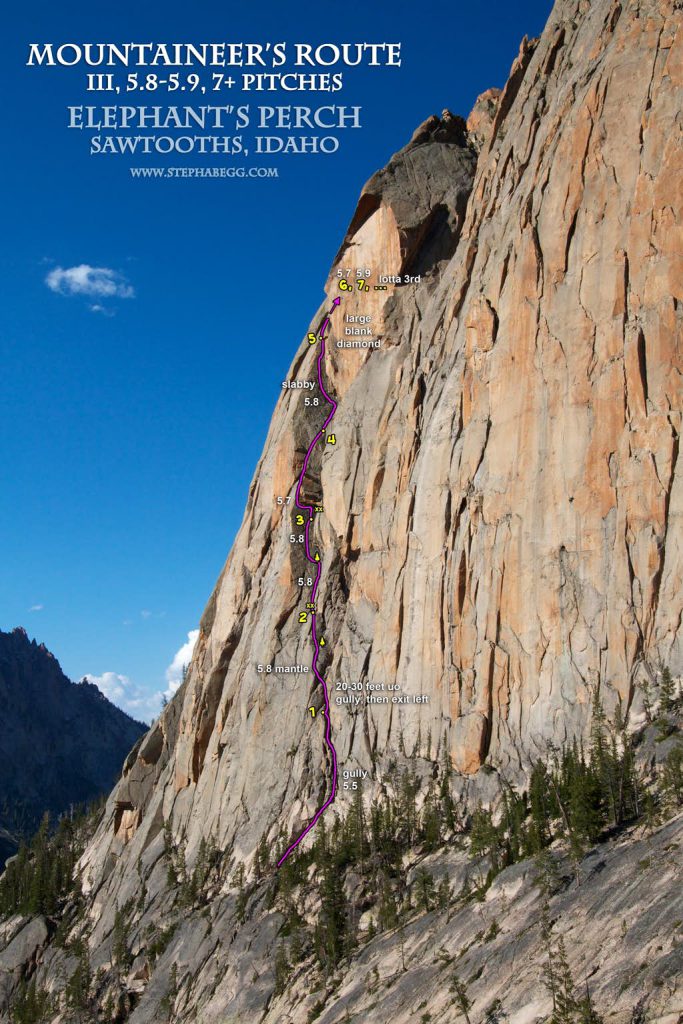


Pitch 1 – 5.5
Start on the easy gully that trends left from near the end of the trail that hugs the base of Elephant’s perch. It turns to a chimney, which you follow for about 20′. End on a large ledge with a bolt at the steeple shaped block.
I think this is roughly the line.


Pitch 2 – 5.8
Starts with a heavily chalked mantle move out left (crux of pitch). Leave the chimney, surmount the mantle (easier if you work around to its left) and follow a crack past a 3-4′ pine tree with slings. Cruise up easy broken terrain to a set of bolts low on a large ledge.

Bottom half of P2
Pitch 3 – 5.8
Head up the crack above and to the left of the ledge, but traverse left after 15′ instead of continuing up the wider crack. Belay at a set of bolts about 30′ below the large tiered roofs above.
Seems like you want to follow the left crack, not the corners on the right. Ends at a bolted belay under the roof.
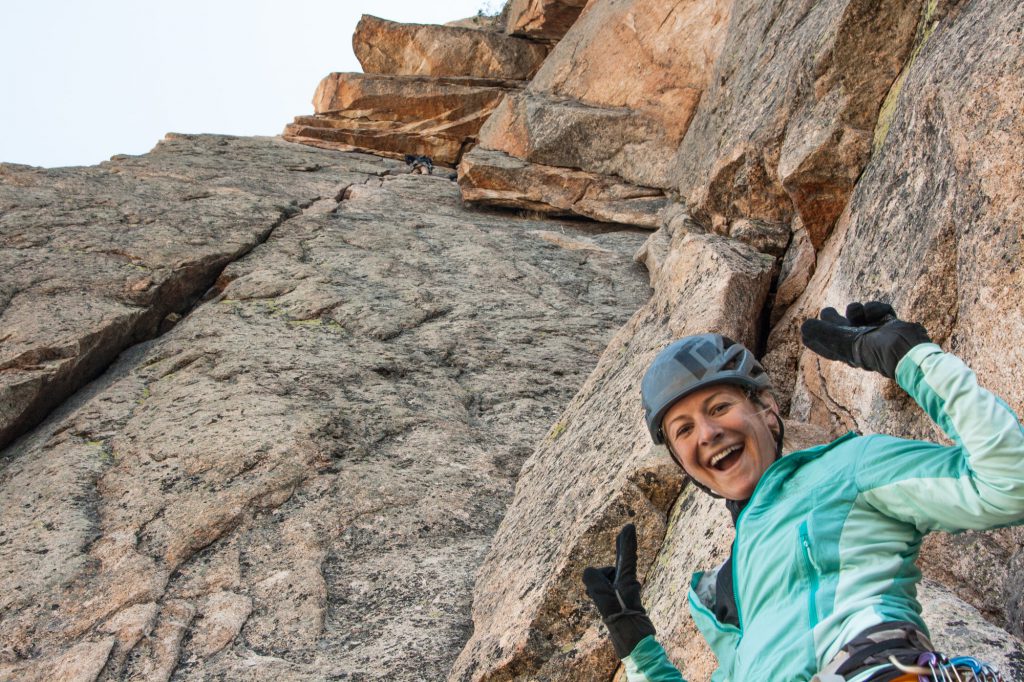

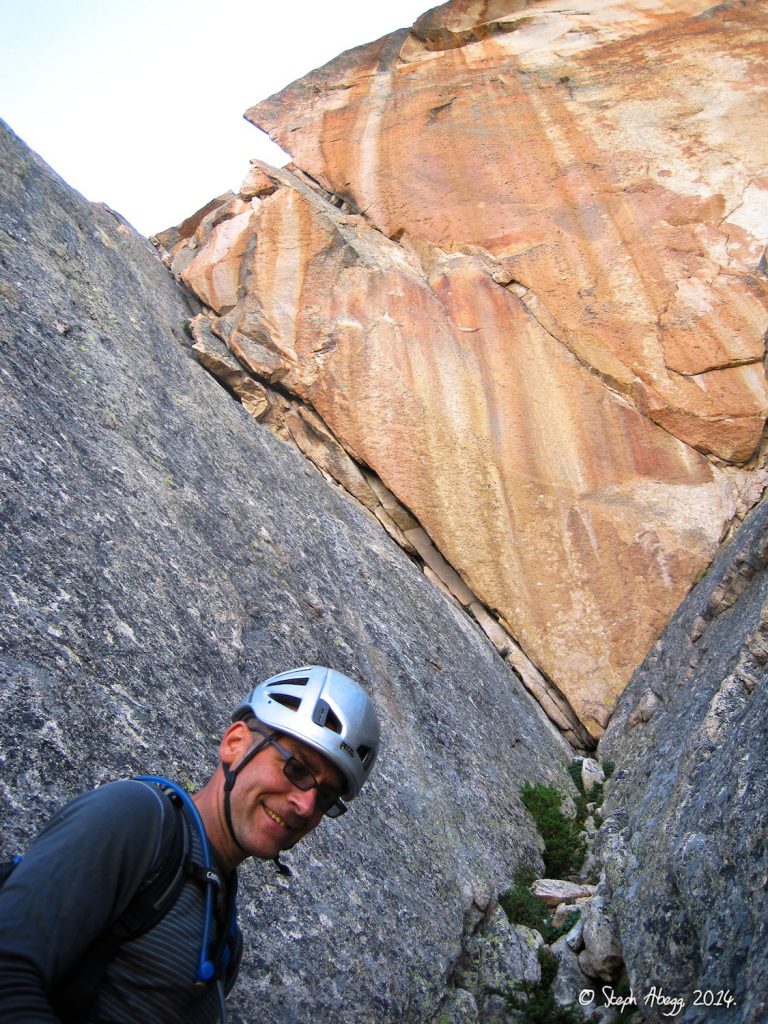
Start of P3 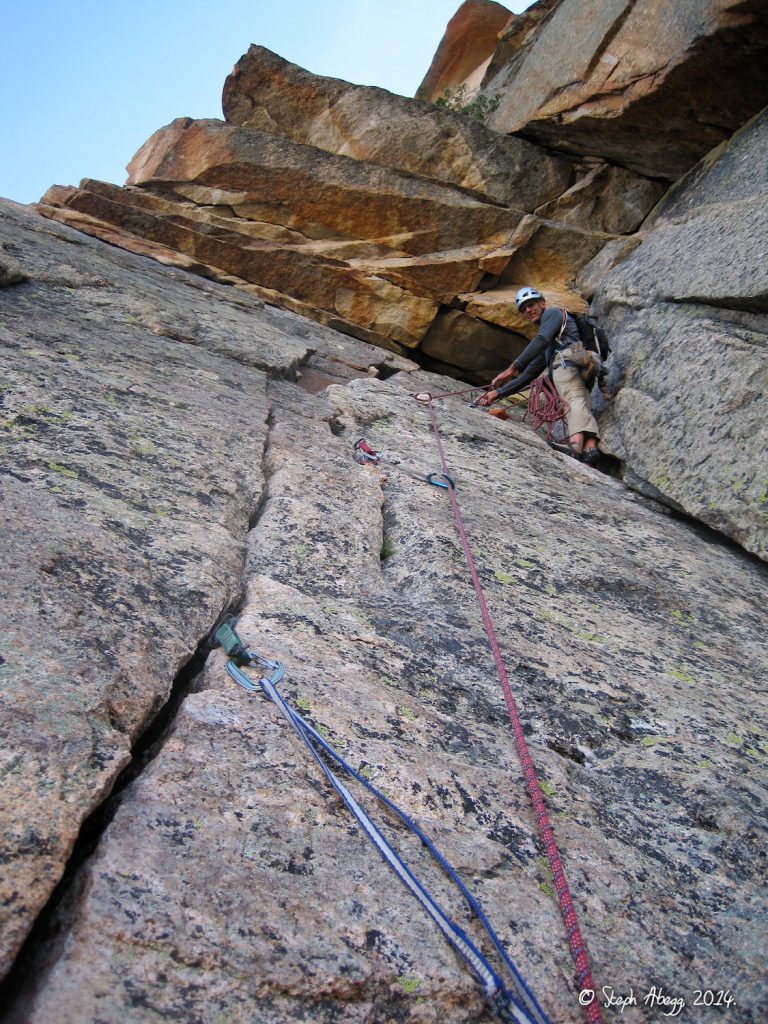
End of Pitch 3 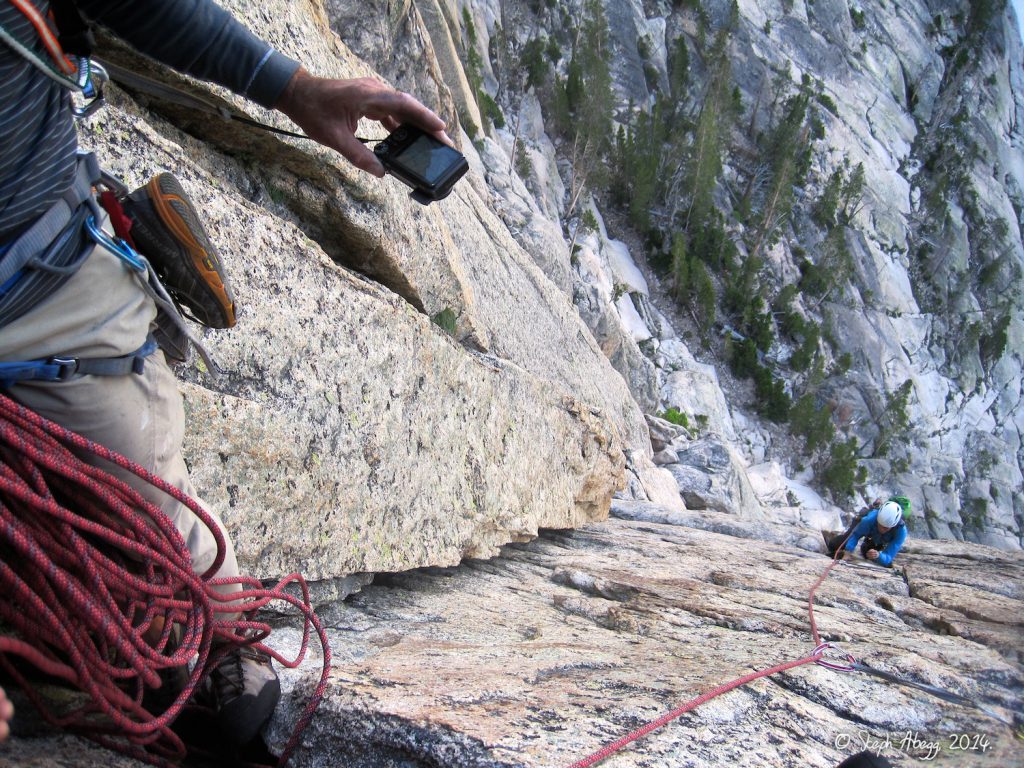
End of P3, looking down 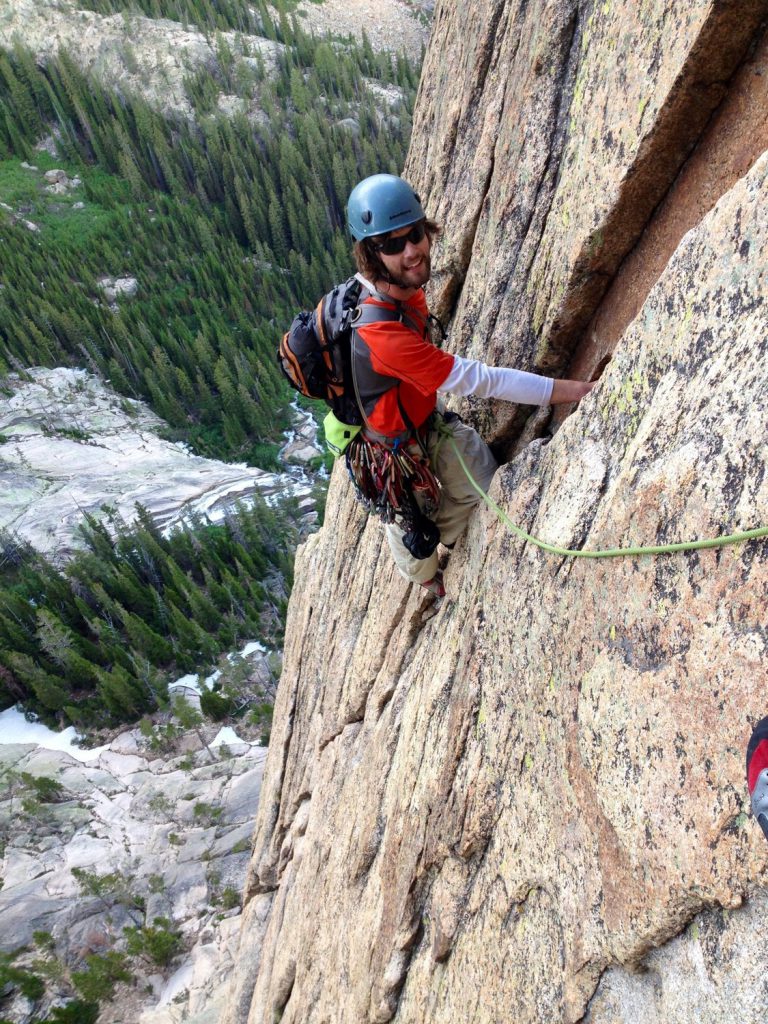
End of P3
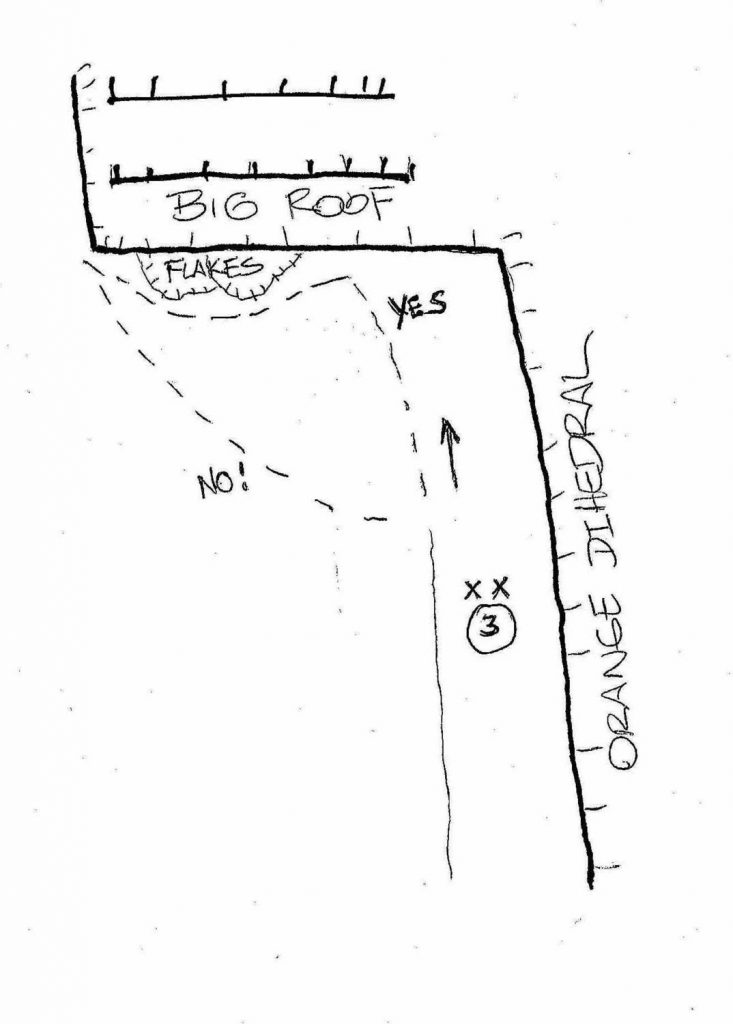
Pitch 4 – 5.8, 160′
From the belay, stay right straight up to get to the roof, get in gear, then move left around the roof. It’s quite easy and there’s lots of pro. There are solid placements right on the left edge of the roof. Pull around and enjoy the spectacular exposure. Continue up a crack that gets easier and easier, eventually 4th or even 3rd class. Belay right at the very base tip of the huge blank diamond that looms above.
Be careful when pulling rope for follower belay as rope can get stuck in flakes if it has too much slack.
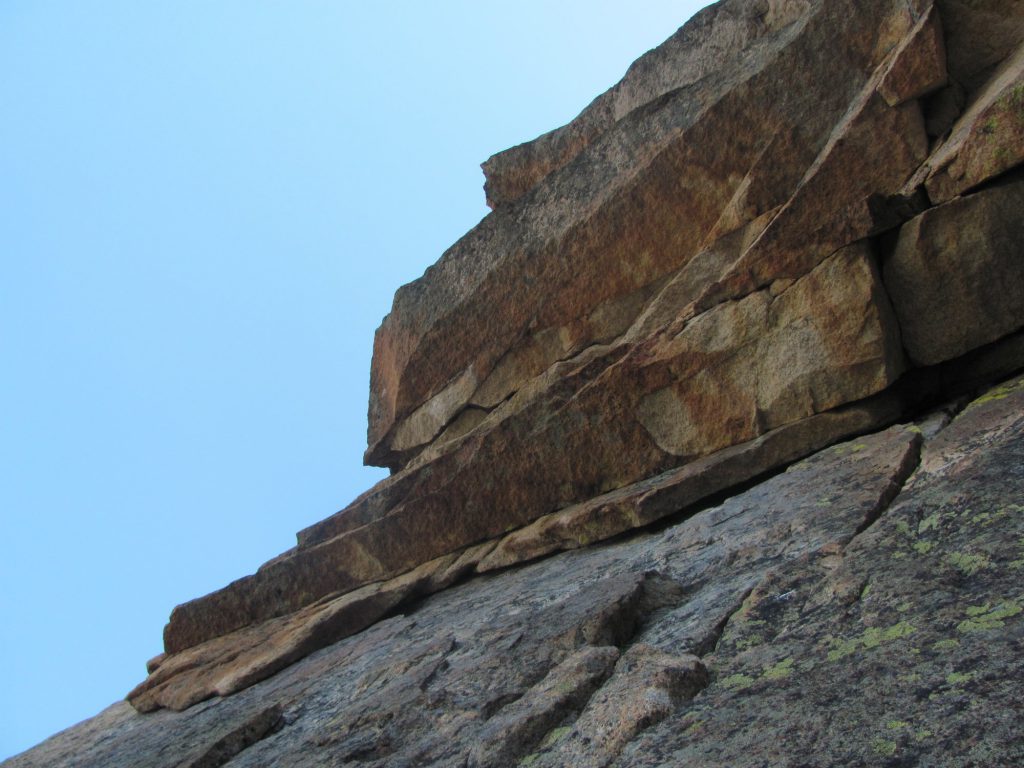
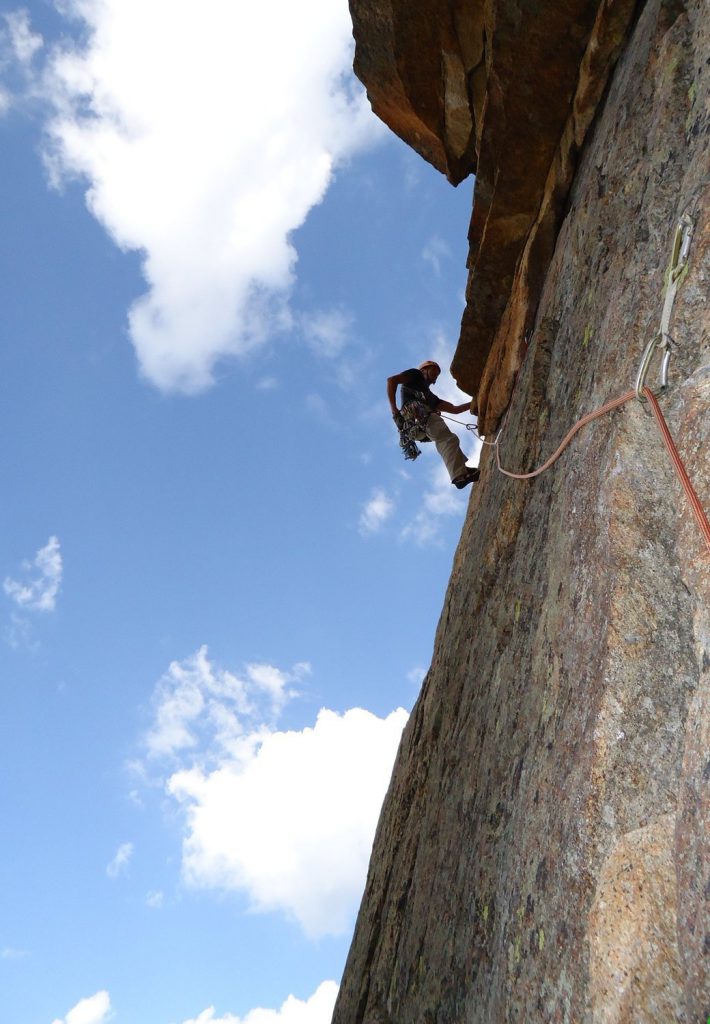
Roof traverse
Pitch 5 – 5.8, 170′
Climb up the slabby face diagonaling left (easier than it looks) to the arete and enjoy moderate climbing as you merge into a dihedral on the right with a ~2′ roof feature. Surmount the roof (cruxy, with good gear) and create an anchor above in any of the decent ledges.

Pitch 6 – 5.7, 100′
Climb up good cracks near the edge of the huge diamond. You will eventually find a clean 20′ finger crack that’s well-worn. Belay near the base of this feature.
Another person said “stay close to the corner on the right. There’s a 5.7ish looking crack that goes a little left but that’s off route.”
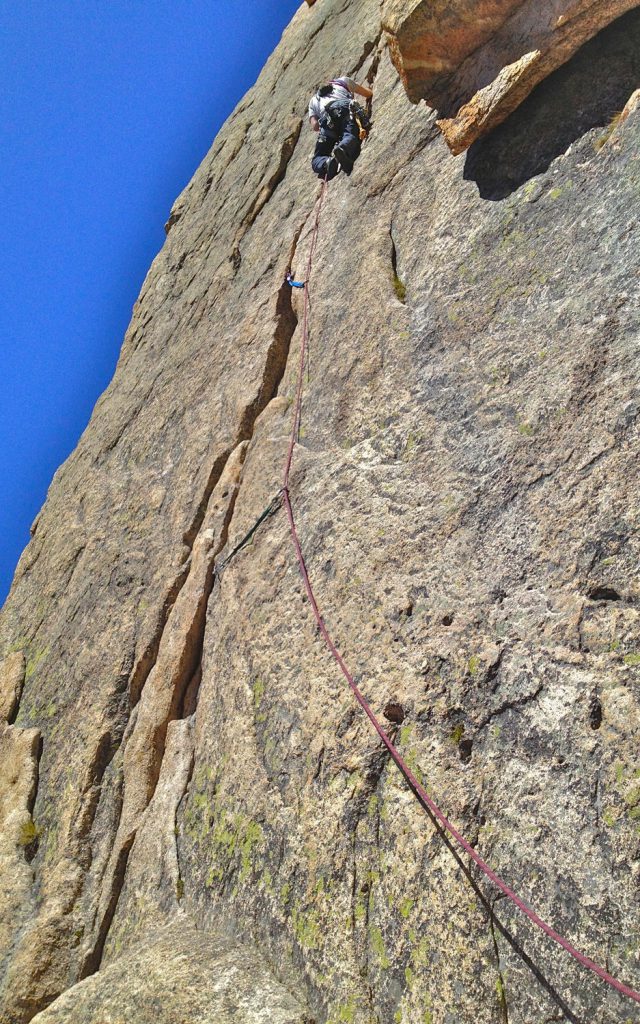
Pitch 7 – 5.9
Climb up the finger crack. Options above left and right if you don’t want to finger jam. Great pro. Above, follow wide cracks for ~50′ which continually get easier. Gear belay when convenient.
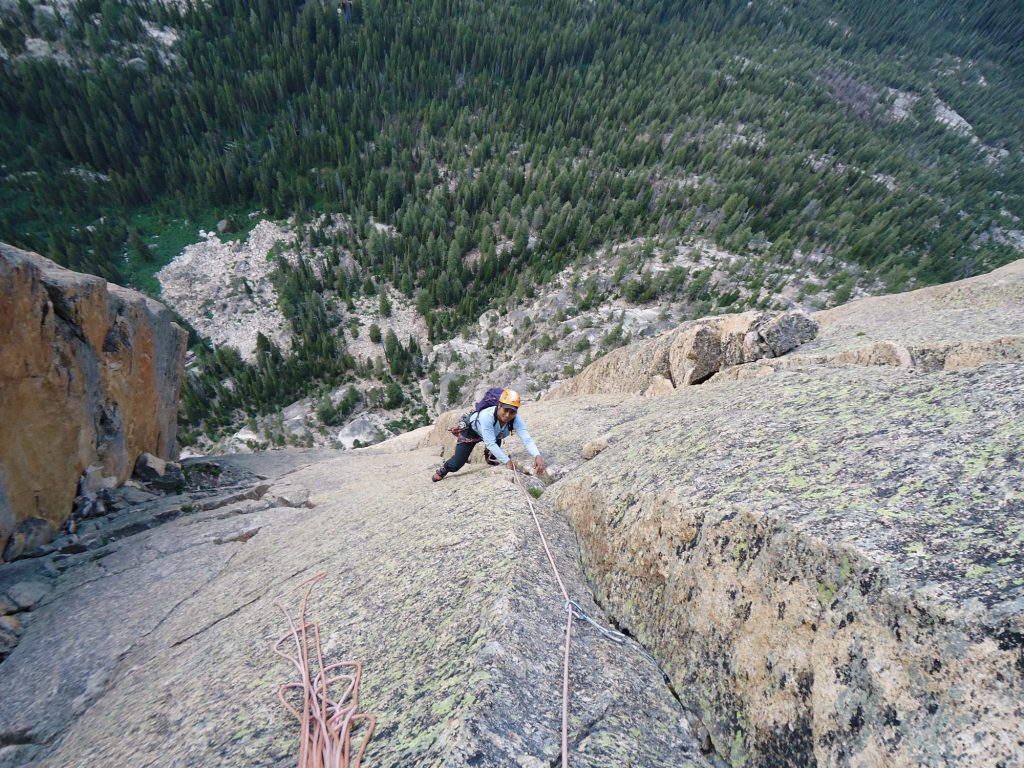
The finger crack 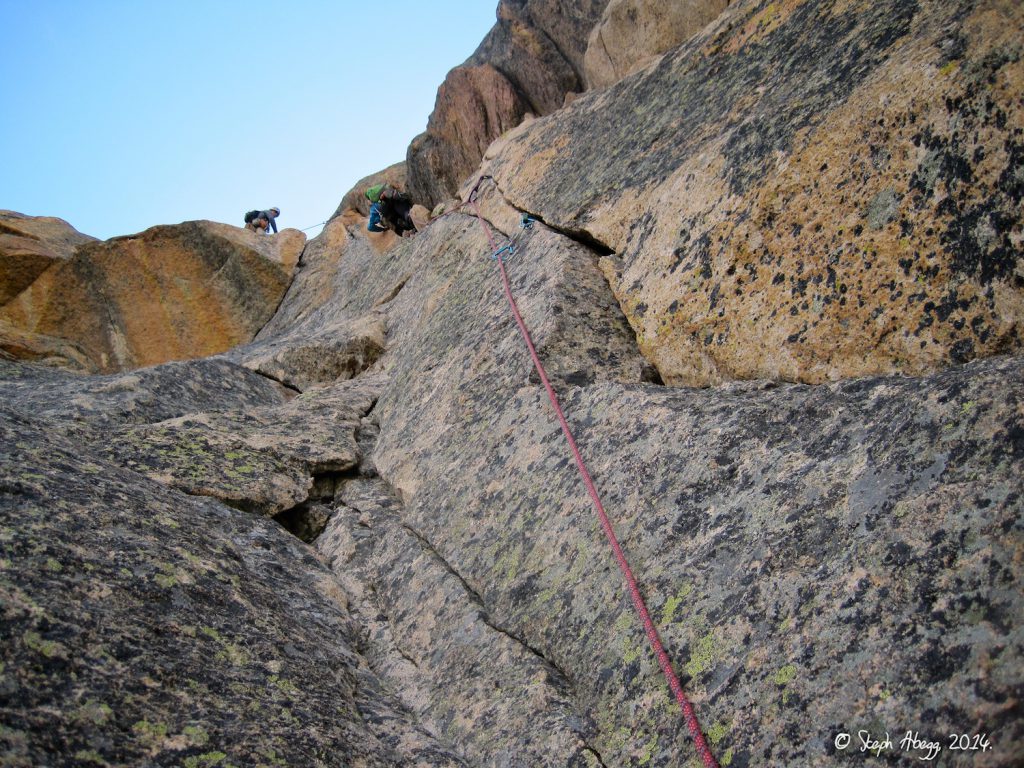
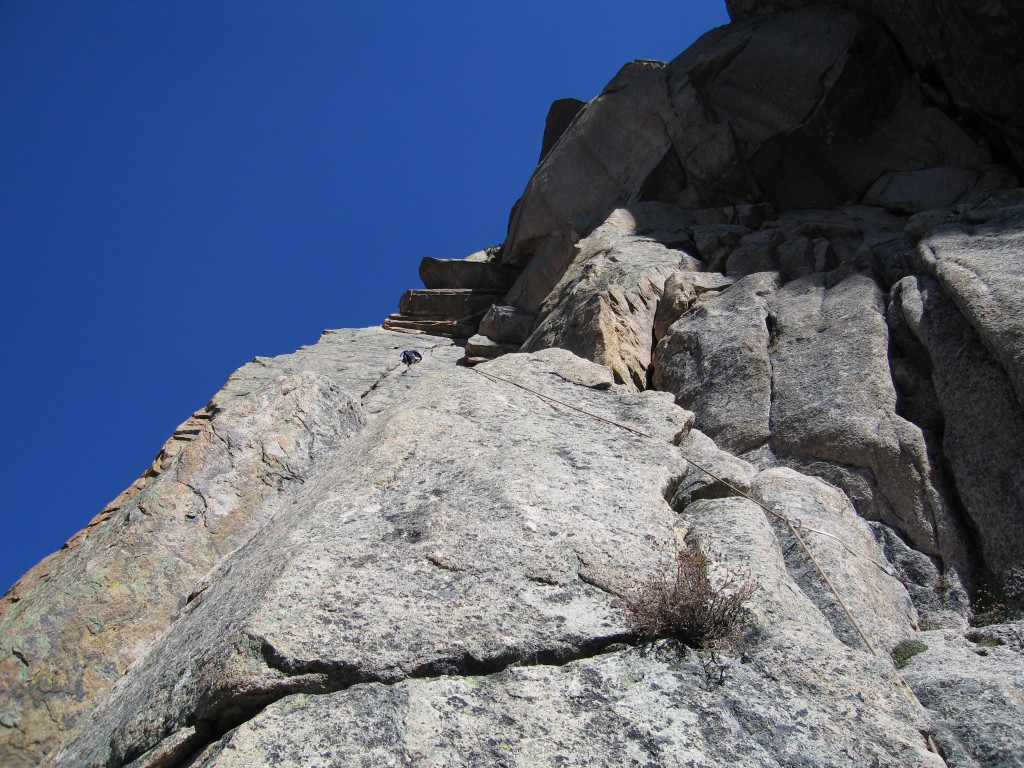
Geoff at the belay and Jessica climbing Pitch 7 of the Mountaineer’s Route. Pitch 7: 5.8-5.9 cracks, jammed blocks, wide crack at top. Led by Geoff. 
Looking down at the crux
Scramble to summit
Steph encountered some low 5th to the summit in one section, otherwise 3rd

Class 3 scrambling to the top of the Perch.
Descent
The more popular descent option is to climb approximately 3 more pitches to the top and find the right side descent gully. We talked to several parties afterwards and people were surprised we choose the left descent option.
Possibly a little glissading up top, then scramble down a sandy gully (hello, Burgundy Col) and a single rappel off a tree at the base of the gully. Steph says from summit to camp is less than an hour.
Another option: Once at the top of this route, scramble left maintaining elevation to get off the route. You’ll cross a bunch of class 3 gullies before being able to gain the upper plateau and descend. You can also take some of these gullies straight to the summit with a little low 5th if you want. This process takes pretty long, probably 30-60 min. But once at the top of the descent gully, its quick and loose down. Single rappel off the camouflaged bolts on skier’s right is how we did it with a 60.
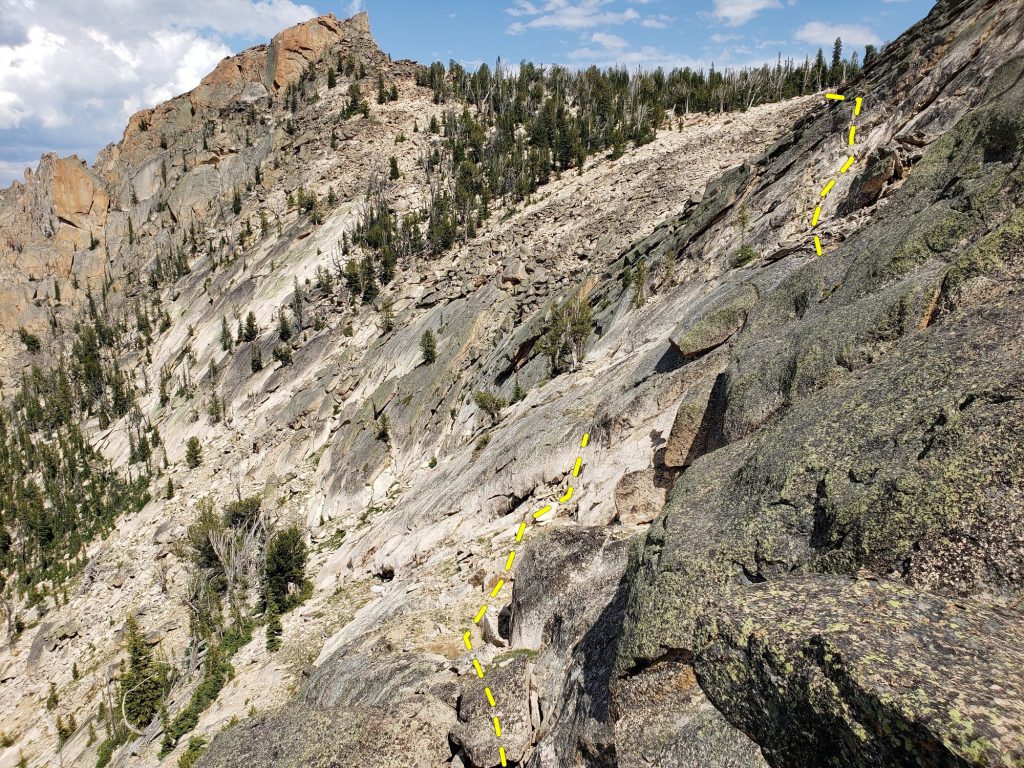
Descent from top of route, head for the tree’d saddle 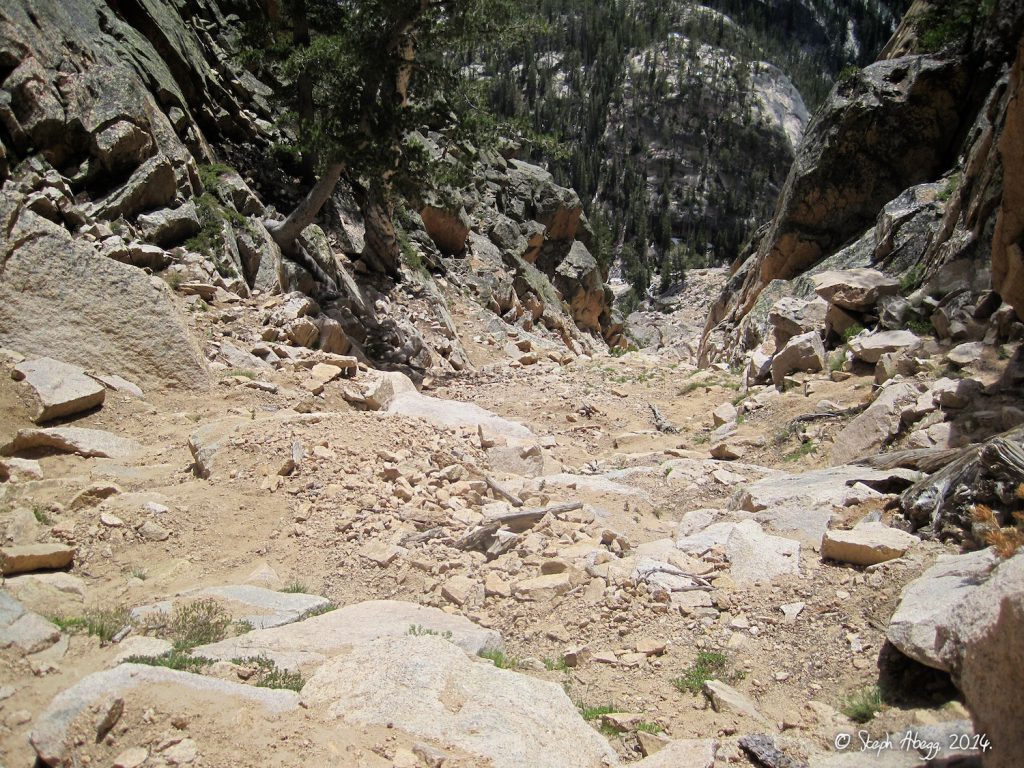
The descent involves a scramble down the gully alongside the eastern walls of Elephant’s Perch 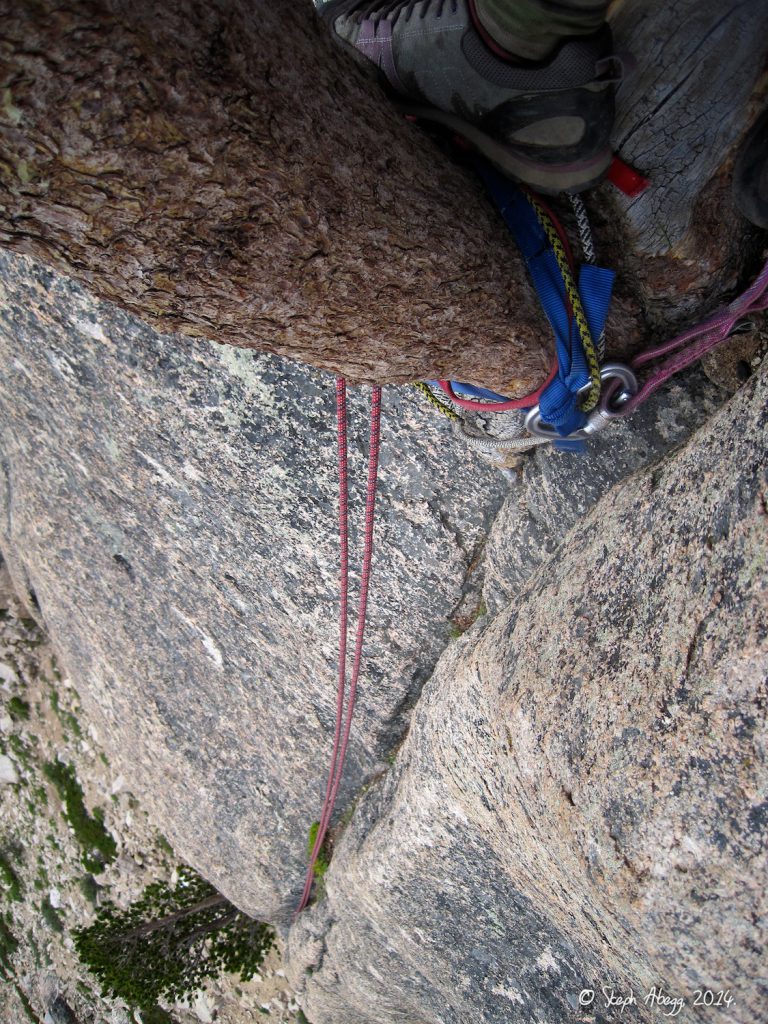
Rappel at base of gully
The true scramblers route/descent route as described on summitpost… they claim if done properly, you can get from the true summit to the lakes in 30 minutes.
Common mistakes are descending the 1st and 2nd gulleys south of the perch (these routes go at class 4-5). The 3rd gully south of the perch provides the quick and easy descent.

Plans
Idaho Aug 2020
Itinerary with Irene’s + Cragging Saturday, Aug 1st 9:00 AM – Drive to Redfish Lake (10:20 hrs) 9:00 PM – Arrive? Drive to Redfish Lake (10:20 hrs), camp somewhere? Salmon River Campground 15 mins to Redfish Trailhead, passes along bakery, so leave by 7:30 Mountain View Campground (no reservations, only a few spots, probably full)…