Gear
- Double #0.3-3, single #4-5, #0.2 for Northwest Face of Liberty
- NW Face of Liberty – 0.2-3 with double 0.3-0.75. “mostly small gear, biggest is #3, maybe 0.2 would be helpful”, a number of ppl mention microcams, SuperTopo claims double 0.4-3, flakes section is all 1-3″ but hopefully only singles is good enough for me
- Cave Route (slower): #0.3-3 with double #2-3 OR North Face 0.3-3 with double #0.75-1
- NEWS: Doubles #0.4-4 (I’ll only bring single #4), single #5
- SEWS needs double 0.3-3, optional #4-5 or South Arete only needs single 0.3-2.
- Northwest Face takes mostly small gear, biggest is #3, maybe 0.2 would be helpful
- Be ready to ditch the extra #1-3’s and #4/5 and water before the first climb
- Nuts
- Radios
- Single 60m rope
Timeline
At peak daylight, sunrise is 5am and sunset is 9pm
- 3:00 AM: Approach to Northwest Face of Liberty Bell (ditch #4/5 and some water at notch) (1.5 hours)
- 4:30 AM: Base
- 5:00 AM: Climbing (5 pitches, 2.5 hours)
- 7:30 AM: Top
- 7:50 AM: Rappel (3 rappels, one scramble, 1 hr)
- 8:50 AM: Notch, grab gear
- 9:20 AM: Climbing Concord (3 pitches, 1 hour)
- 10:20 AM: Top of Concord
- 10:40 AM: Rappel (2 rappels, short walk, 30 mins)
- 11:10 AM: Base of Lexington
- 11:30 AM: Climb Lexington (3 pitches, 5.7, easier, 1 hour)
- 12:30 PM: Top of Lexington
- 12:50 PM: Walk/rappel Lexington (2 rappels, longer walk, 1 hour)
- 1:50 PM: Base of NEWS
- 2:10 PM: Climb NEWS (5.9, 5 pitches, 2.5 hours)
- 4:40 PM: Top of NEWS
- 5:00 PM: Rap NEWS (5 rappels, one gully, then walk around, 1.5 hr)
- 6:30 PM: Base of SEWS (only single #0.3-3?)
- 6:50 PM: Climb SEWS (1.5 hrs)
- 8:20 PM: Top of SEWS
- 8:30 PM: Descend (Last time 1:50 hr descent, 1hr?)
- 9:30 PM: Base
- 11:00 PM: Car
Approach
2.7 miles, 1,900 ft gain, 1.5 hours?
Could probably ditch gear at the notch before moving over to Northwest Face (Leave: #4/5 and some water).
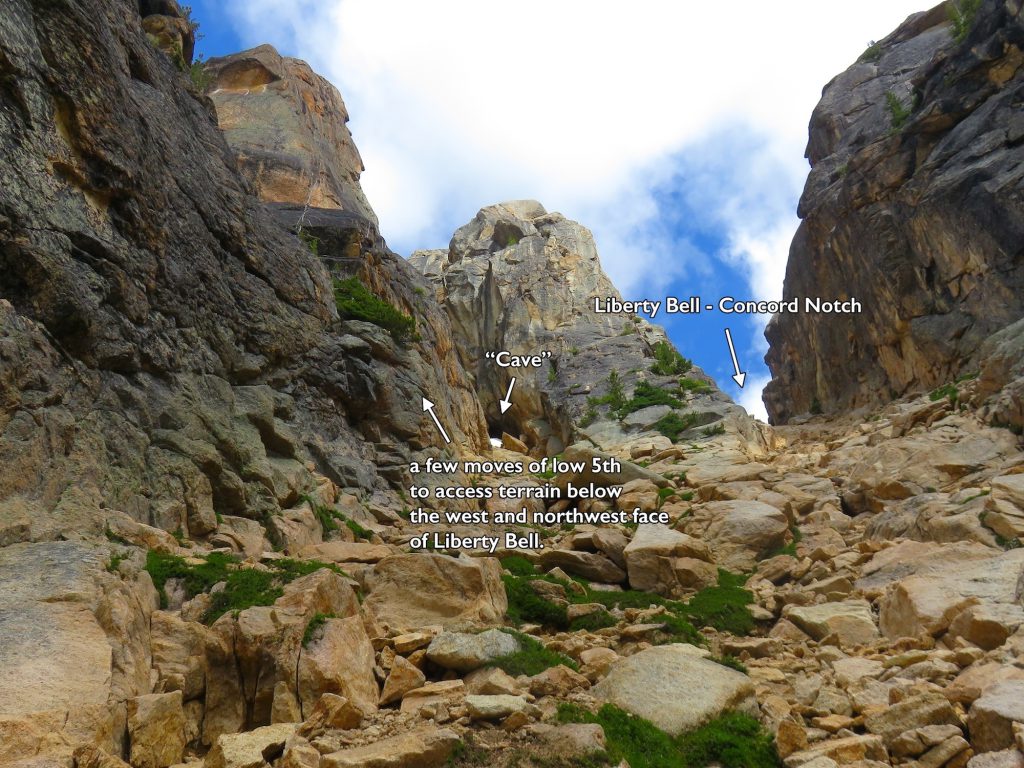
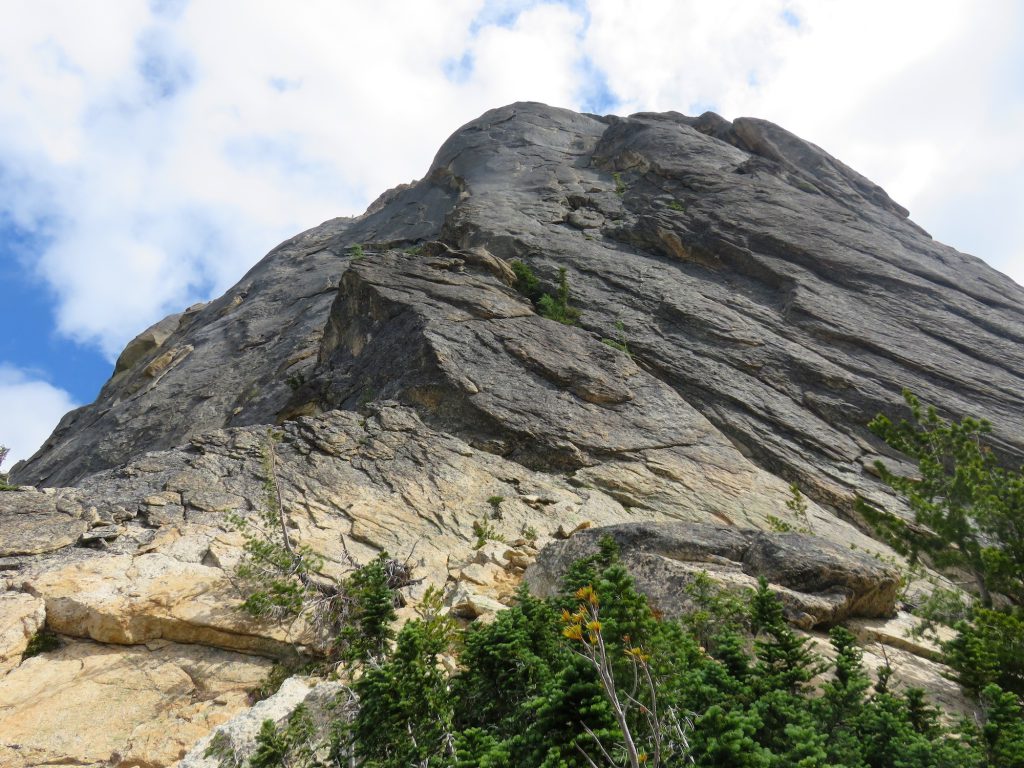
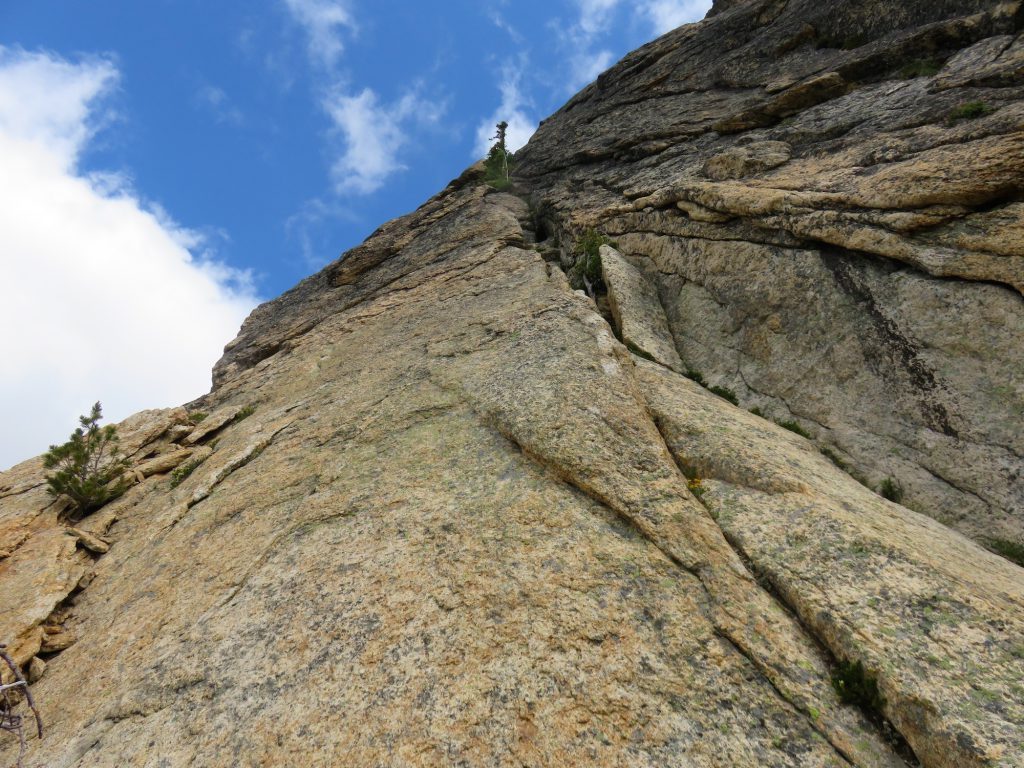
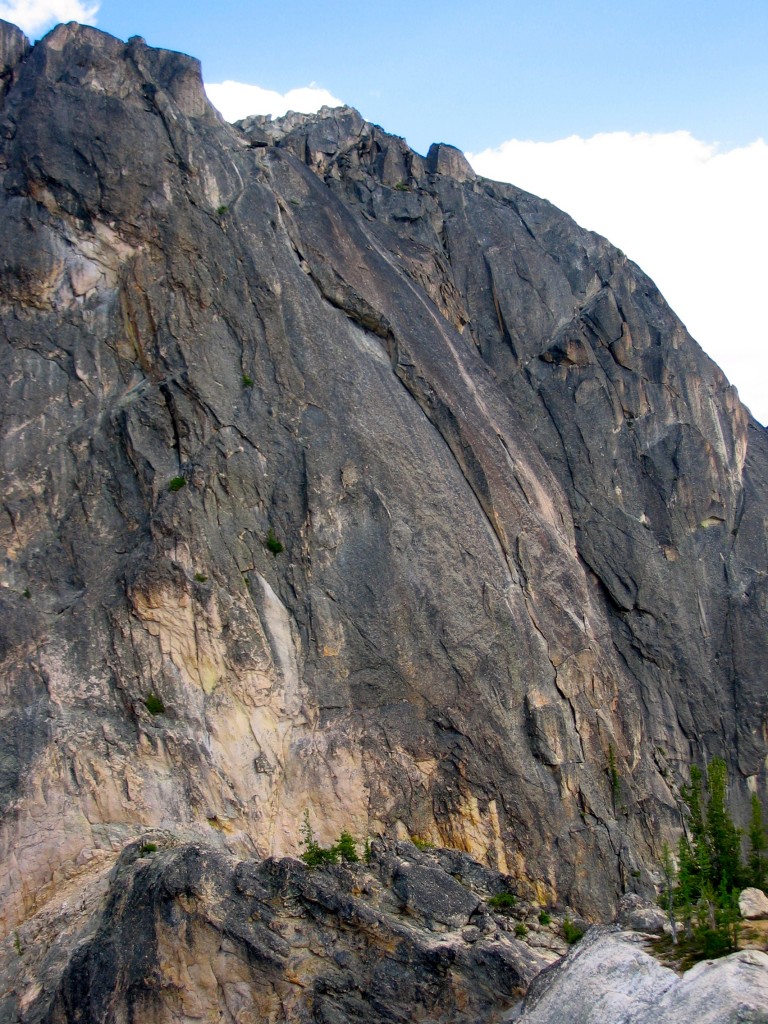
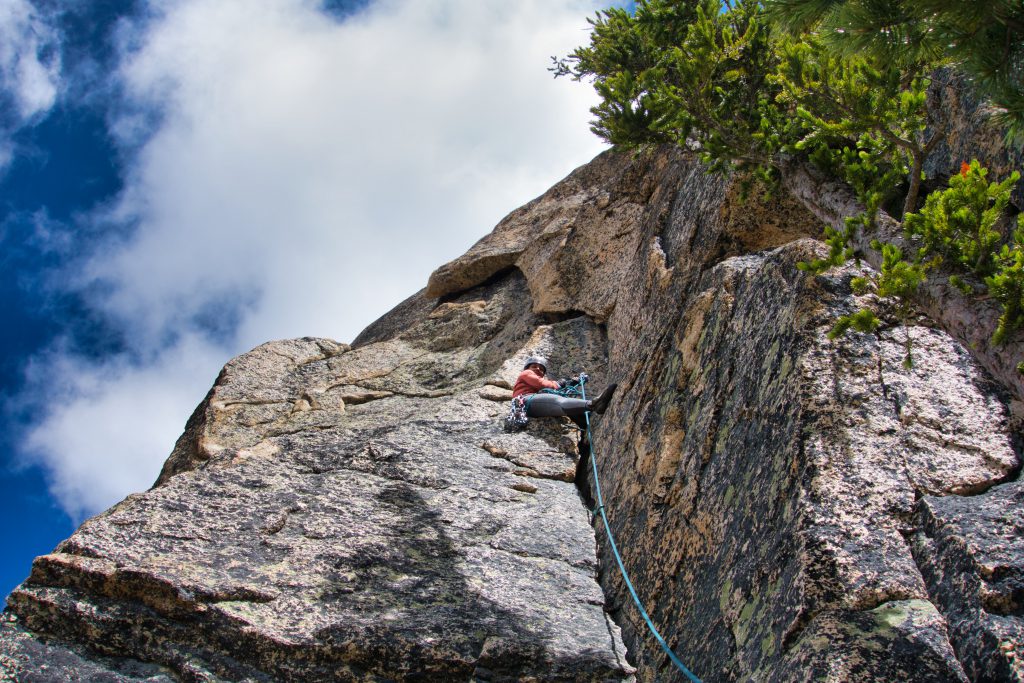
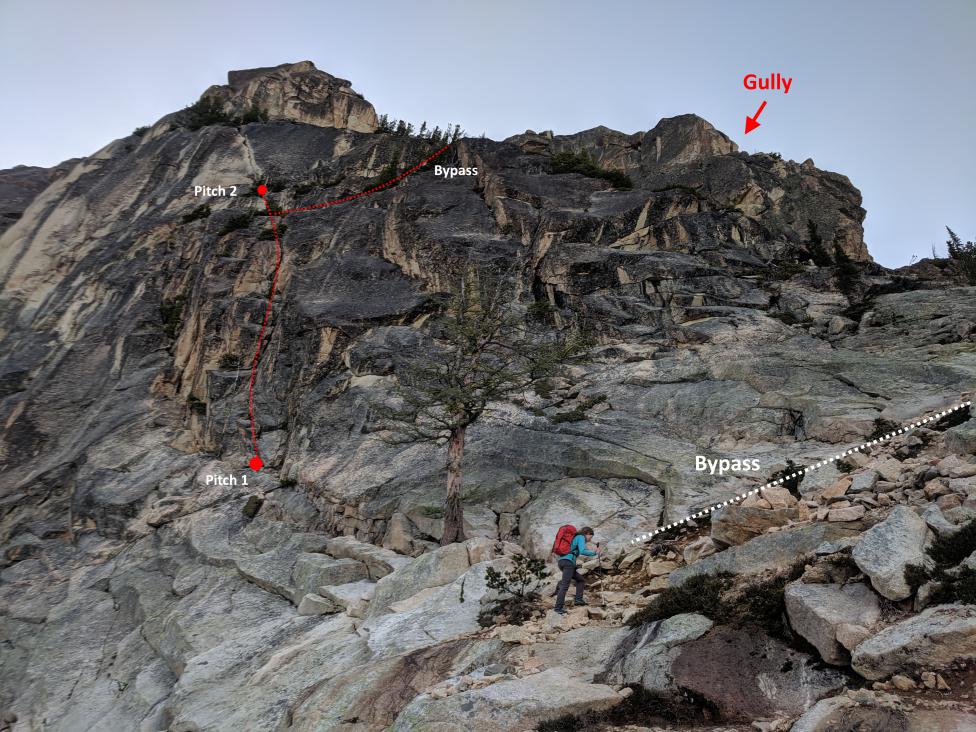
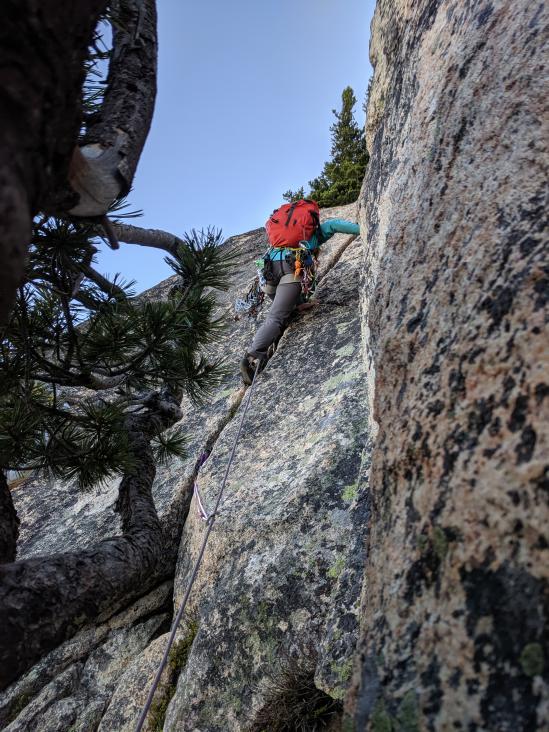
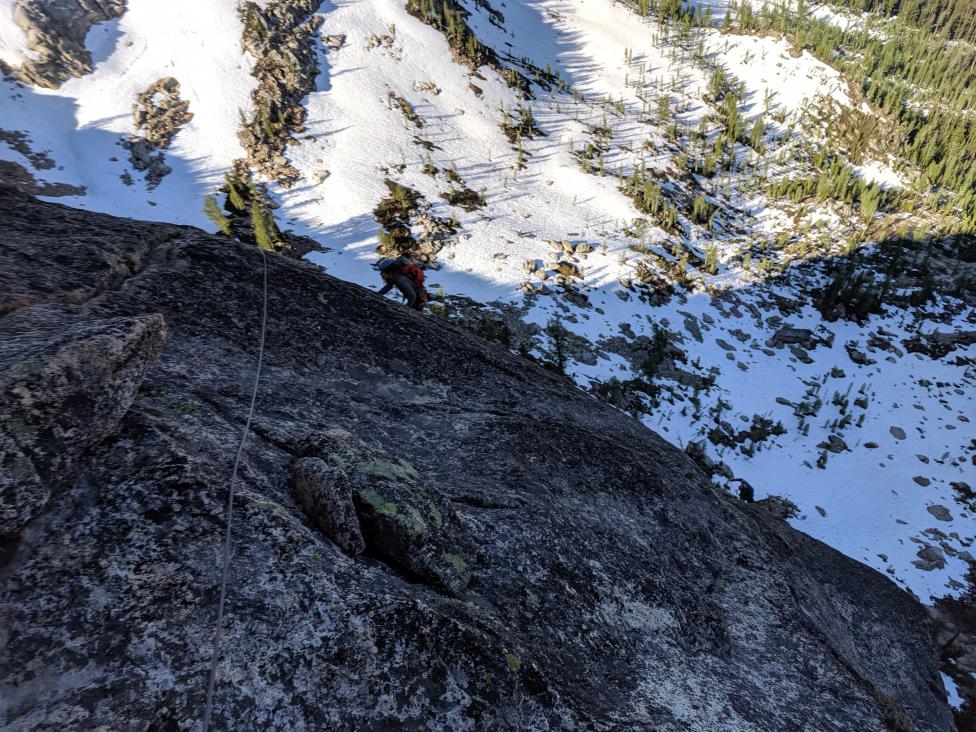
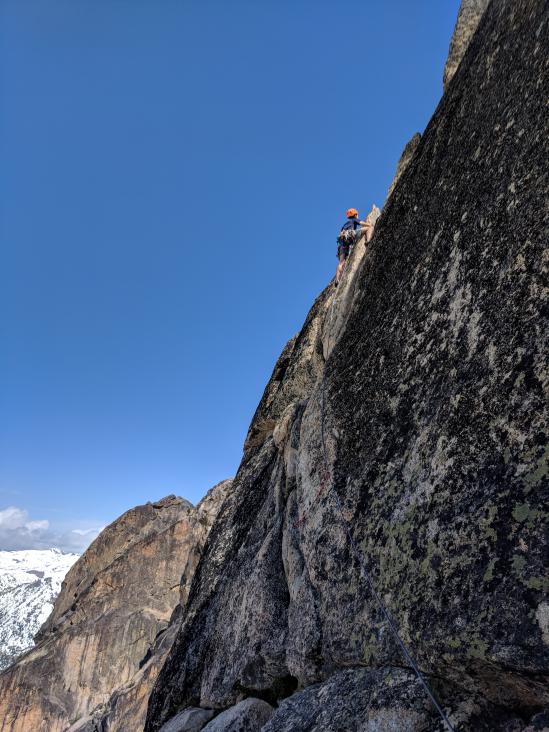
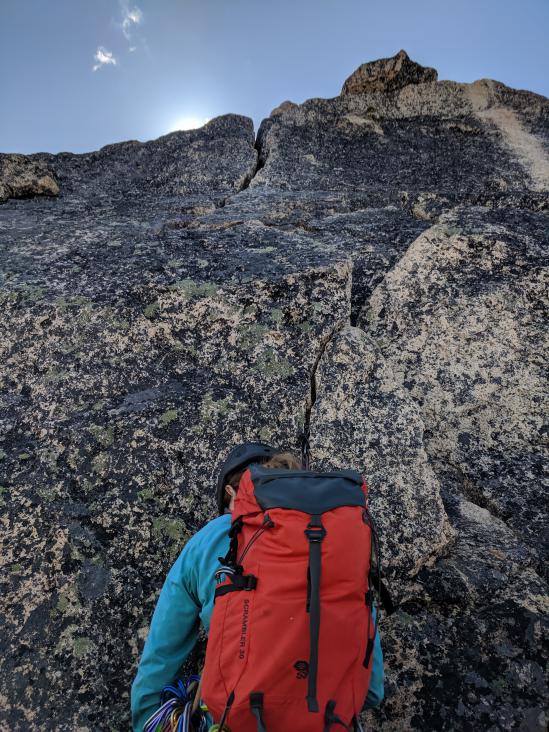
Northwest Face of Liberty Bell
5.9, 5 pitches, ~600′. Mostly small gear + nuts, gear up to #3. Thinking 0.2-3 with double 0.3-3?
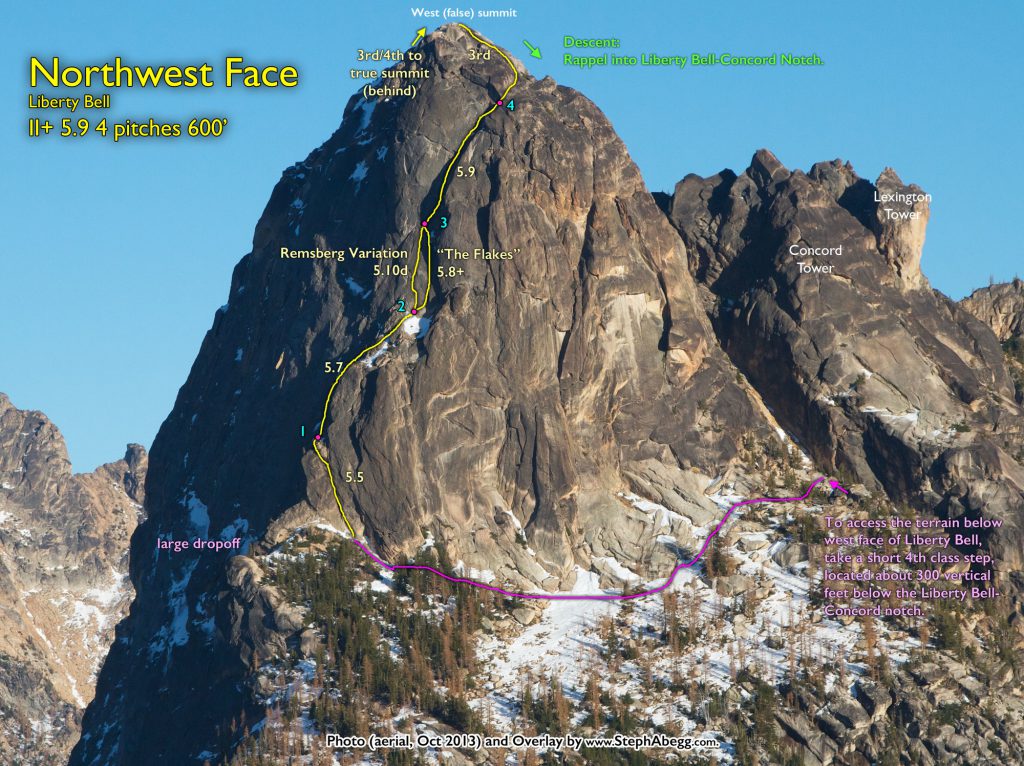
P1 – 5.5
Head up the left trending gully/crack system, past a couple trees, to a good belay ledge.

Pitch 1 of NW Face of Liberty Bell.
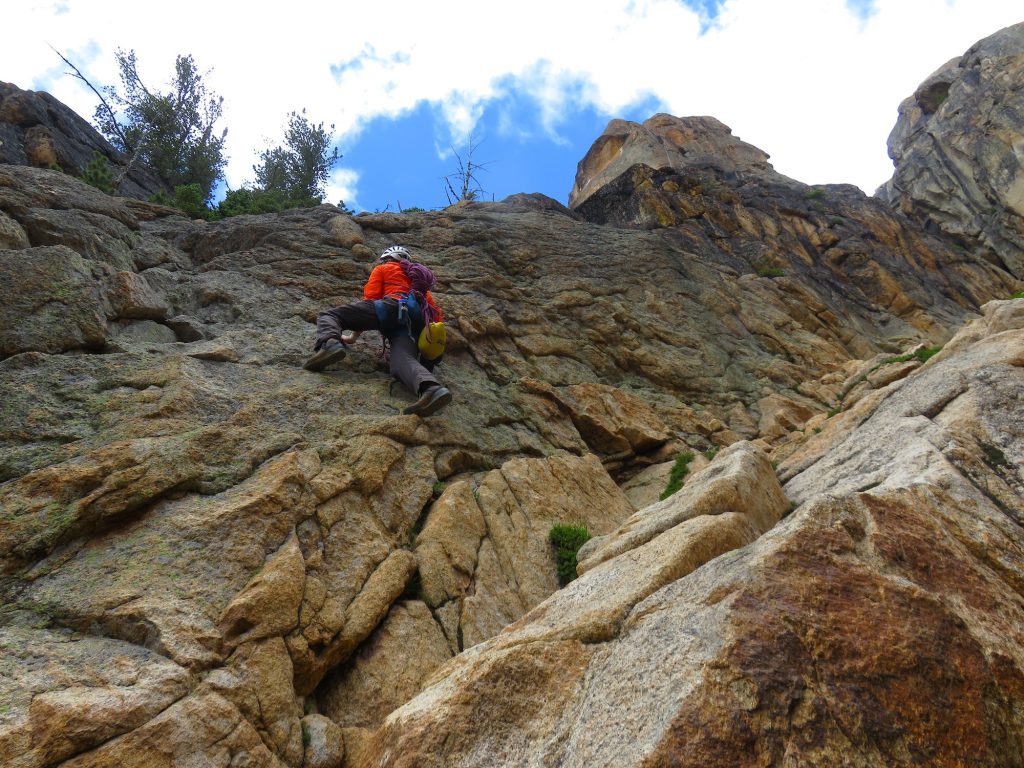
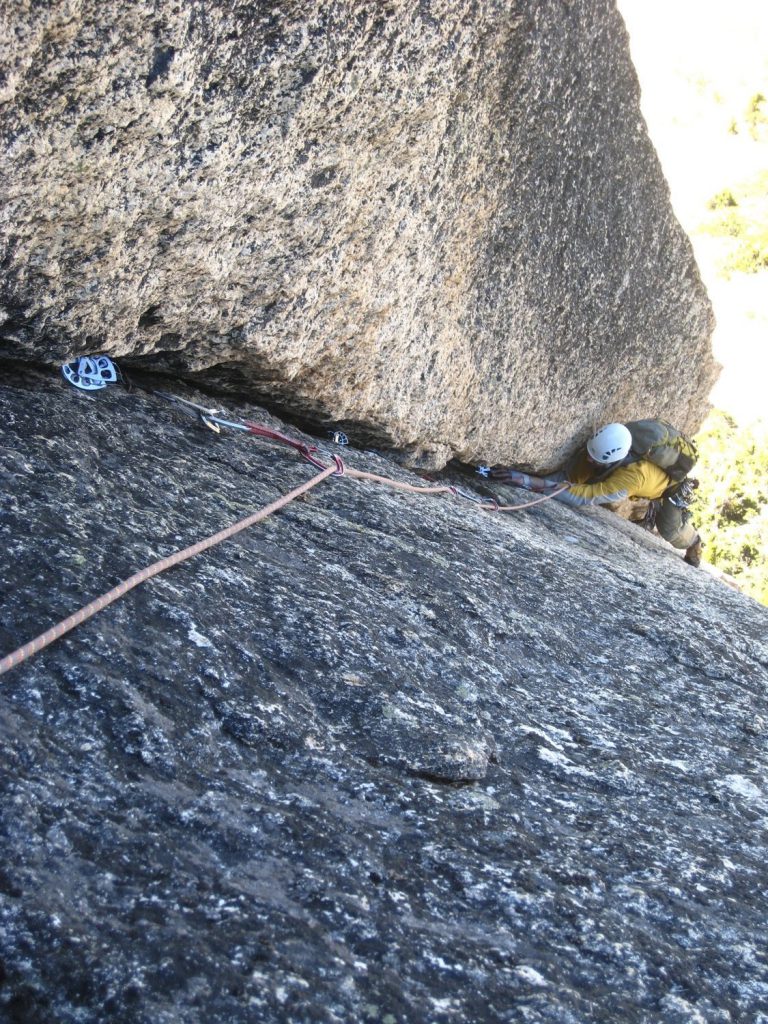
P2 – 5.7
Head up a crack system (5.7) to the left of a 2-3 ft chimney with a few pitons near the top. Continue up, over, and off a horn (4-5 feet) as the Beckey guide suggests or just climb around it to the left. Scramble up a 4th class gully to the right towards the start of the 3rd pitch. Consider finding a solid place to belay your partner just past the horn and carrying the rope the final 100 ft. up to the 3rd pitch.
Pitch 2 of NW Face of Liberty Bell. 
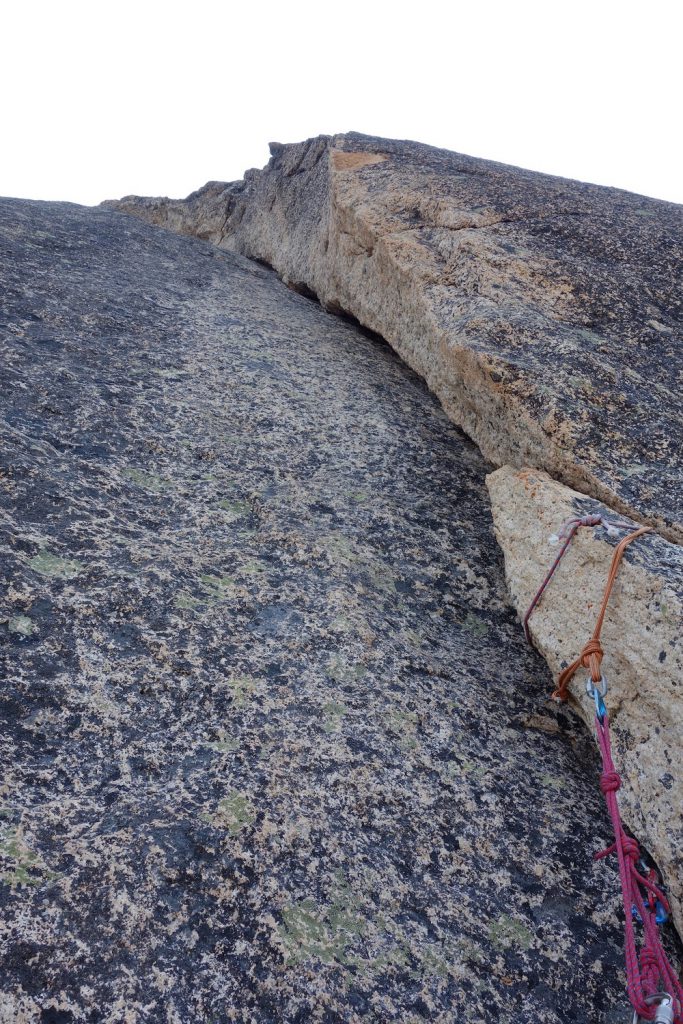
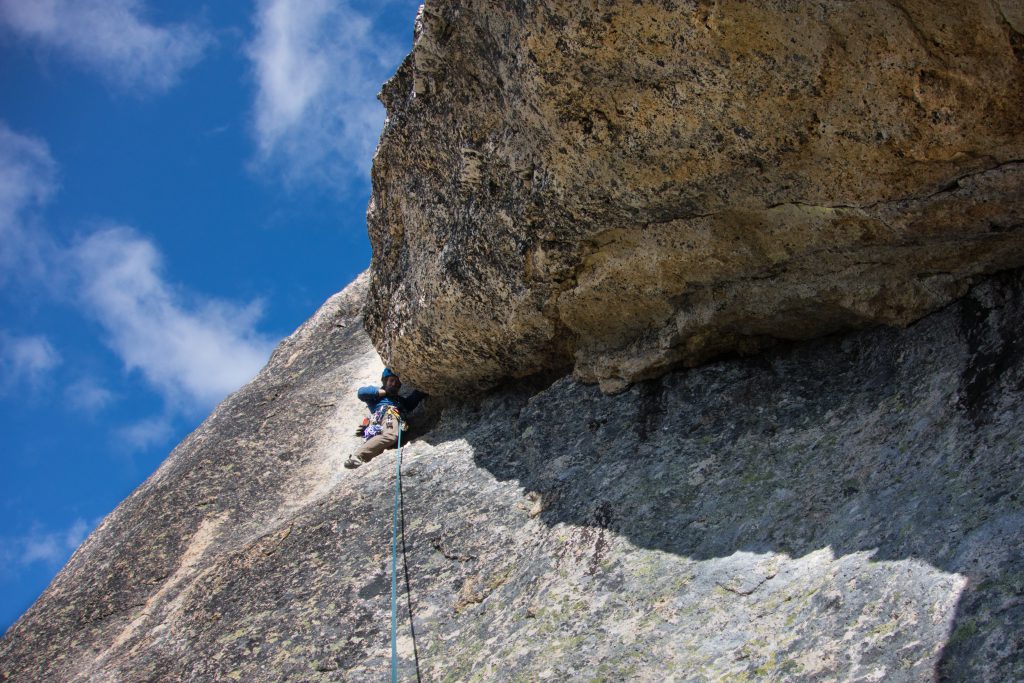
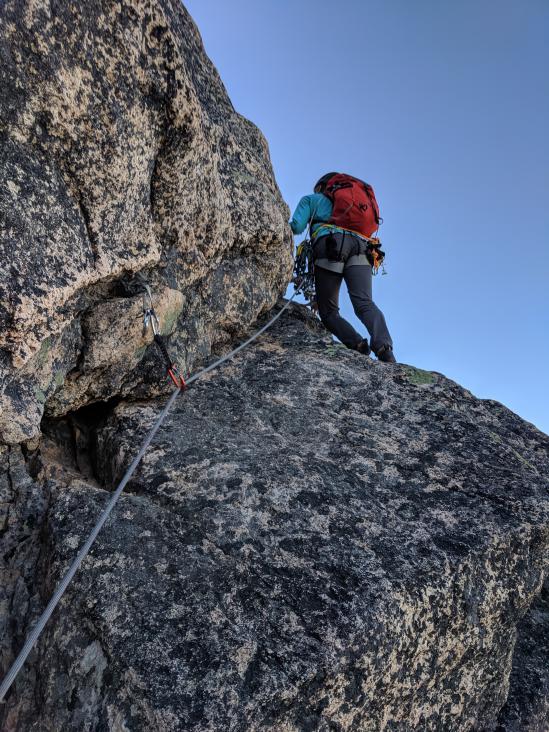
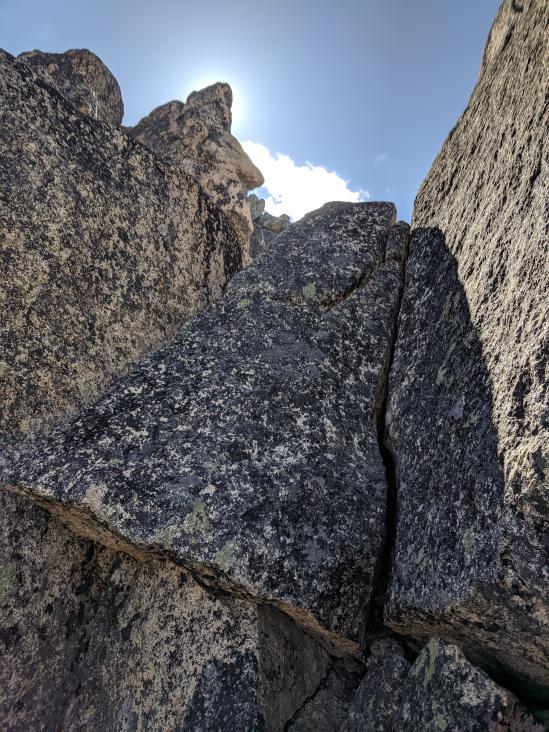
P3 – 5.9, ~30m
Left facing corner system made up of large thin flakes that are a little loose in places down low. The crux moves come about 25 feet off the belay and are reasonably protected if you look around. PG13 perhaps given the flakes but not too dangerous. After the flakes, continue up and left to a small ledge and belay.


End of P3
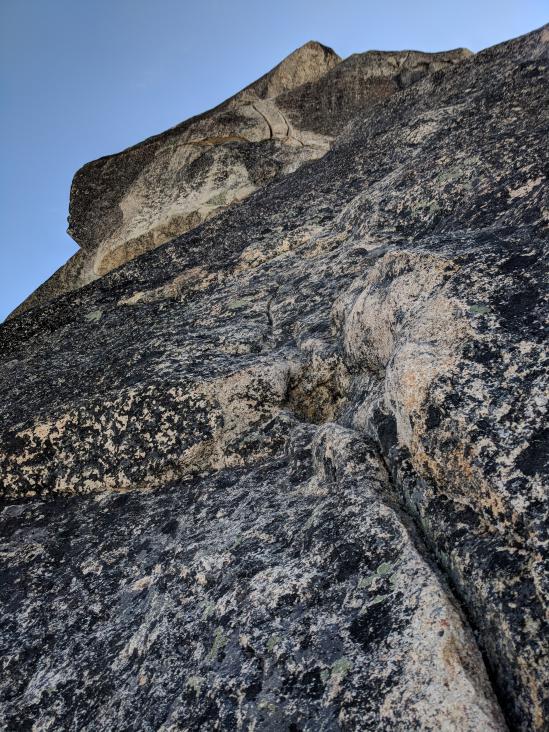
P4 – 5.9
The money pitch. Climb a dihedral with interesting features that get you moving around. There’s plenty of pro to be had in nearby cracks. Be aware that the dihedral crack gets very small near the top and is runout about 20-30 ft. It is also a bit dirty but thankfully the angle of the climb lessens substantially. A fun pitch.
Pitch 4 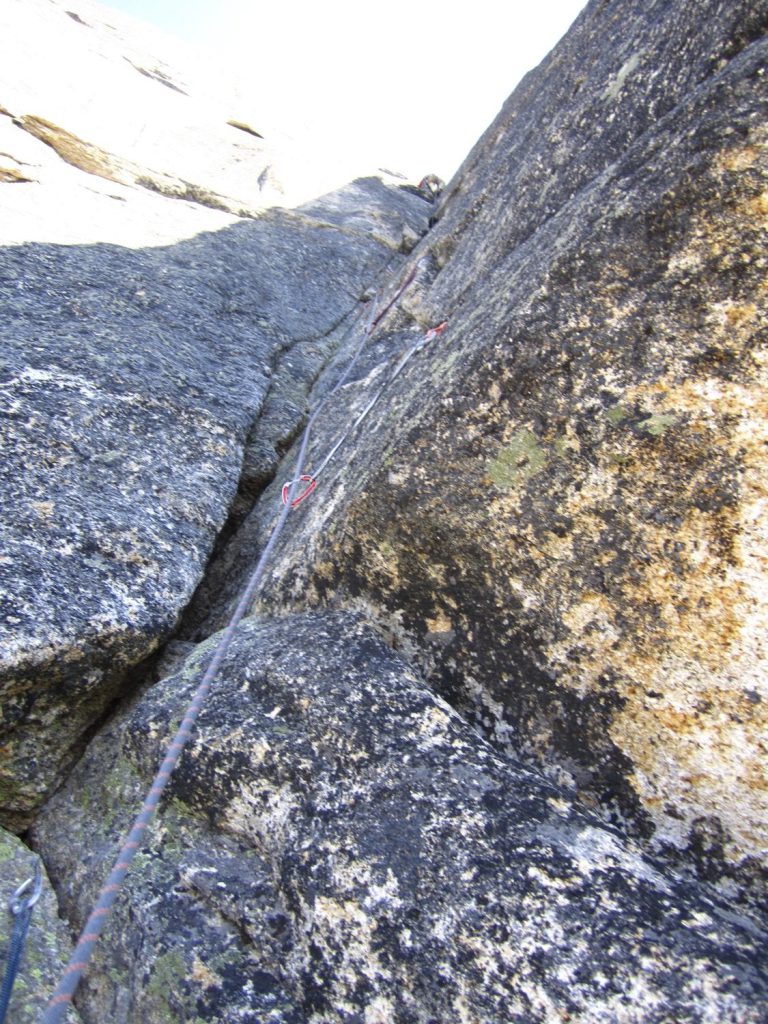
Looking up corner 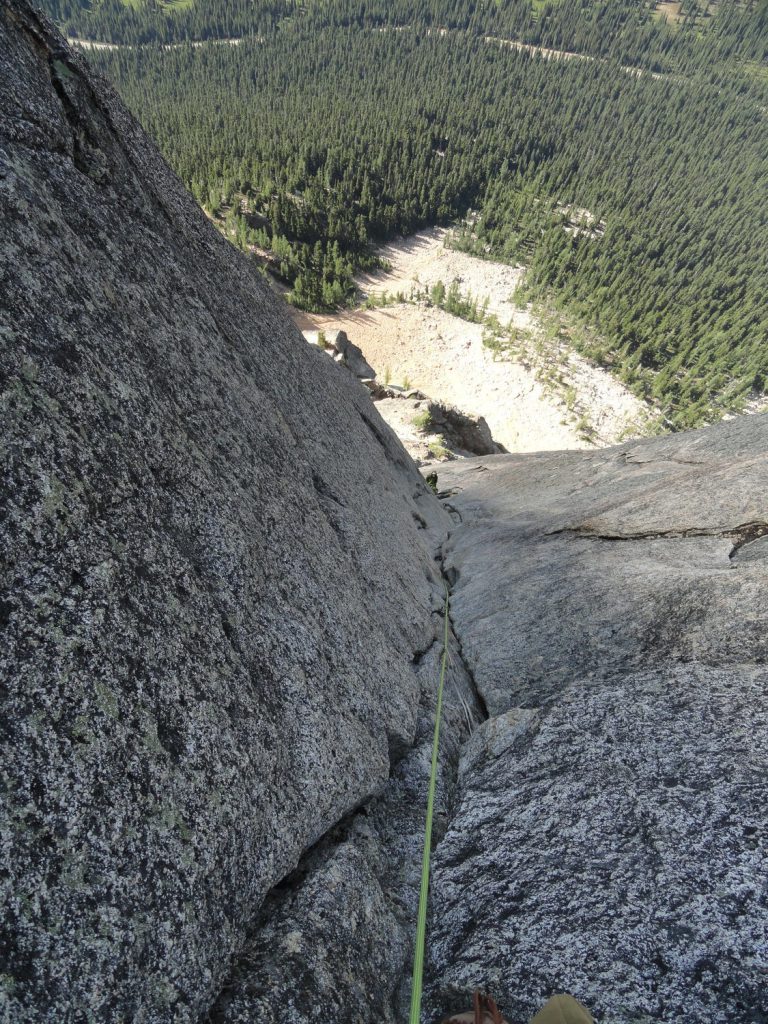
Looking down corner
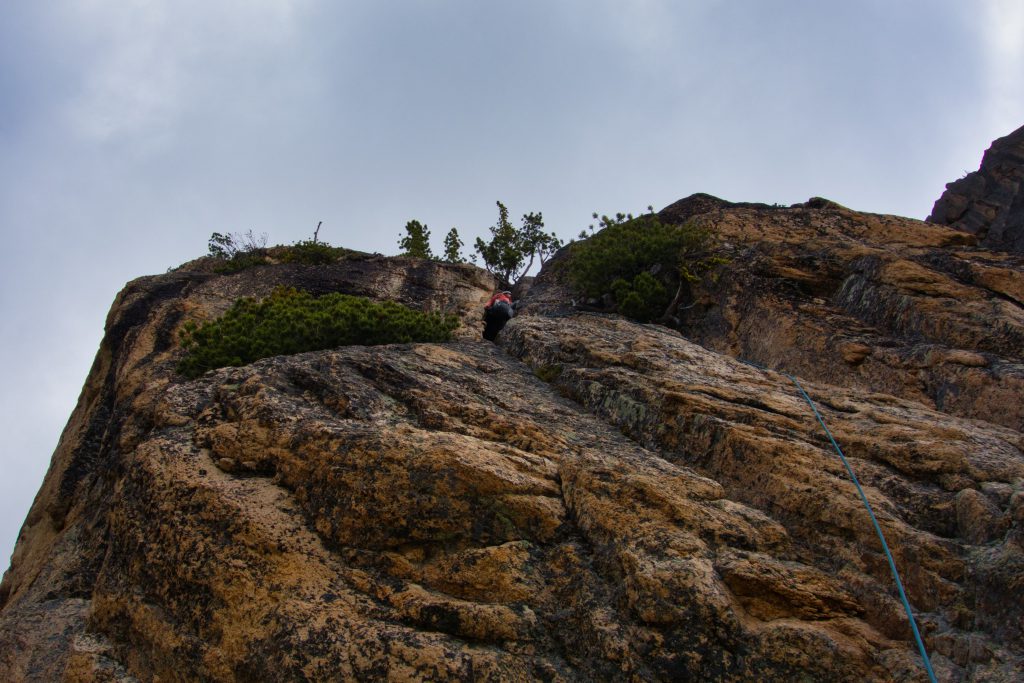
P5 – Mid-5th
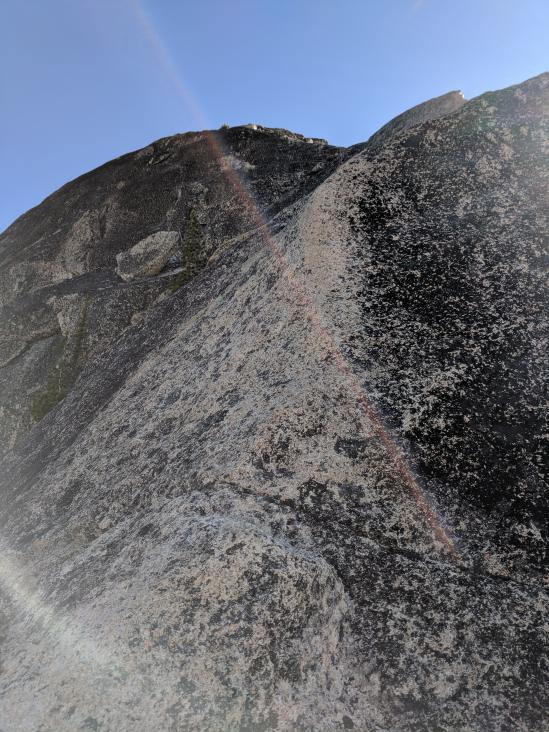
Head up and left on easy terrain to the west summit of Liberty Bell.
Summit
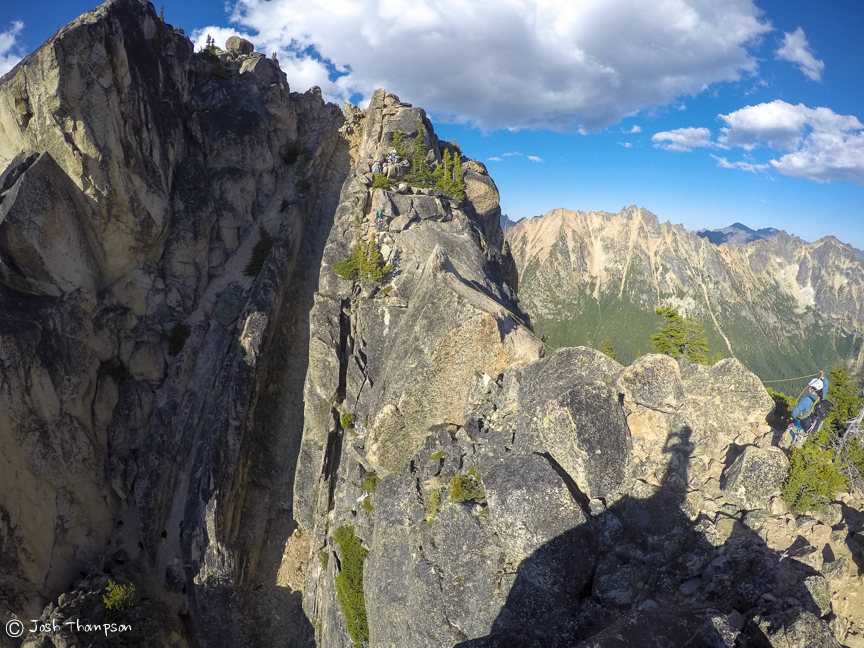
From the west summit, scramble down and across the notch then up to the main summit.
Descent
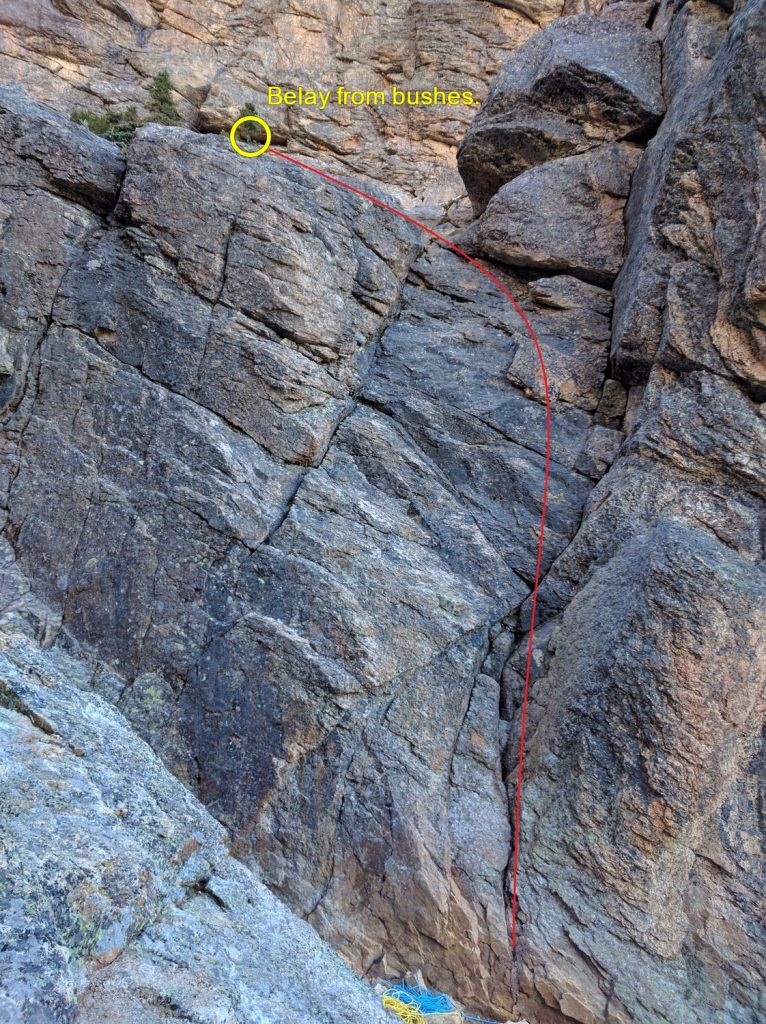
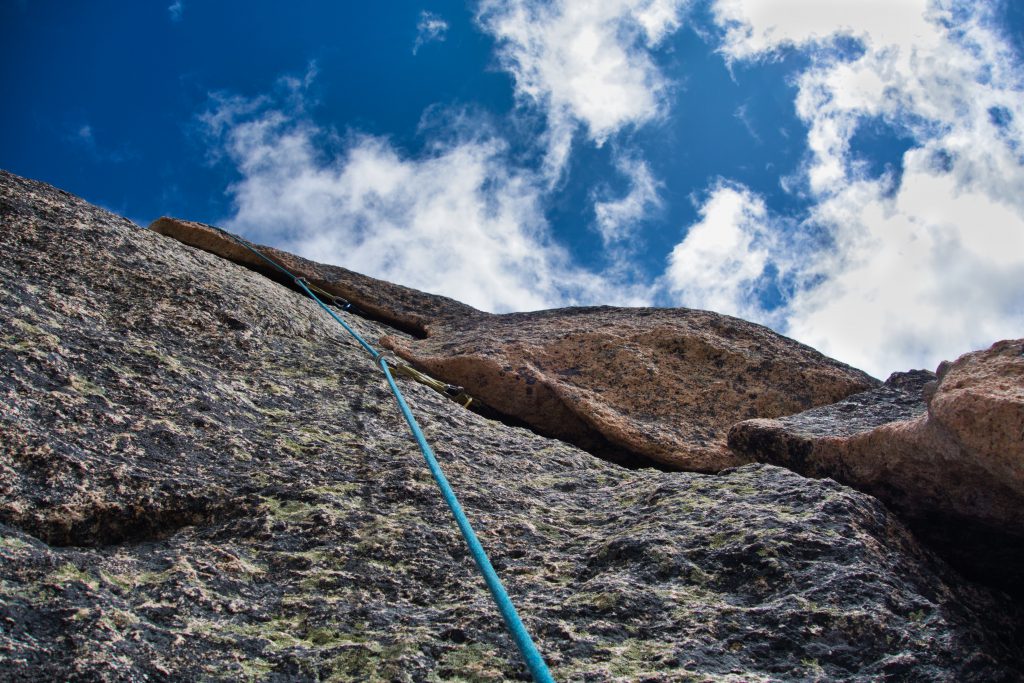
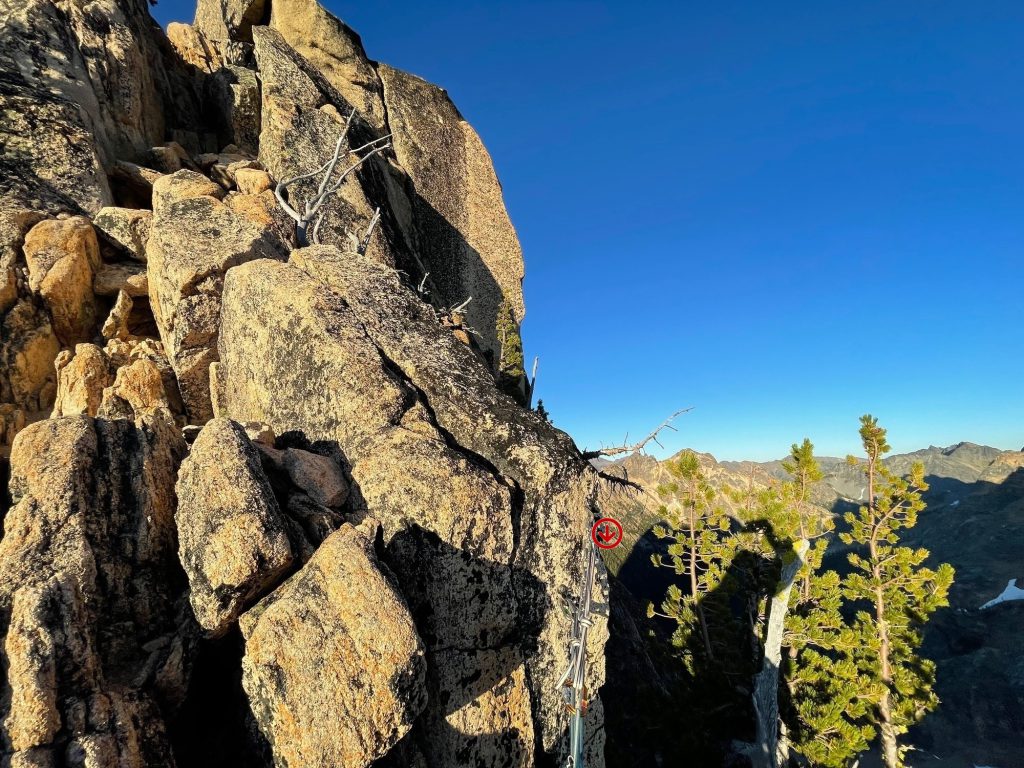
Follow standard Liberty Bell descent. From the summit, go toward the standard route but veer to skier’s left and look for a groove in the rock. Take caution on slabby down climb and you’ll see a couple slings wrapped around a tree with double rings. 60m rope is sufficient.
- R1: ~28m, down to the large ledge below.
- Scramble/down-climb skier’s right leading to a cliff. Look right, and you’ll see a rock ledge and bolts on a wall.
- R2: Rappel climber’s left toward a large tree with a small platform next to it.
- R3: ~25mm find bolts on the wall climbers right of the tree, rappel down into the gully where the standard route starts.
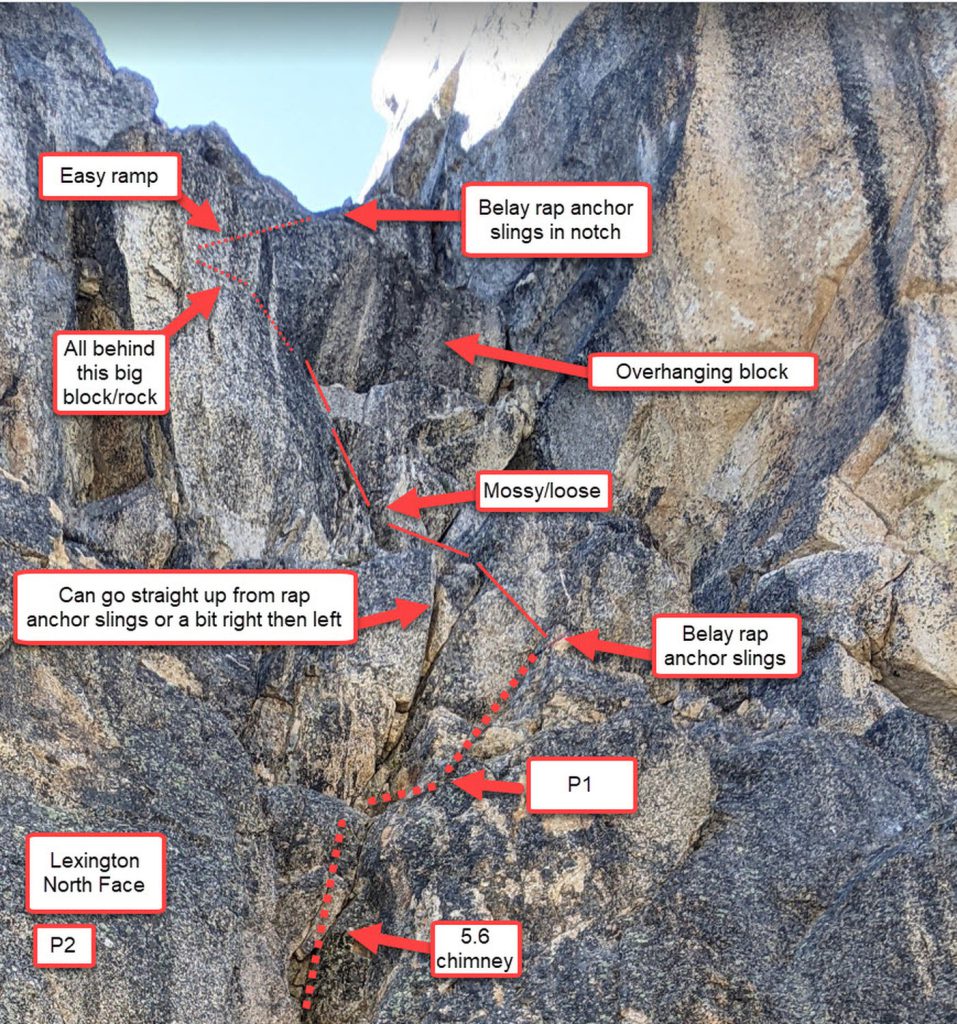
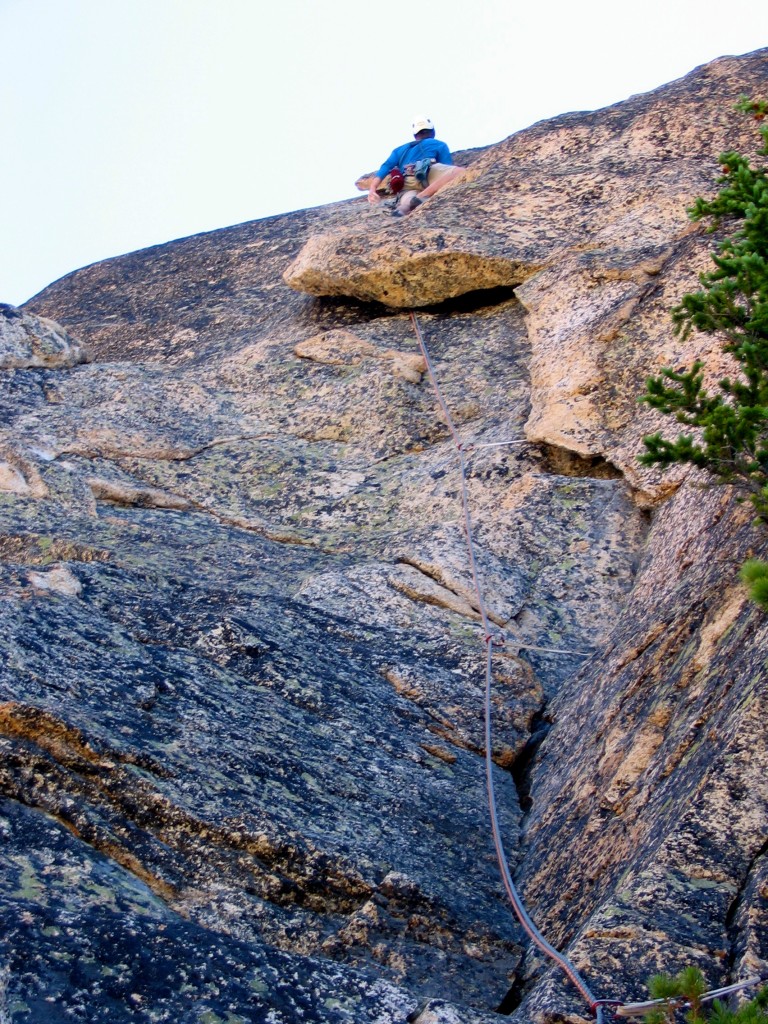
Concord – North Face
Begin from the top of the notch between Liberty Bell and Concord Tower. Single #0.3-3?
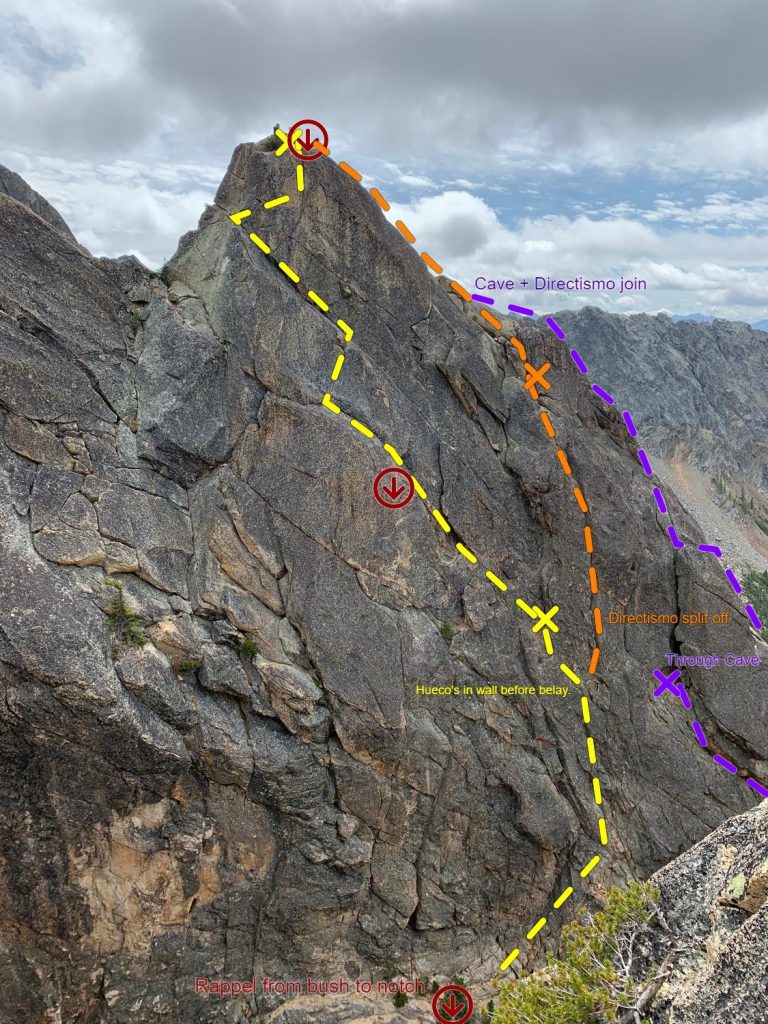

P1 – 5.6
Short and straightforward. Follow a crack system to a large ledge with some small trees.
P2 – 5.7
Cruck pitch. From the ledge, go right on easy terrain then straight up on some hollow and flaky sounding rock. The pitch ends right after what appears to be 10-15 feet of an unprotectable blank wall, but has huge huecos with great holds (stay left here to stay on North Face).
Maybe can link P2-3?
P3 – 5.7
From the belay head left up some crack systems (easily takes a #3 cam) then go up two 5.0 slabs and up a bear hug flake just below the summit
Descent from Concord
Single 60m adequate. Rappel the South Face.
- R1: ~30m, from south side of the summit, rappel off a bolted anchor to another bolted anchor.
- R2: ~30m, Rappel to a ledge.
- From that ledge, easily walk/scramble down to the Lexington-Concord Col. Walk the short distance across the Concord-Lexington Notch to the start of the North Face Route on Lexington.
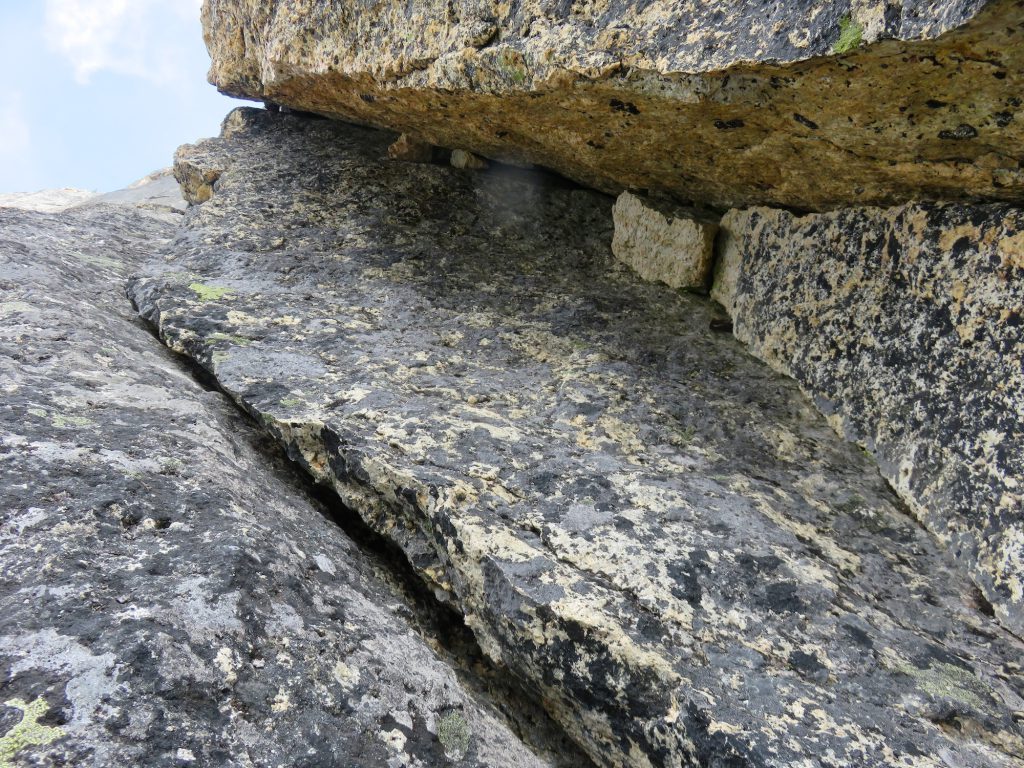
[ALT OPTION] Concord – Cave Route
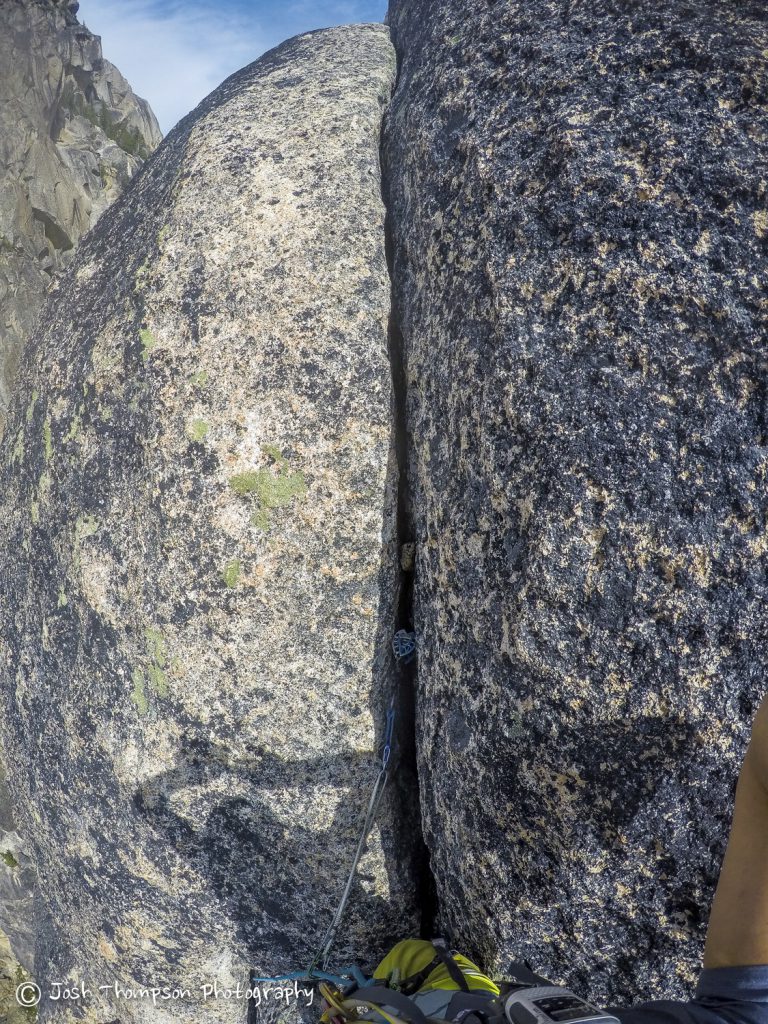
5.8, 3 pitches. The route starts on the north side of Concord Tower about 50 feet down the gully from the notch at two semi-parallel diagonal cracks.
Gear: #0.3-3 with double #2-3?
P1 – 5.8
Crux pitch. Move up the two semi-parallel right diagonal cracks. There’s a “bomber 0.75” somewhere. Once past the diagonals, continue up a flake past a dead tree and again move up and right to another tree (that no longer exists) to gear belay from.
Top of P1
P2 H1
From the belay, move up and to climber’s left under an overhang and continue traversing left. Bring a few extender slings or rope drag will be an issue. The traverse will lead you around a corner and slings will be about 20 feet from the corner at the entrance of the cave to belay from.
End of P2 H1 (before the cave)
P2 H2, 20′
Move through the cave (~20 feet) and belay from the other side.

Cave 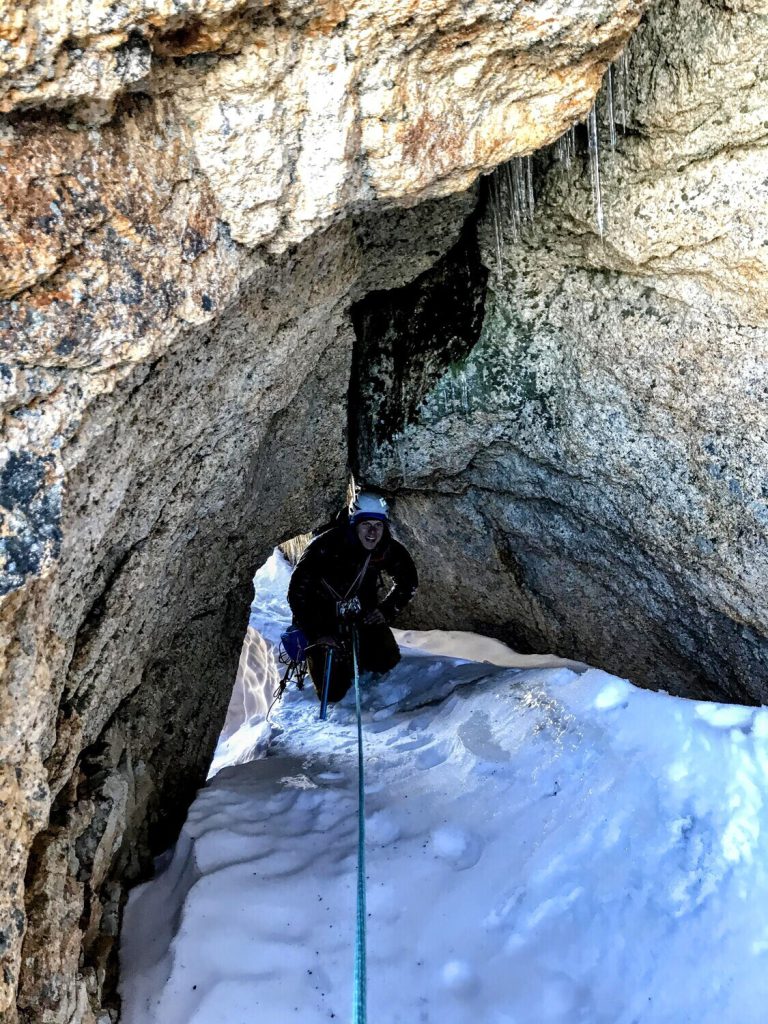
Cave in May 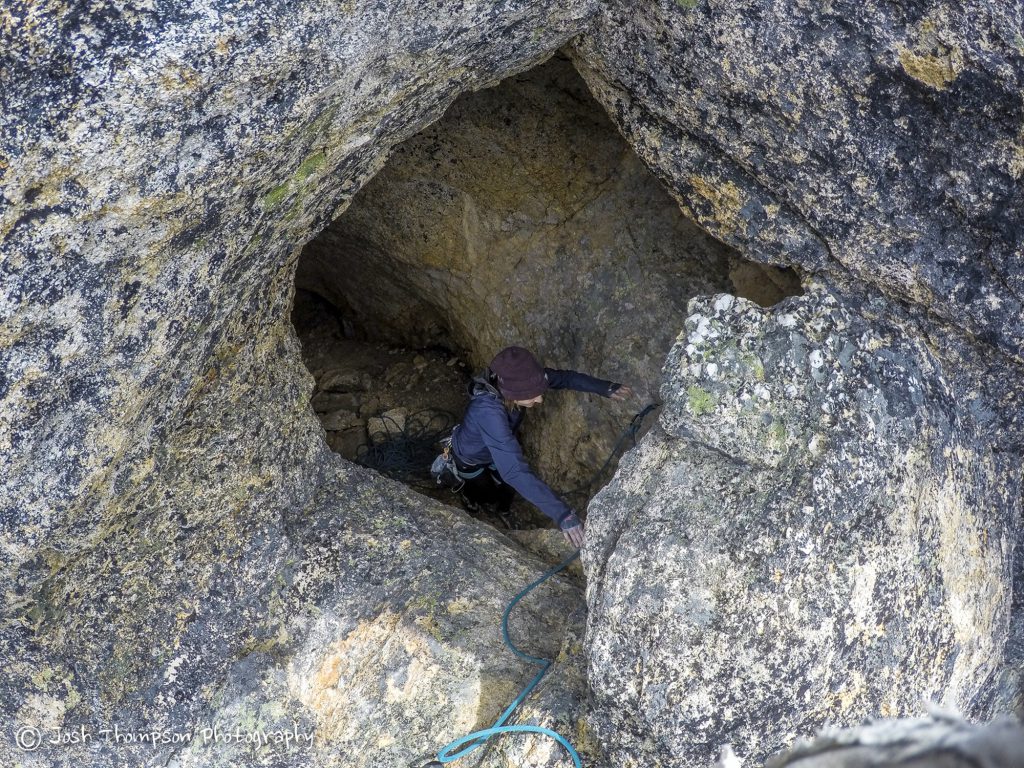
Exiting the cave
P3
Looking up the face there’s a 5.4 crack that leads to some face climbing to the top where there is a belay spot at a tree. To get into the crack you have two options, one is an exposed knobby slab to the left you can travel up to the crack or you can make the lie back move to get into the crack right off the bat. The rest of the pitch is easy face climbing.
Start of P3
P4: Scramble to summit
Lastly, scramble up about 40 feet to the top to summit. It’s very exposed so you might want to rope up. The rappel is on the west side of the summit.
Final scramble/P4
Descent from Concord
Single 60m adequate. Rappel the South Face.
- R1: ~30m, from south side of the summit, rappel off a bolted anchor to another bolted anchor.
- R2: ~30m, Rappel to a ledge.
- From that ledge, easily walk/scramble down to the Lexington-Concord Col. Walk the short distance across the Concord-Lexington Notch to the start of the North Face Route on Lexington.
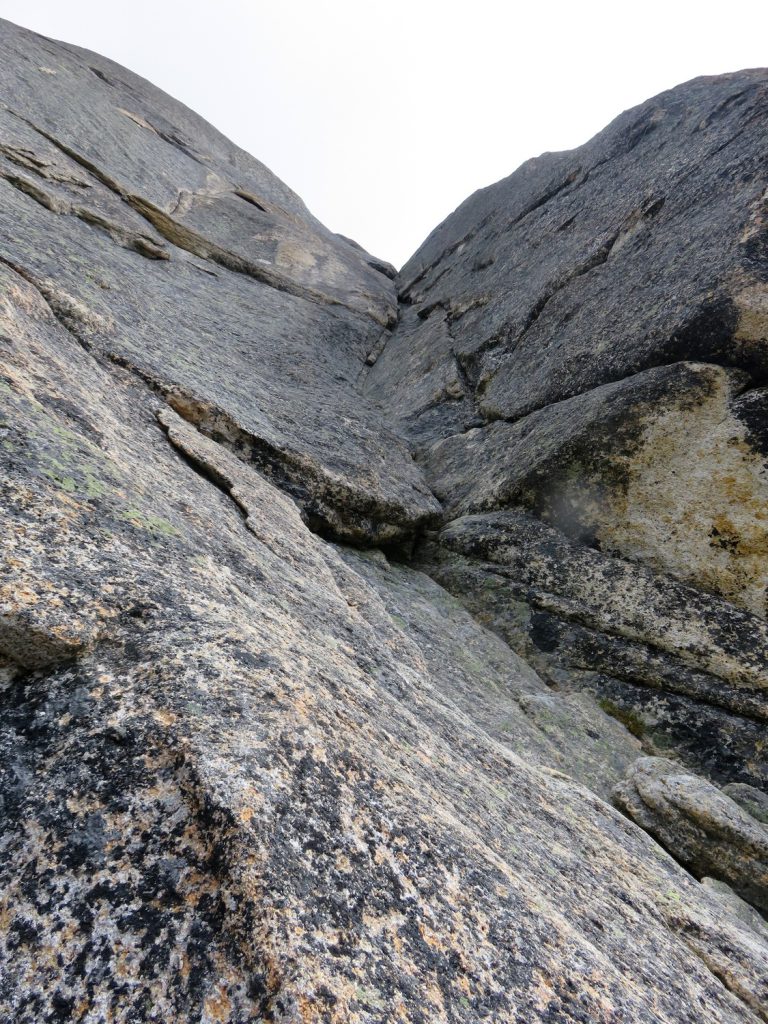
North Face of Lexington
5.7, 3 pitches. Gear: #0.3-3 with double #2-3, nuts.
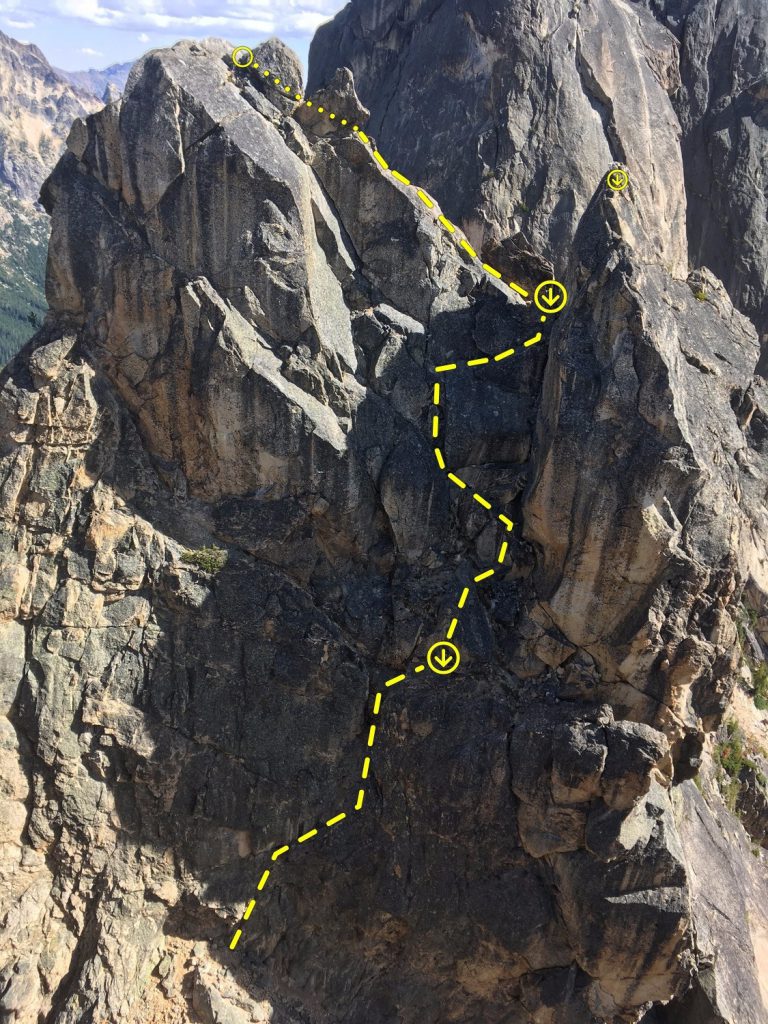
P1 – 5.7, 125′
Crux of the route is right off the ground in an awkward rightward trending handcrack. Once through it, the climbing eases. Pick you way up the easiest options to a large belay block slung with tat and a rap anchor (visible from the base of the climb). If you try to link with P2, it’s 65m.

P2 – 5.7, 85′
Initially climb a few moves right of the belay, then head back left up and over some more blocky (and mossy) terrain. Meander your way back and forth climbing the path of least resistance, eventually trending farther right. Belay at the notch between the true summit and the west summit (there is a rap anchor here as well).
P3 – Low 5th
If you are comfortable, unrope for this pitch and scramble to the true summit along the ridge crest. There may be one 5.easy move on it, but it’s mostly 4th class.
Descent
From the summit of Lexington, descend 20 feet east until you can rappel 30m down to the ledge where the East Face and Tooth and Claw top out. Look to the south to a large flat area on the ridge crest: that’s your destination. From the bottom of the rappel, head due west a short distance down a steep scree gully. Until you can cross over a few short 3rd class ribs and traverse down and left aiming for the large flat section in the ridge. Once on the large flat section, head to the far south end and rappel 20m off a tree to a scree-covered slope. Walk along the crest for a short distance until you can drop down a gully that angles toward the northwest edge of North Early Winters Spire and the start of the West Face and the Northwest Corner.
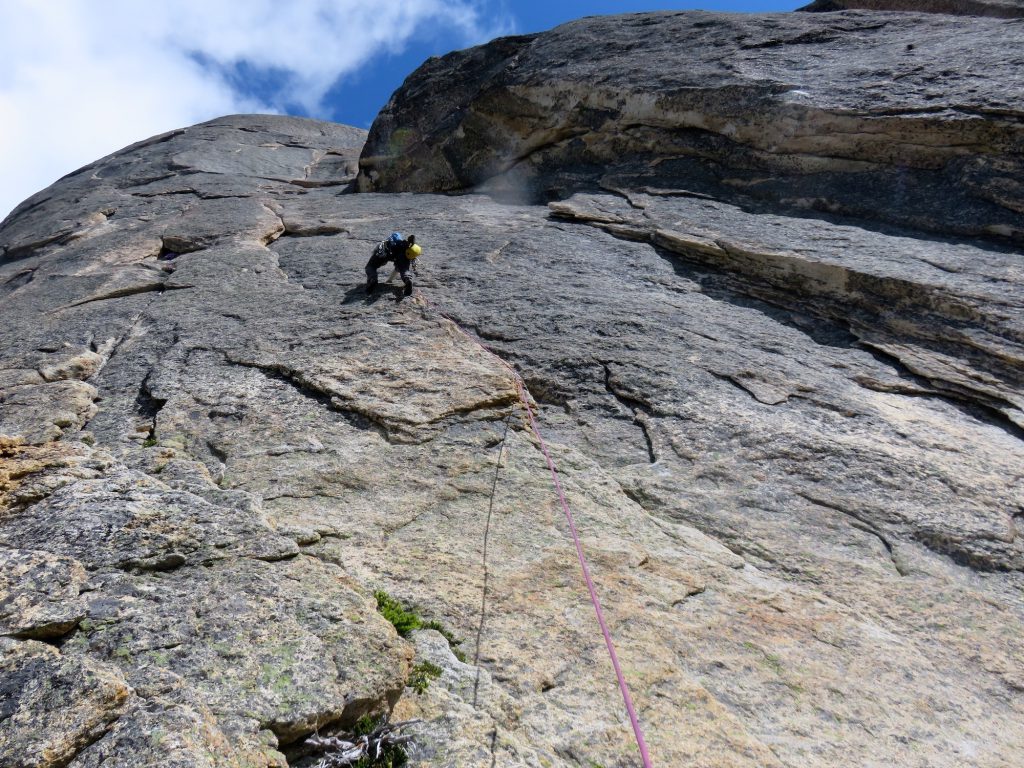
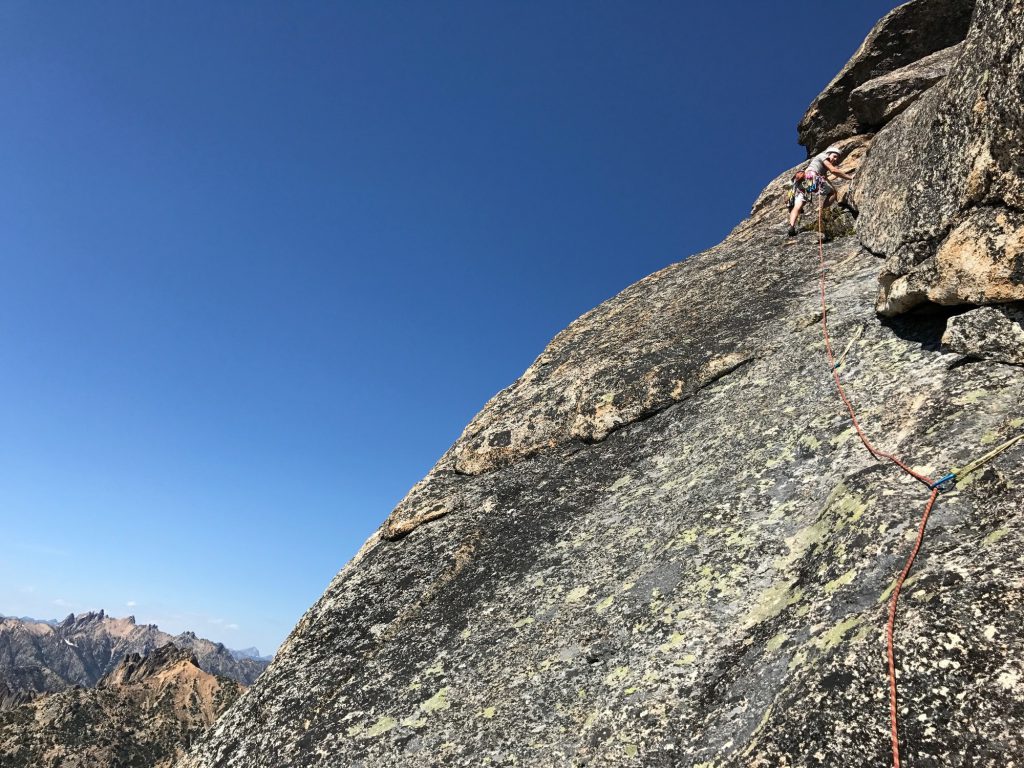
Northwest Corner of NEWS
5.9, 5 pitches. Doubles #0.4-4, single #5.
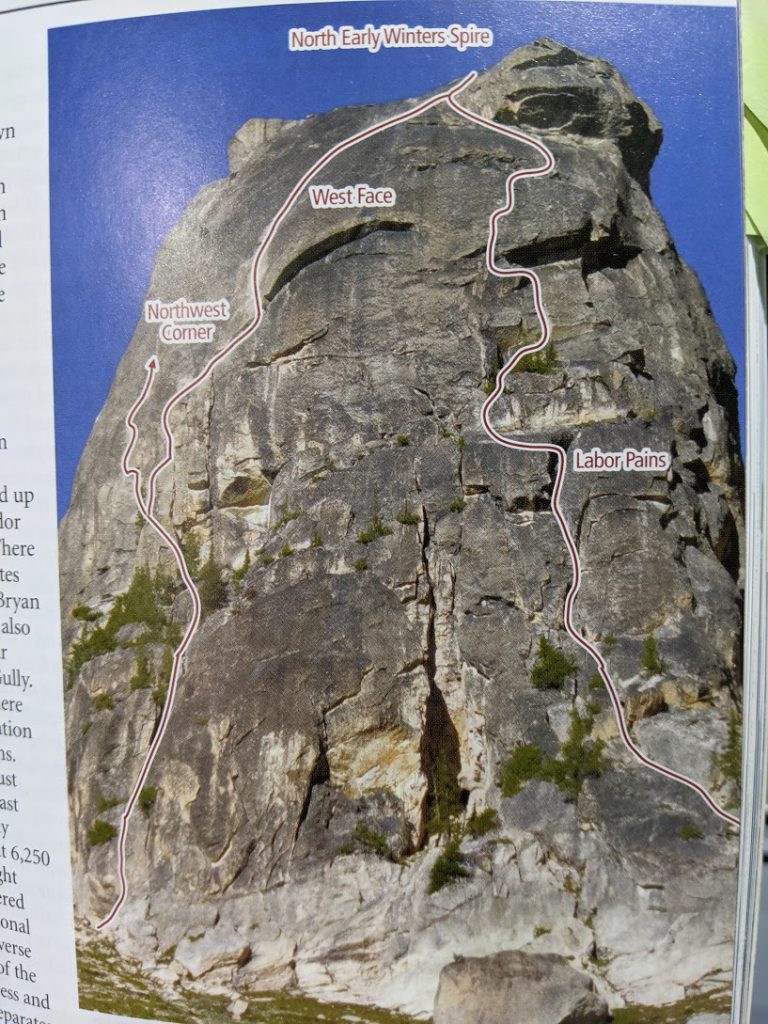

Pitch 1
Climb the crack/corner to the ledge. Runout start. Part of it is a chimney that doesn’t have much in terms of protection, but this section is short and fairly easy. Can link with P2.
Start of P1 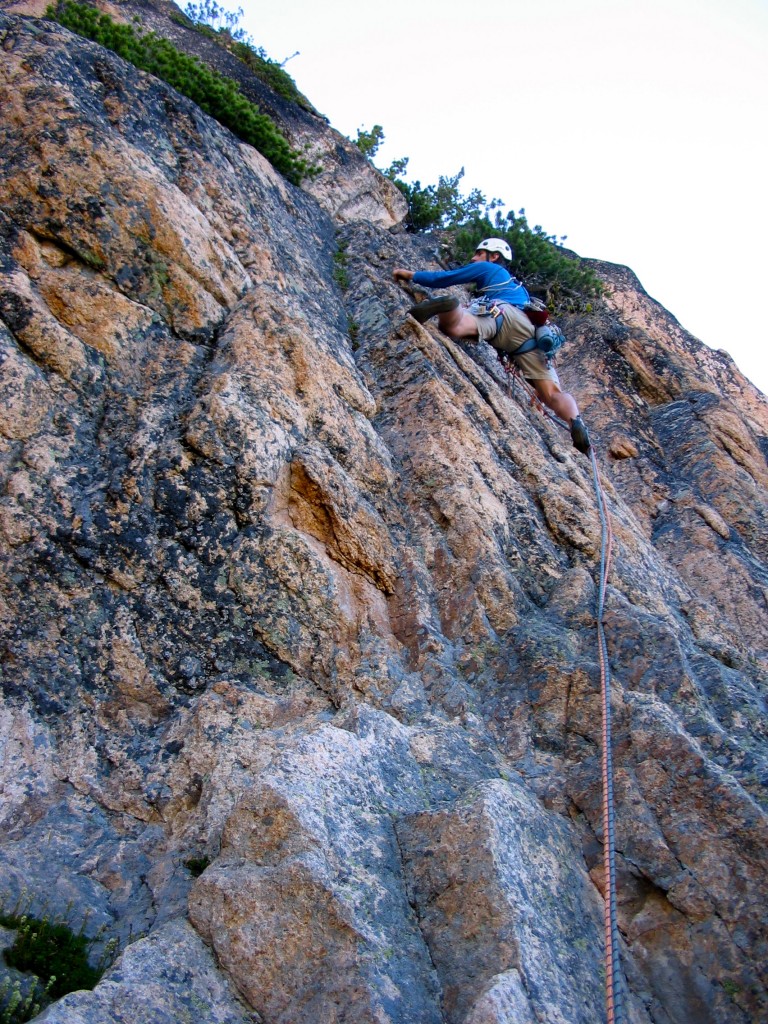
Start of P1 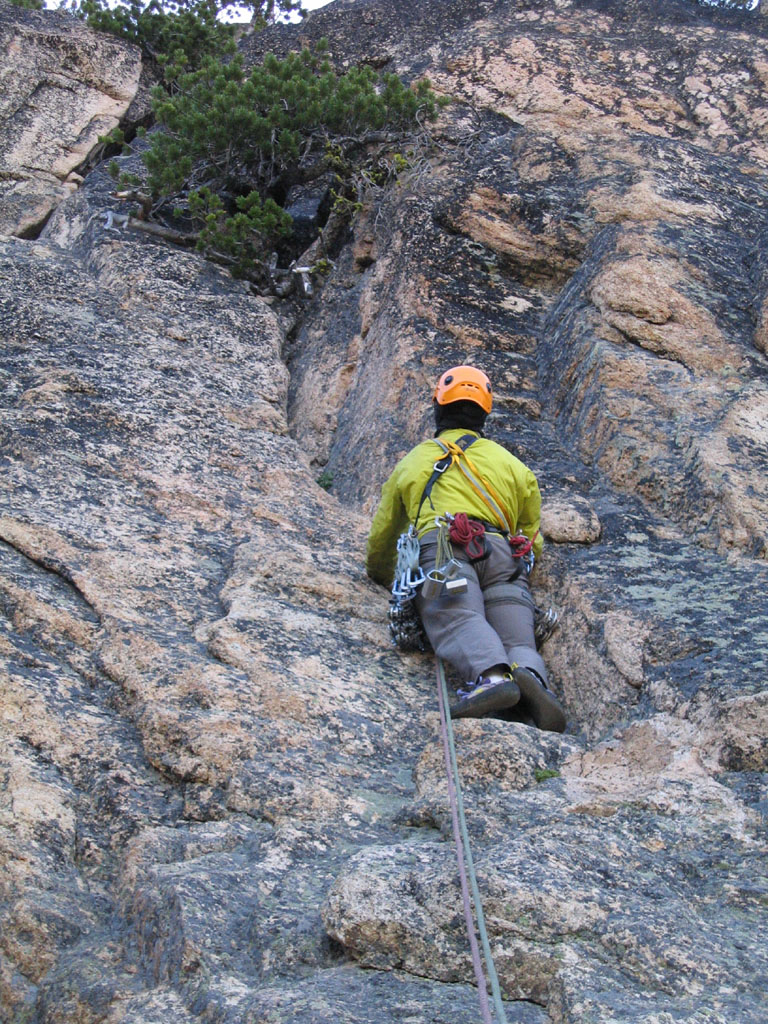
Pitch 2
From the left edge of the ledge, continue up and left through some more trees and up a corner to another belay ledge.
End of P2
Pitch 3 – 5.8
Continue up a left-leading flake/wide crack (remember the big gear!!!) to another belay ledge with many slings wrapped around the tip of a small pillar. You don’t want to skip this belay because you will want to have all your big gear for the next pitch.
(Gear tips: #4 and #5)

Start of P3 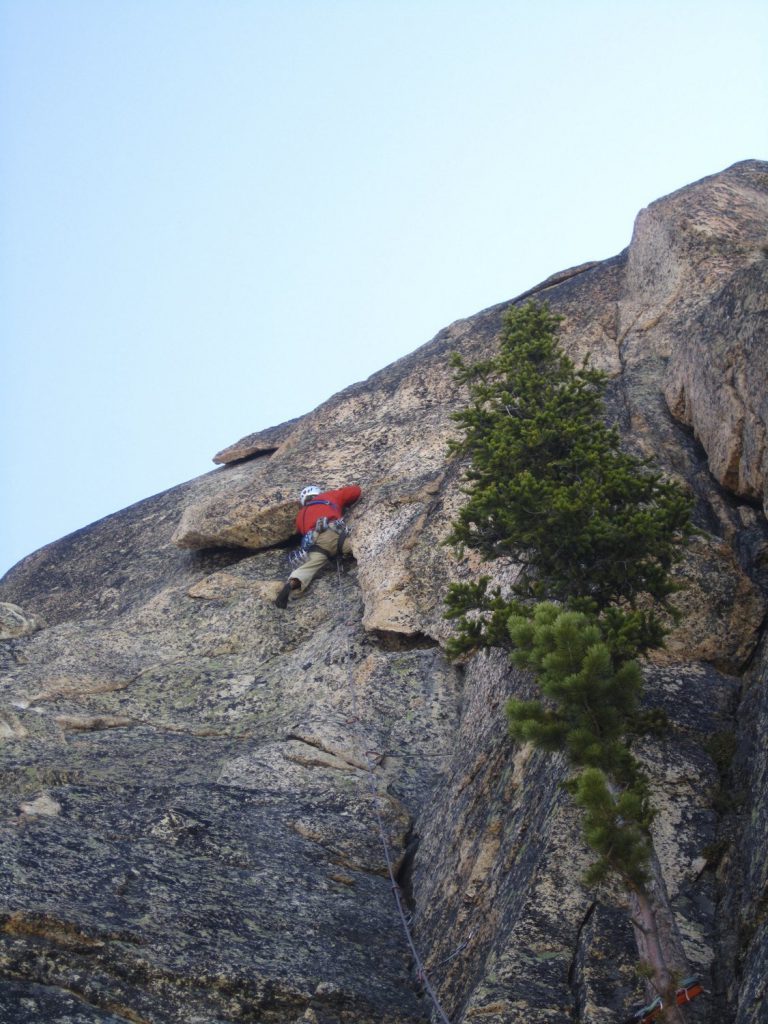
More zig-zagging flakes 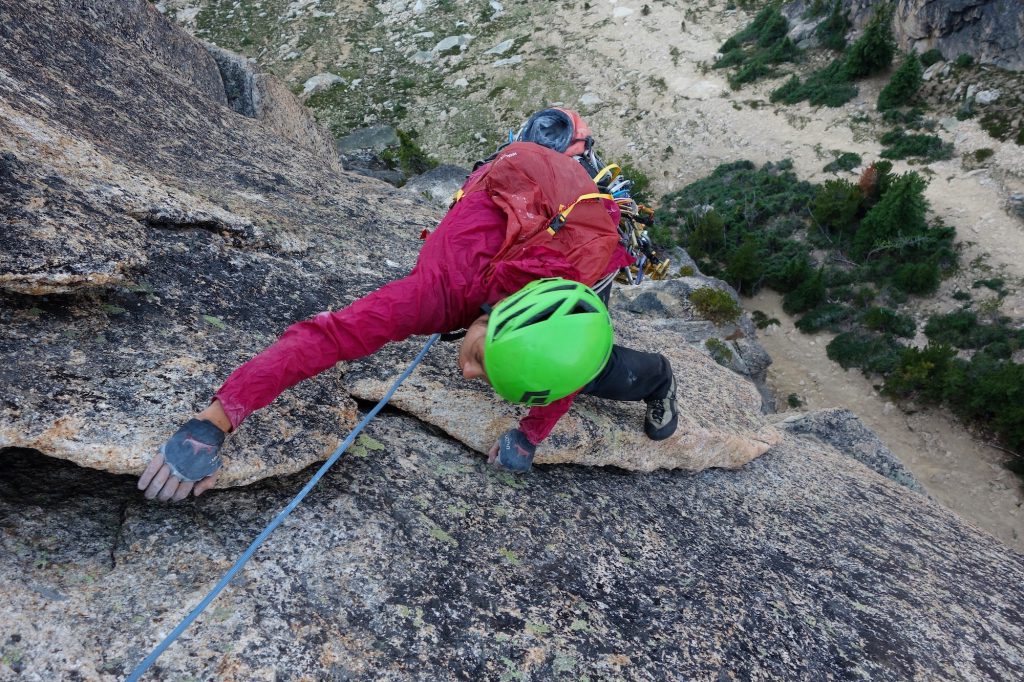
End of P3
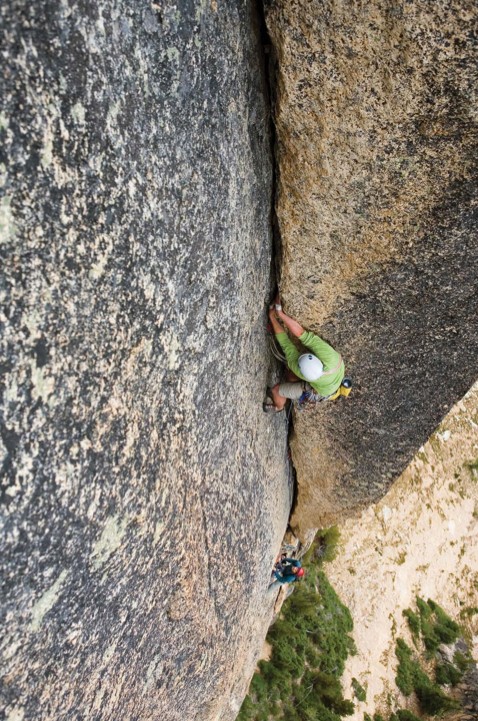
Pitch 4 – 5.9+
Continue up the “surprisingly secure offwidth” pitch. It seems like the best way to do this pitch is to smear up the face and stick your right arm in the crack for balance. Continue up to another sloping ledge below a roof.
“5.9 almost the whole way. Lots of hand jams if you are patient with it. Some fists required with very minimal offwidth climbing. The crack is burly, sustained, and a bit awkward.”
(Gear tips: Bump up a #4, protects well with 2-4 sized cams, and if you have a 5 you’ll be able to place that as well. build a pretty bomber belay with .75-1 and .2-.4 sized pieces in the shallow groove up and right of the wide corner.)
Start of P4 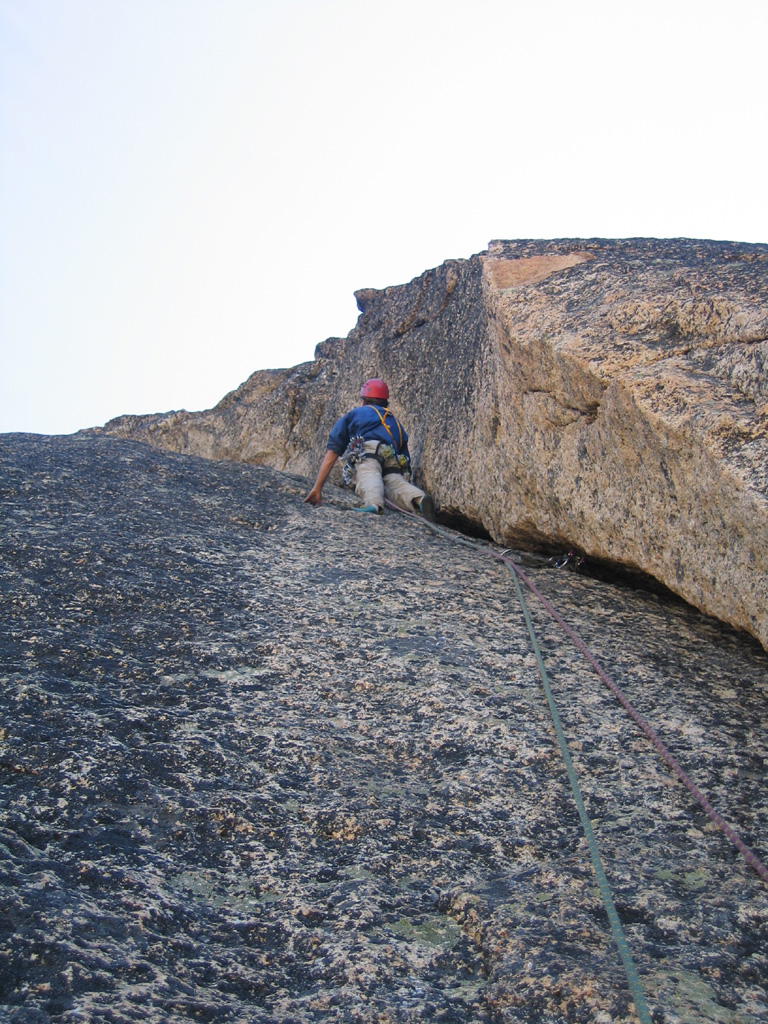
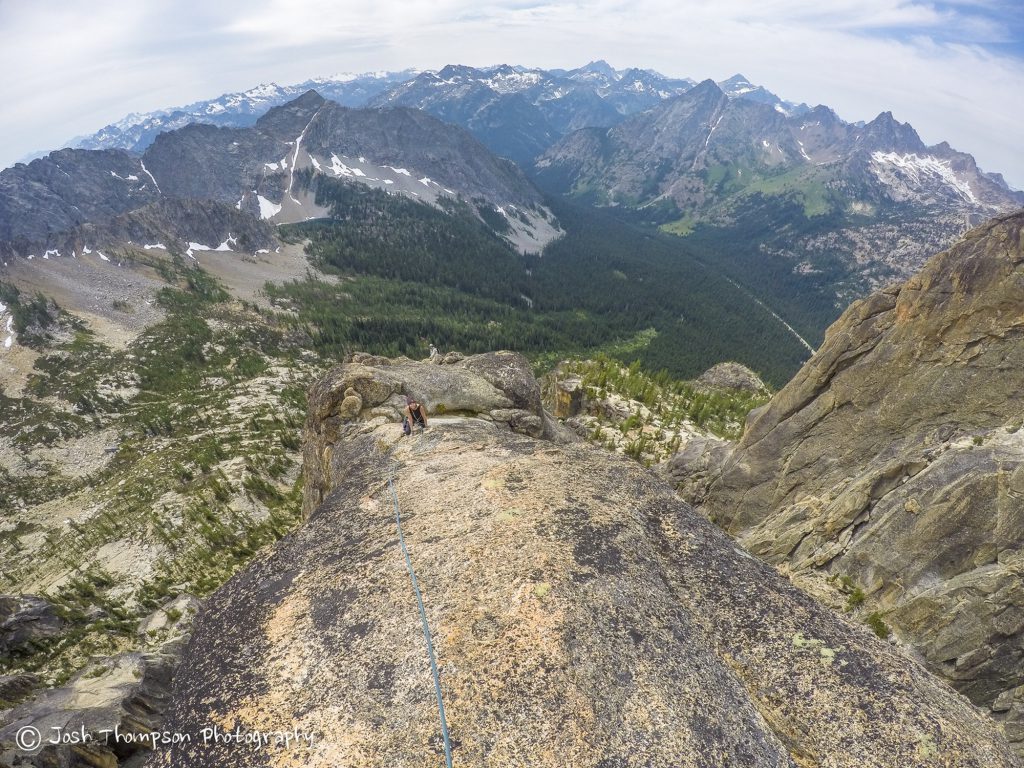
Pitch 5
Traverse leftwards around the roof on slab (watch rope drag!) and continue up the crack system as the angle eases and you reach the summit.
Start of P5 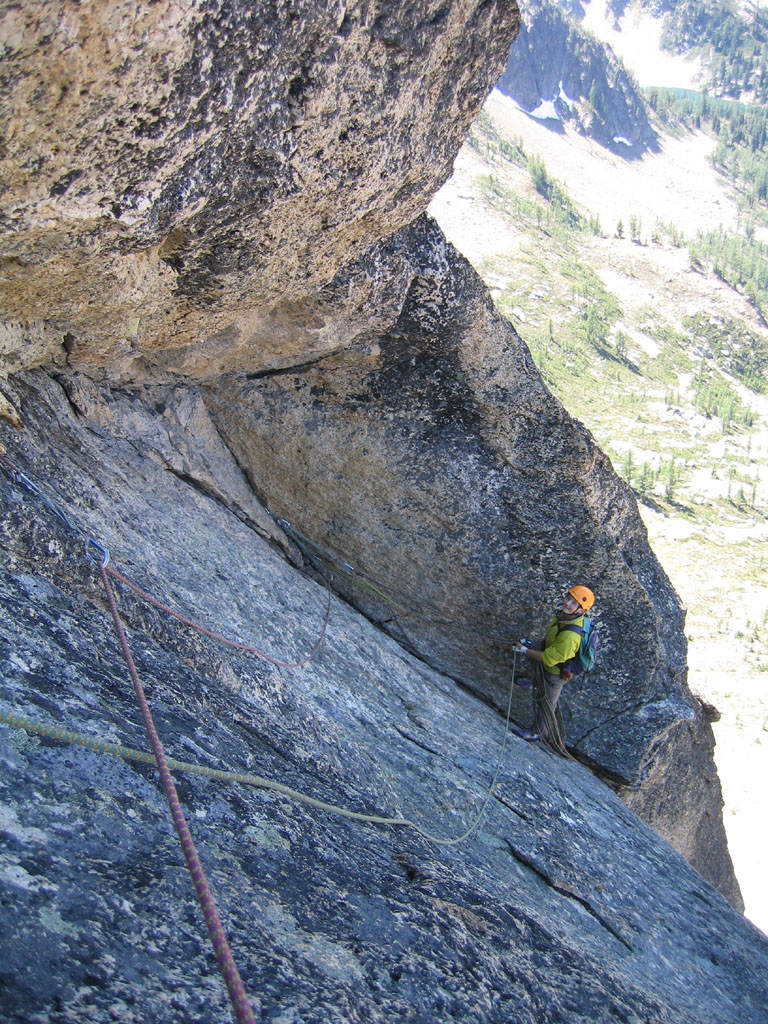
Looking back 
Near the top
Descent
West Face Rappel (Recommended more recently)
5 rappels total, single 60m adequate. If you scramble up to the top of low angle terrain of the west face you’ll find the upper anchor (and be able to summit for a nicer view), or…
There is a very nice rappel route adjacent to the West Face route. From the top, locate the hand crack that marks the last pitch of West Face. The rappel station is about 15-20 feet skier’s left of this crack. It is a little bit exposed getting to the anchor, but it’s not bad. From there, four very clean rappels down the face brings you to a gravelly ledge. There is a cairn skier’s left on this ledge with a little dirt path that leads around a corner. There is a final rappel station around this corner that avoids a very sketchy, sandy downclimb.
Supertopo: From the summit descend west, passing one notch on your left until you see Section Notch on your left with a tree at the top. There are rappel bolts on the wall that are nearly hidden until you’re directly in front of them. Make three single rope rappels (one 60m required) off of bolts until you reach a loose, sandy gully. The second rappel barely makes it with one 60m rope, so use caution. After completing the third rappel into a sandy gully (snow in early season), descend the gully 150 feet until it cliffs out. Make a spectacular rappel off two bolts over the house-sized chockstone that you likely didn’t even realize you were standing on. Scramble down another short, loose sandy section and either make one last short rappel to the ground or down climb a 30-foot section of 5.0.
Two hundred feet around the corner to your right is the base of the route.
From the base, walk over to the base of the Southwest Rib of South Early Winters Spire.
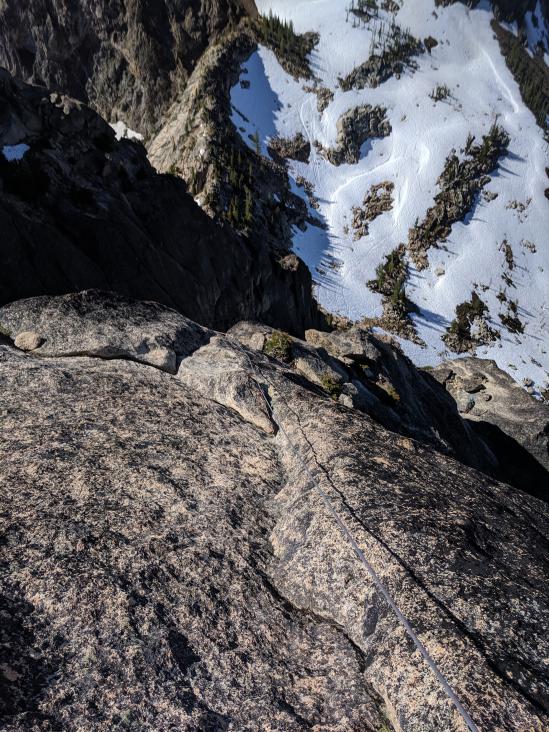
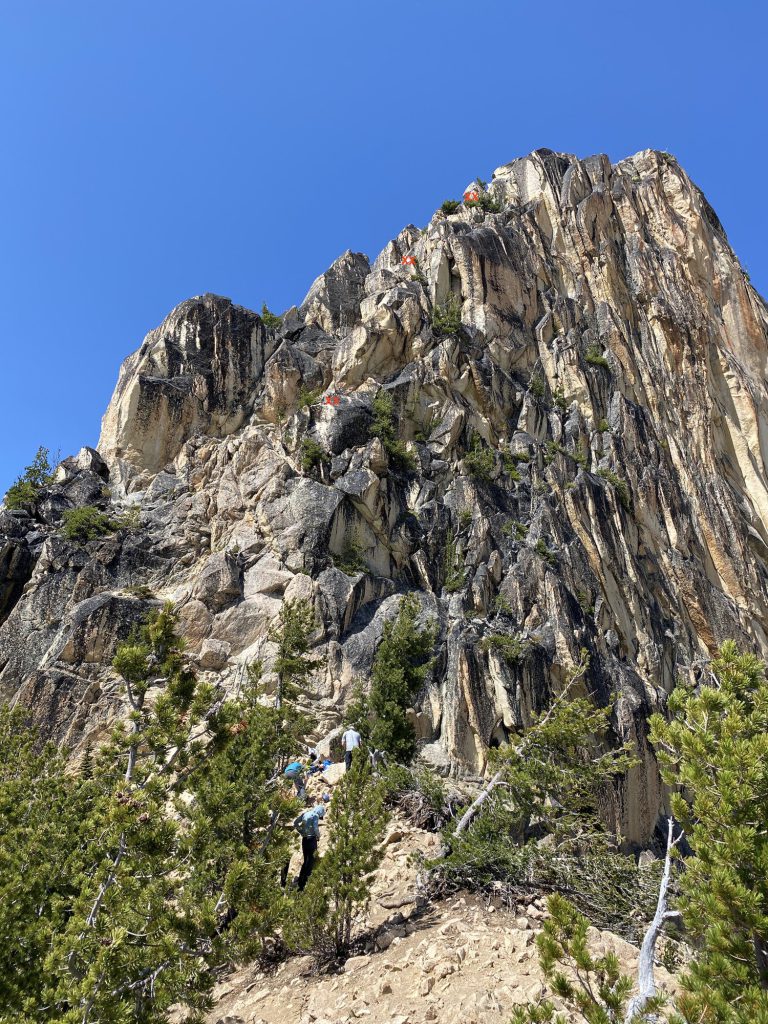
Southwest Rib of SEWS
5.8, 8 pitches. Gear: Previous times I brought doubles #0.3-3 and one #4 and full nuts, but next time could just do doubles of #1-3 + nuts (no large nuts needed). Could use the #5 on the bear hug though if I already have it for NEWS. Like a 4 hr climb?
Leave at P1: 0.2, and possibly the #4 and #5, and maybe water.
Pitch 1 – 5.8+, 200 ft?
The official pitch one starts at the base of the dead tree. We’ve unknowingly bypassed it each time.
Pitch 2 – 5.8, ~120 ft?
Gear: I believe I only used #2-#4.
Belaying from the tree ledges, start up some easy 5th class climbing.

Then, the “wavy crack” starts. It’s a wide, left-leaning crack. It’s awkward. Toughest part of the whole climb. End on the dirt at the top left, belay off a tree.
Pitch 3 – 5.6, ~60 ft
Continue up and left from the tree up the crack.
When you reach the trees, traverse right and slightly up around a buldge to the base of the nervous nelly pitch.
Pitch 4 – 5.6+, ~100 ft, “Nervous Nelly”
Continue up mostly unprotectable slab following the easiest path.
About 30 feet up, you’ll run into the crux. Foot and hand holds disappear. There’s a crack over to the right but no obvious way to reach it.
After lots of hunting, you’ll find a tiny foot hold nub far to the right, which you can extend your leg out and just barely reach, and some hand holds on the left that you can lean out to the right on. Your last piece is 10-15 feet below you, did we mention unprotectable? Make a reach of faith to the crack to the right. You’ve made it!
Pitch 5 – 5.7+, ~80 ft, “Bear Hug”
The famous bear hug pitch! Climb the obvious dual widths. You can just barely place a #4 at the beginning. The toughest moves are at the beginning. A #5 would protect nicely, but it’s ultimately not needed. Once off the beginning moves, it starts to feel more secure (which is good, since without a #5 you can’t get any gear in until you get to the top).
From the top, traverse right for 15 feet to a nice blocky flat area and belay.
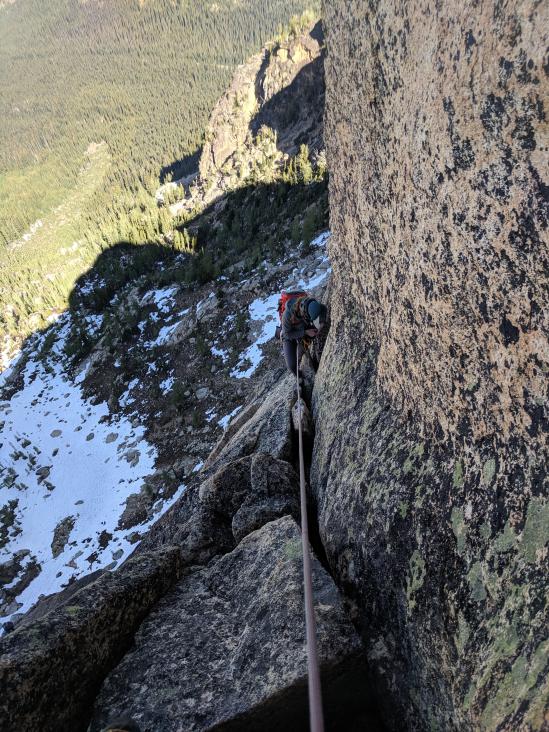
Scrambling
Scramble or simul-climb the class 4 terrain, following the easiest path.
Pitch 6 – 5.5, 200 ft
Make sure you start your belay as close as possible, as this is a rope stretcher! Climb the slab, clipping the bolt.
Continue up easy slab for the full 200 feet, staying on top of the ridge in general. There’s one section where I traversed right and around rather than climbing up an unprotectable slab ridge.
Pitch 7 – 5.5, ~80 ft
The “bunny ears”. There’s a number of options…
- Left option: Traverse left on some easy ledge systems, nicely protected by some cracks at feet level. We’ve always taken this option.
- Straight over option: Go straight over/through the bunny ears. Apparently you then have to rappel after this.
- Right option: We’ve seen several people go right. It looks sketchy/difficult traversing.
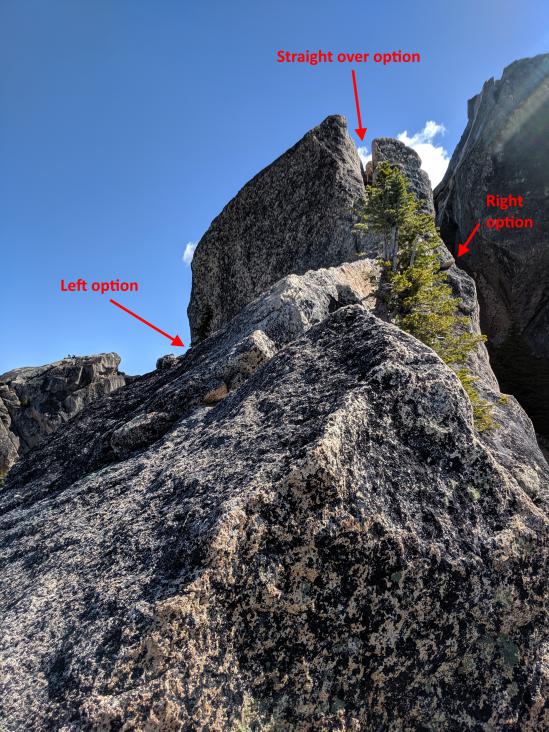
We’ve always gone the left option.
After going around the left, immediately go right and up over a little ridge nook (about 9 feet) and belay.
Into the gully
Down climb into the gully. It’s kind of nice to be roped up for this, with all the loose dirt.
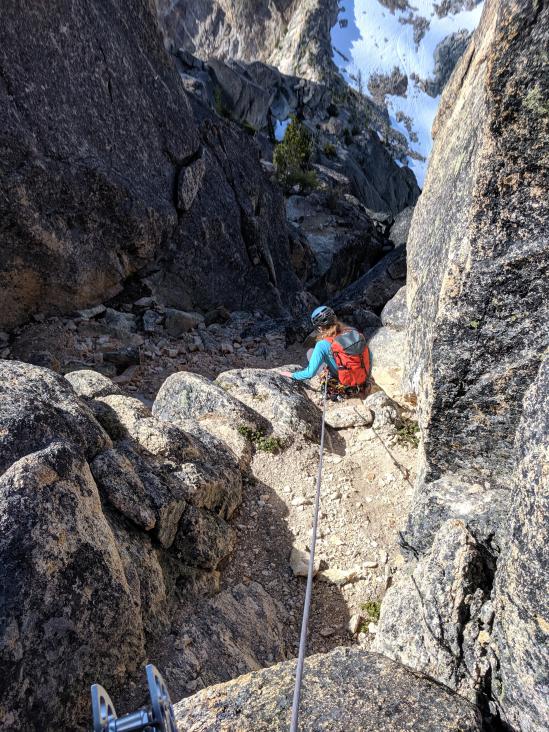
Once in the gully, walk up to the top of the col to the base of the last pitch.
Pitch 8 – 5.5, ~80 ft
Climb the easy crack system up to the summit. There’s one tricky move on this, the rest is nice and easy!
Descent from SEWS
There are 3 new rappels, all are climbers right of the gully and the normal climbing route. The anchors are bolts and chains and all offer steep and fairly clean raps and good pulls with a 60m rope.
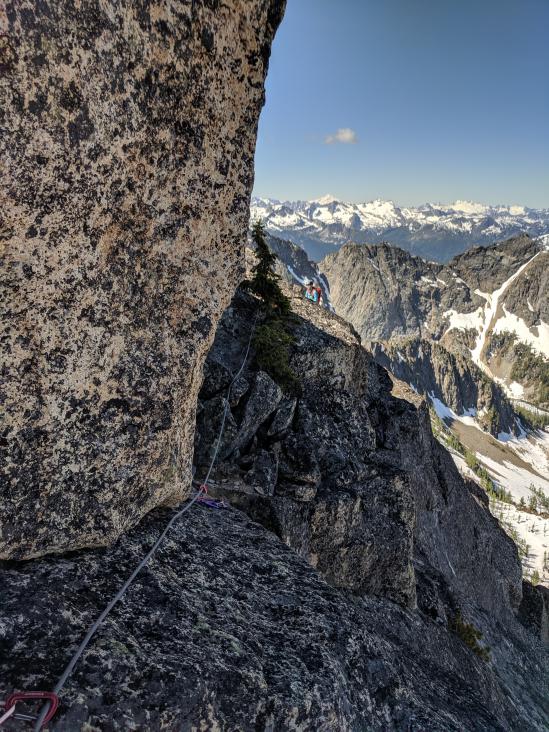
First scramble back across the whalesback.


R1: The top anchor is on a big ledge right above a small tree that some people have previously rappelled off of. This tree was awkward to rappel off of and you had to climb down and under it to get to the slings. (Some of you will know exactly what I am talking about, while this will seem nonsensical to others) The new bolts are on the large ledge above and just climbers right of this tree.
Reports
Northwest Face of Liberty Bell and Liberty Traverse attempt
On Sunday, we were planning on attempting the Liberty Traverse, and successfully climbed the Northwest Face of Liberty Bell, but then Concord was dripping wet, and with the 55% chance of rain at 2pm, we decided to bail after getting to the base of Concord (and that was the right call, it started raining at…