Overview
Well bolted route ascending some pretty good rock, although rock quality decreases after P5. Route does wander a bit, especially on P4.
| 5.6 | 5.7 | 5.8 | 5.9 |
| 🪢 | 🪢 | 🪢🪢 | 🪢🪢🪢🪢 |
Gear
- Single 60m rope
- 14 draws (6 sport, 7 single alpine, 1 double alpine)
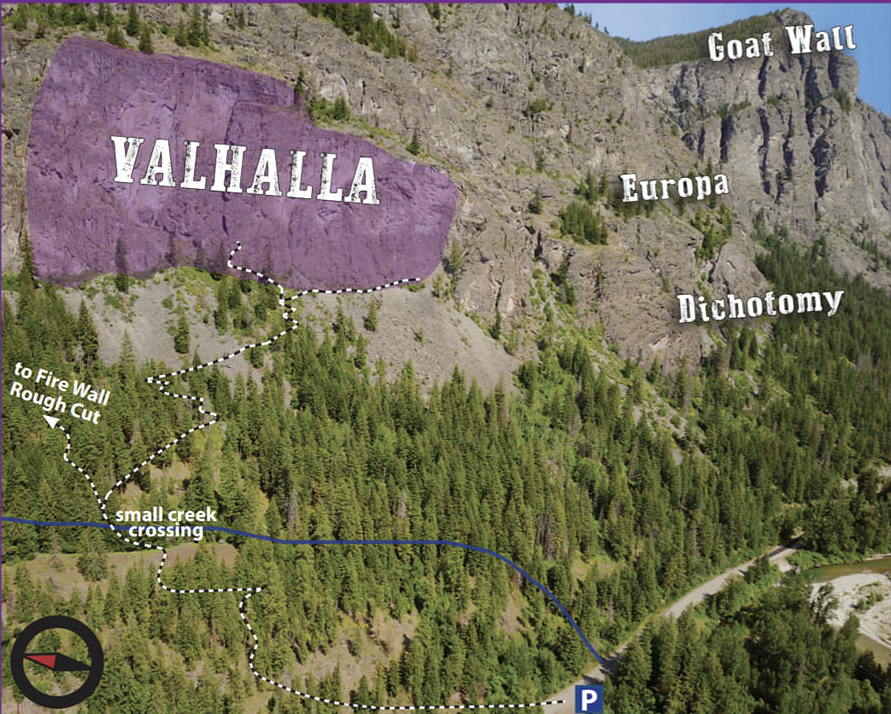
Approach
0.5 miles, 760 ft gain, ~30 mins? Park at the large shoulder just before an unmarked creek crossing in the road.
Locate the climbers access path on the north side of the road ascending up a steep hillside. After about 5 mins on the path, it drops down to a small creek crossing and then a fork. At the fork, take the path on the right and start heading east toward the large wall above. Continue east 5 more minutes to a large talus field. Head up the talus field but stay left of the talus under some trees before cutting right onto the talus field. Continue up the rock path over a set of large boulders and then head directly across. After the rocks, keep on the path past a short section of loose scree and soil which gradually becomes larger rocks and more talus. Follow cairns up the talus before reacing a split bolder in the path.
From the split boulder, head up and left towards a large fir tree. From the fir tree, P1 is visible. Belay at a small clearing in the bushes.
Route
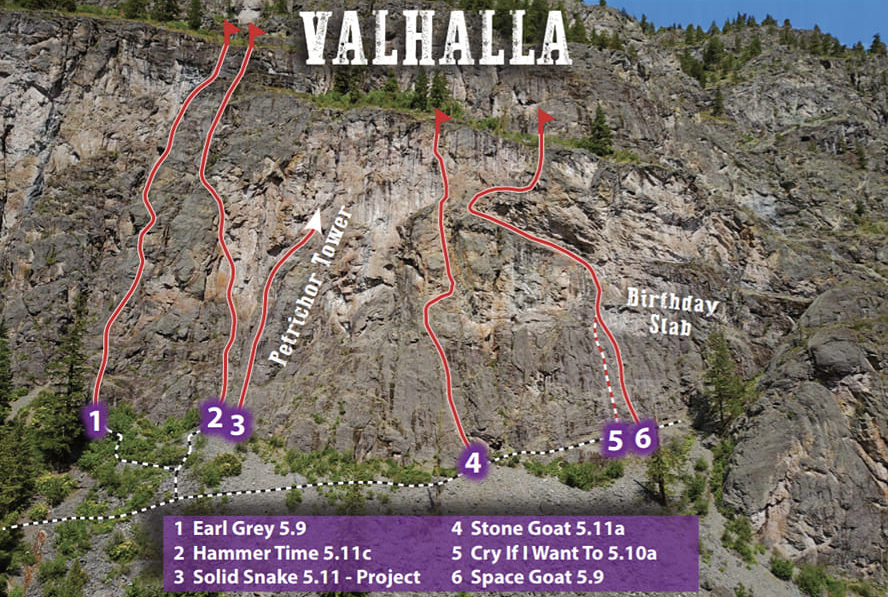
P1 – 5.6, 90′, 6 bolts
Start by climbing over a few blocky ledges. Then scramble to a set of chains at the next good ledge.
P2 – 5.9, 100′, 10 bolts ⭐⭐⭐
Mantle past the first bolt, then pull a couple stout moves off the next ledge. Continue up and right on a slabby ramp, then head straight up to the belay.
P3 – 5.9, 80′, 9 bolts
Proceed up and slightly left, traversing under small roofs before heading back up and right to the next belay on a smaller ledge.
P4 – 5.8, 110′, 13 bolts ⭐⭐⭐
A long pitch that starts out left on a short slab and then goes back right up a blocky ramp. Make a bouldery move back left and continue across low angle rock before ending in a short dihedral. Make sure to extend your clips but also consider the swing potential for your follower in the traversing section.
Some say P4 is harder than P3. P4 is also exposed.
P5 – 5.9, 60′, 8 bolts ⭐⭐⭐
Short but sweet, many say this is the money pitch. Traverse left across a slab to some exposed face climbing on “rimestone” rock. Belay under a big roof at a 3-bolt hanging belay.
Can link with P6 (140′, 18 bolts combined), however rope drag will be difficult to avoid.
Looking back at initial traverse from belay 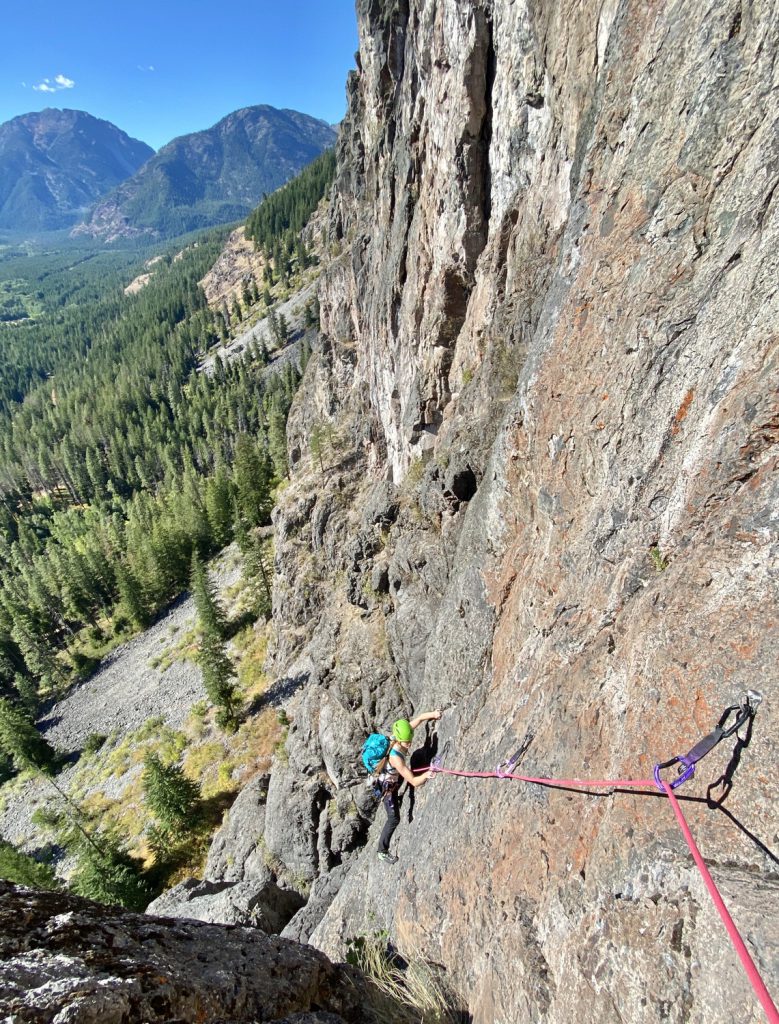
End of P5
P6 – 5.8, 80′, 9 bolts ⭐
Quality of rock decreases on these remaining pitches. Escape the roof on the right and continue over moderate terrain to the next belay at a more comfortable ledge.
P7 – 5.7, 100′, 9 bolts ⭐
Begin over a couple small ledges. Then, after clipping a few bolts, follow the leftward trending bolt line to the next belay on the big ledge. Remember to extend draws to avoid drag.
P8 – 5.9, 100′, 8 bolts ⭐⭐⭐
From the belay, climb left and mount the ledge to the prickly rock (a limestome drip). Jam past a sharp bulge and continue on cruiser slabs to the summit. There’s a summit register just down below on the big ledge.
Some really like this pitch.
Top
The top apparently does top out on a ledge with a summit register, but one person describes it as not very spacious for lunch.
Descent
Rappel the route with a single 60m rope. 7 rappels total.
- R1: Rappel P8 (30m)
- R2: Rappel P7 (30m)
- R3: Rappel P6-5 (30m) (skip the P5 roof belay, go straight to top of P4)
- R4: Rappel ~30m straight down to an independent rappel anchor bypassing P4
- R5: Rappel ~30m straight down to an independent rappel anchor bypassing P3
- R6: Rappel ~30m straight down to the top of P1
- R7: Rappel P1 (27m)