Exfoliation Dome is a seldom climbed peak with a tricky to find trailhead. Note: There are often loose flakes on the route, sometimes it can be dangerous.
Key resources
- Google Maps directions to the road fork (see Getting There for remaining instructions)
- Hiking: 1.2 miles, 1,277 ft gain (round trip)
Itinerary
- Total car-to-car est: ~16 hours
- Driving dirt road: 26 minutes
- Hiking up: 0.6 miles, 1,277 ft gain (~1:30 hours)
- Climbing up: 6 pitches (~7 hours)
- Rappelling down: 10 rappels (~1.5 hours)
- Hiking back down: 0.6 miles, 1,277 ft loss (~1:00 hours)
Unique gear
- Trad rack 0.2-4.0, with doubles of 0.3-3.0, nuts. The micro #0.2 and #4 were both useful!
- 60m rope
- Double ropes for rappelling (bolt anchors on descend route are more than 100 ft apart)
Getting there
High clearance vehicle required (and probably 4×4 too). 26 minutes of dirt road driving.
Follow the Google Maps directions to the road fork (48.1619, -121.6000). This will take you on Frog Creek Road (FR 2060). You’ll need a mid-clearance vehicle to get through this section of road, as there’s two washouts (you’ll later need a high clearance vehicle, but that’s only for the final half mile which you could walk).
At the turn off, take the left road (this is actually still FR 2060 even though it seems smaller and isn’t on Google Maps). Continue on that for about 6 more minutes. You’ll encounter one difficult to cross wash that’ll require high clearance to get through (you could park just before it and walk the remaining 0.5 miles). Then you’ll cross a second wash and you’ll immediately find parking on the right for 4 vehicles, with a nice fire pit and a good view of the valley on the right. Park here (48.1434, -121.6065).
Trail
Trailhead (48.1433, -121.6064): Just about 10 yards past the parking area, you’ll find the trail cutting up into the forest on the left side of the road. In about 10 more yards up the forest, you’ll run into a pit toilet with some wood acting as a fence. That’s the start of the trail!
For the first half of the trail (0.3 miles, 500 ft gain), stay in the forest, remaining climbers left when in doubt. There’s a path through the forest that’s usually visible. This part is decently steep, but pleasant. No bushwacking or anything! This part took us 30 minutes to get down.
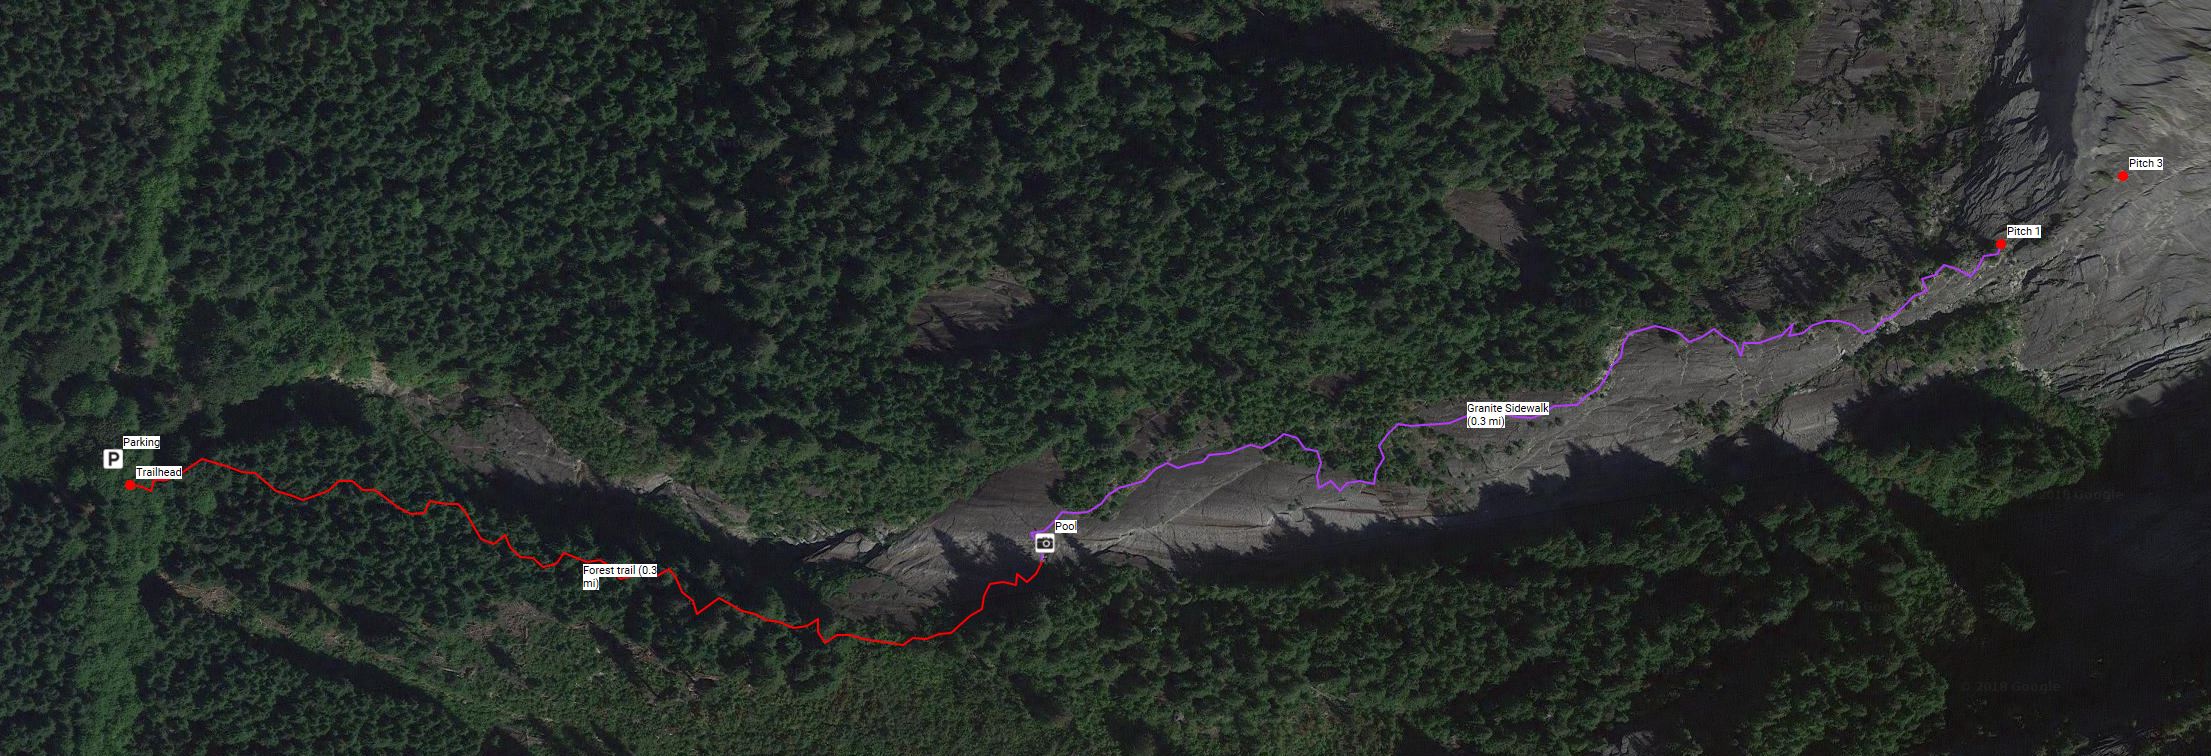
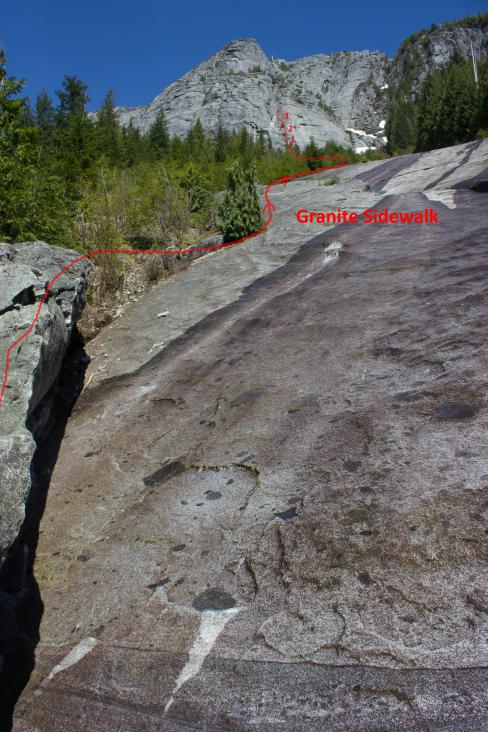
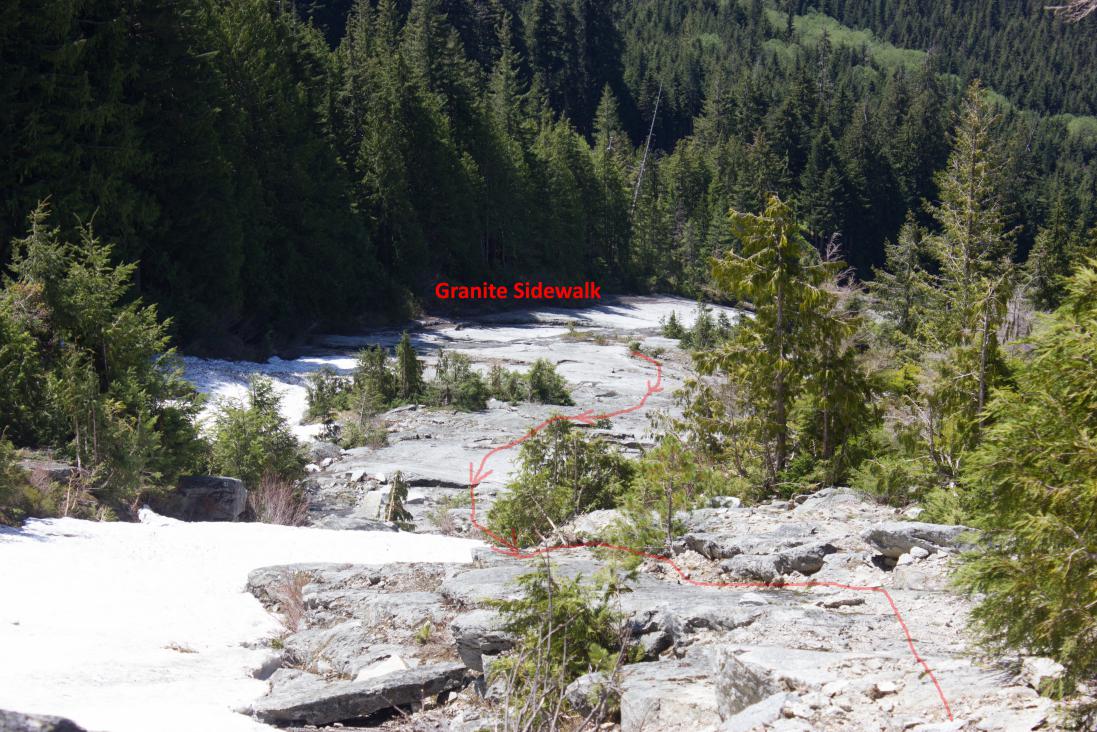
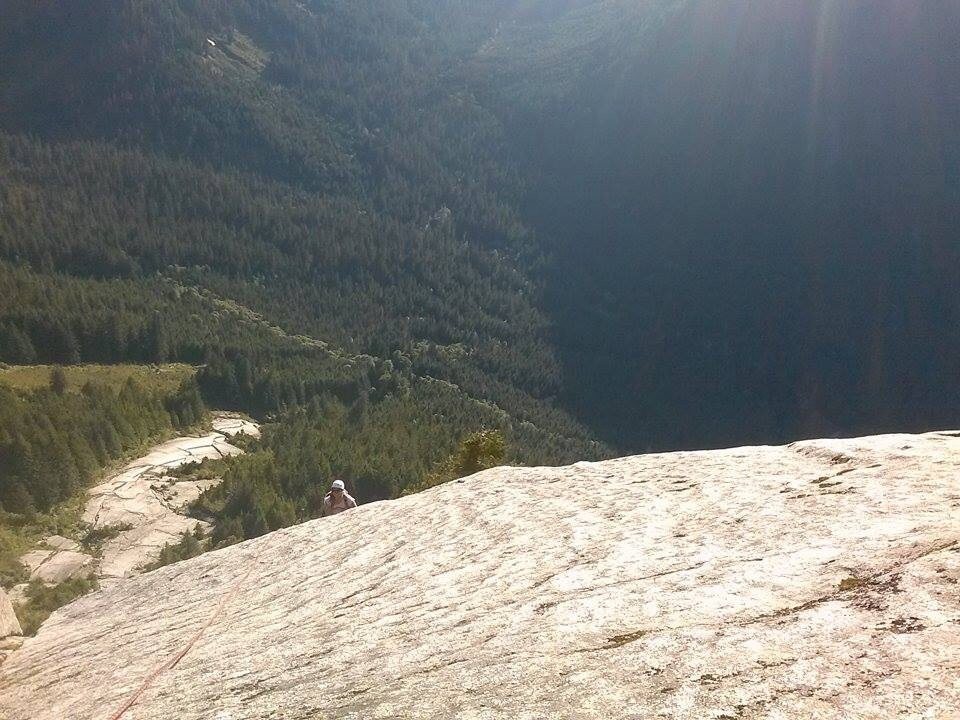
Eventually, the trail should lead you out onto the “Granite Sidewalk”. You’ll have to go through some brush to get to it. Cross the pool over to the climbers left of the Granite Sidewalk (48.1431, -121.6015).
The second half of the trail (0.3 miles, 777 ft gain) goes straight up the steep and smooth granite sidewalk (stay on the climbers left side typically). It’s very steep with scary consequences, but the granite is actually quite grippy. You could always put on your climbing shoes for additional traction. Do not try to find paths through the side brush… just trust yourself and walk on the granite, it’s much better than anything you’ll find in the side forest. Towards the climbers left at the top you’ll come to the base of the climb. Coming back down this took 1:12 hours.
Topos
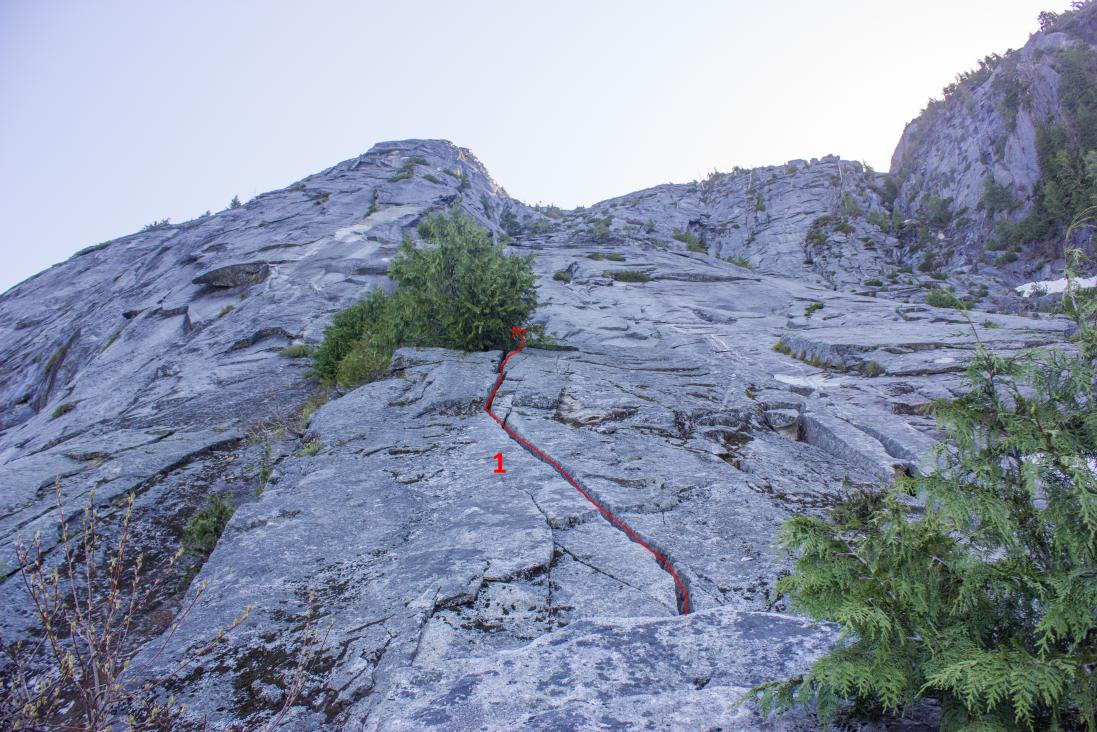
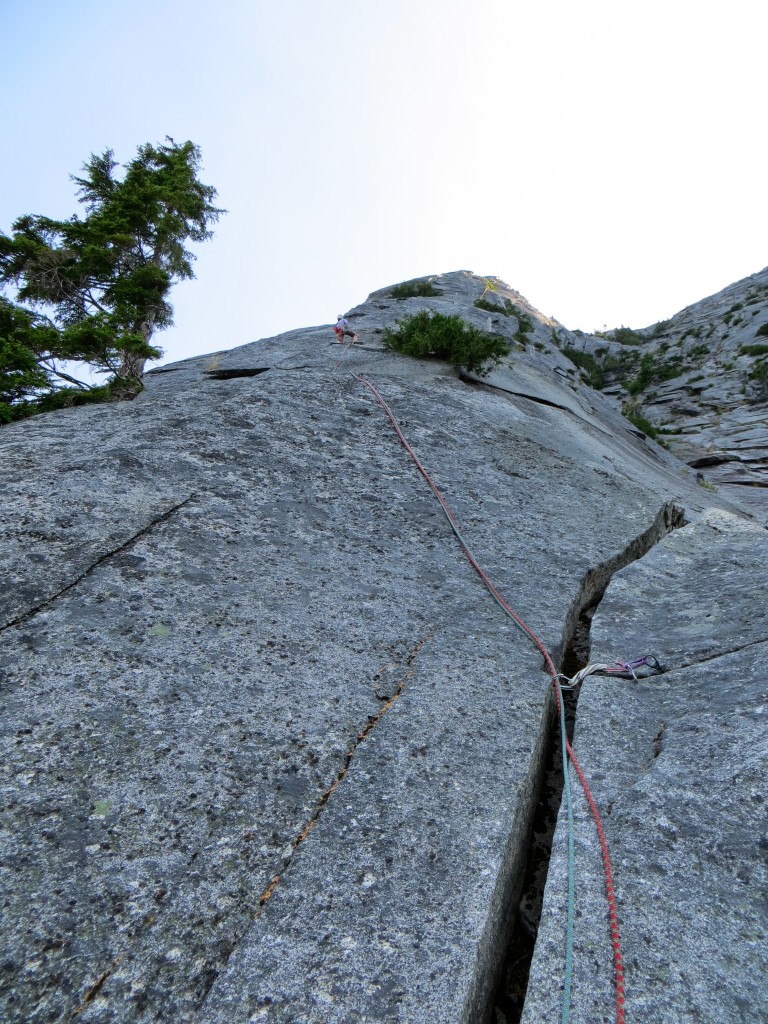
Pitch 1 – 5.5, 130′
Starts up a wide off-width unprotectable crack, but easy 5th class climbing.
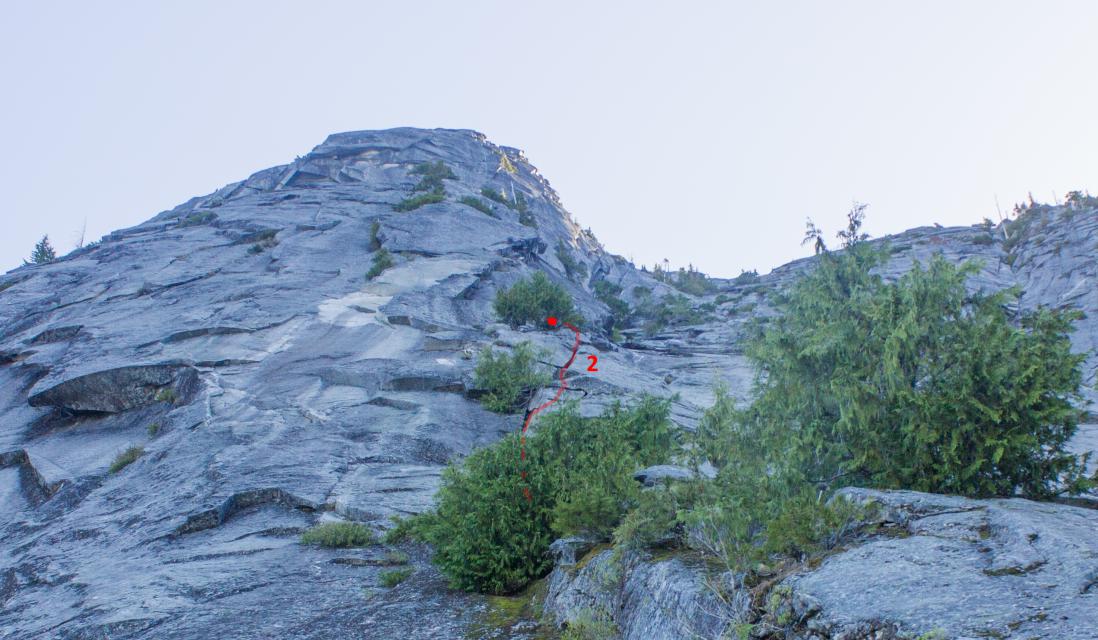
Pitch 2 – 5.7, 180′
A bit more enjoyable climbing. “Move up into the 2″-4″ crack on the left side of a left-facing corner. Undercling left and climb up to a cedar belay” (Cascade Rock).
Lieback up the corner and turn to the roof and undercling it to the left (very fun climbing, about 5.5). Stay on the top level and jamb and lieback up the low angle dihedral (starts as 5.7, then gets eaiser) using the crack at your feet for pro. Continue all the way up to the ledge with the tree to belay. 180 feet (SummitPost)
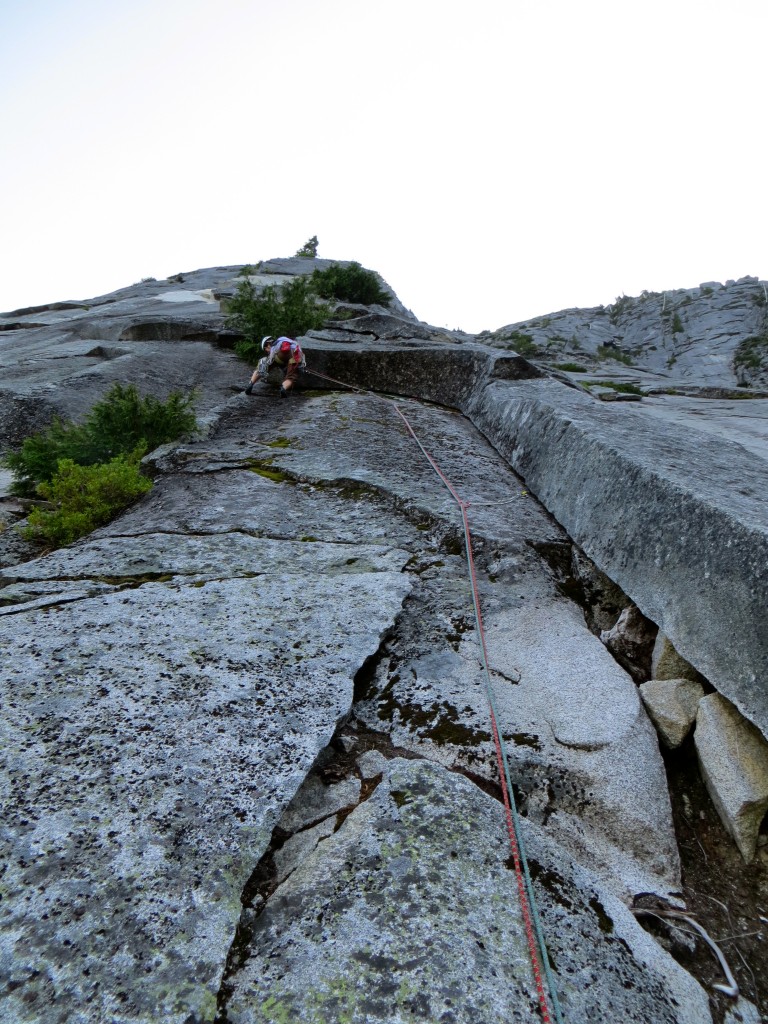
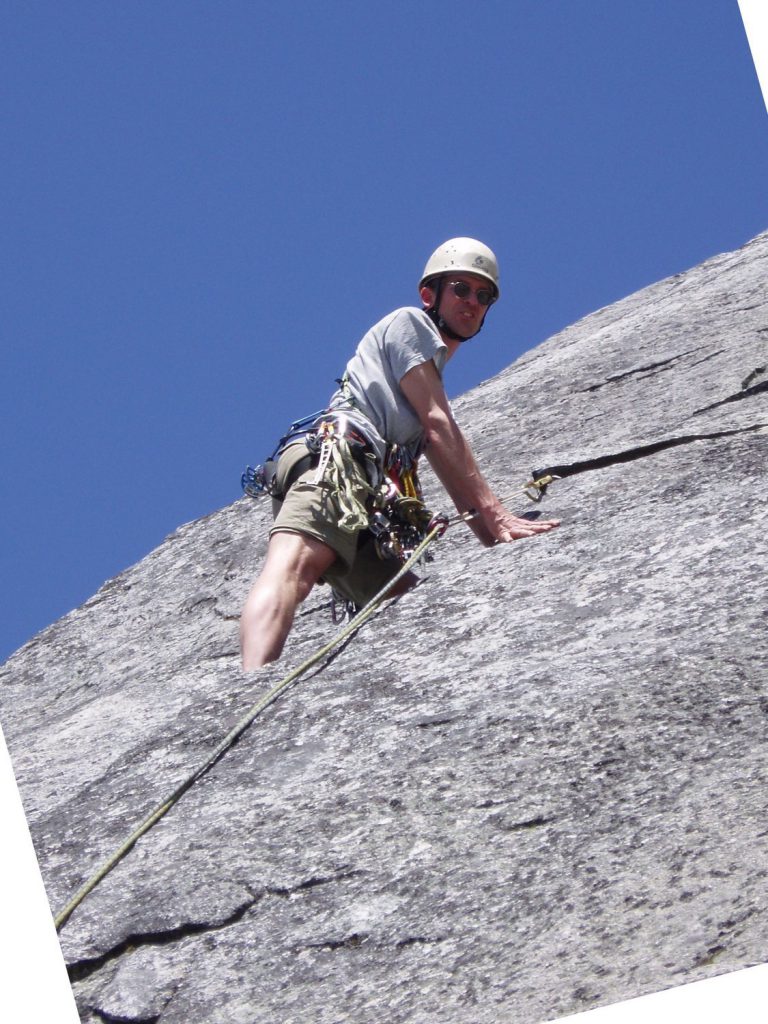
Leading P2 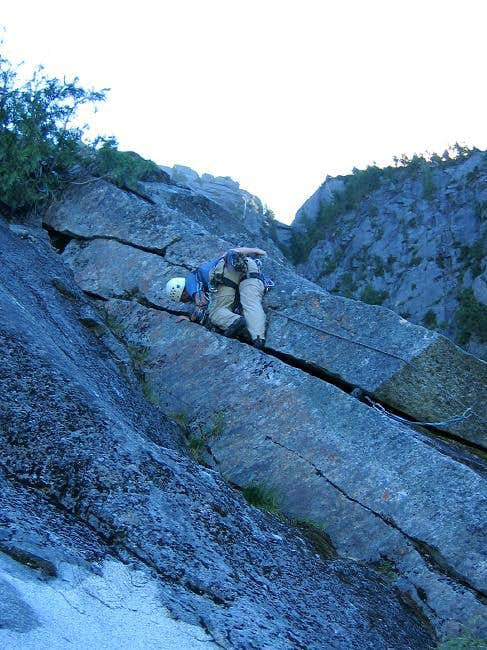
Leading P2 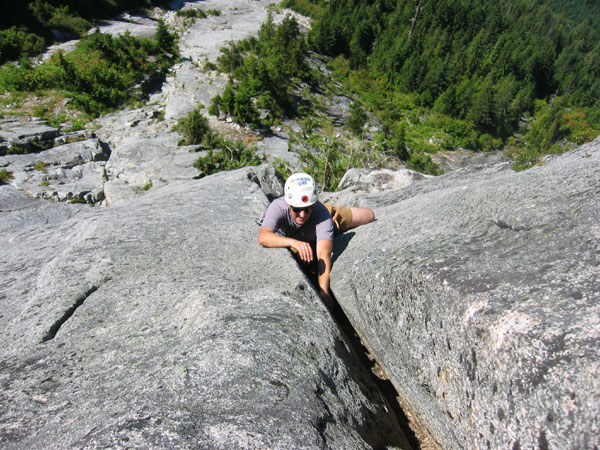
End of P2 offwidth
Pitch 3 – 5.8+, 150′
Unprotectable moves to get to the left corner. Can get in a couple poor nuts, not confidence inspiring. Feels like close to a 5.10 move to get to the left corner.

We stopped after this. There’s a flake that’s fallen but is held together with a sling, and apparently more loose flakes above. Plus we were running out of time since we initially took the wrong approach on the trail and wasted tons of time.
The route apparently continues up the corner with an airy 5.8+ step leftwards back onto the buttress, they recommend doing it all in one pitch as belay options are tight. “Belay past an overhang, amid flakes back left on the crest” (Cascade Rock). The move through the roof is pumpy and airy.
SummitPost – Keep moving up until things get difficult and mossy. Now use holds and get up on top of the arete at the ledge. Belay here using the 3″ crack for an anchor. 150 feet
Right-facing corner of P3 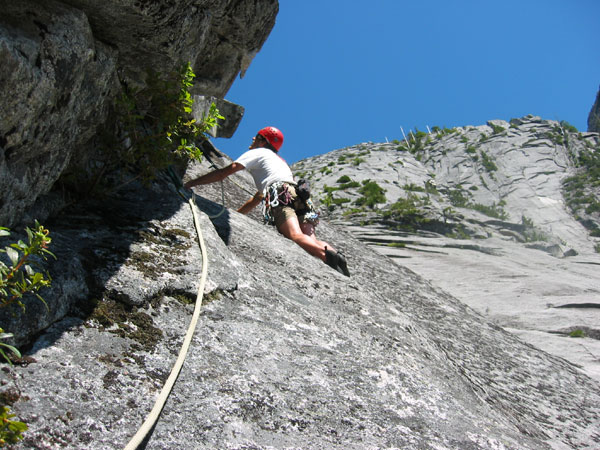
Second crux of P3 
Following P3 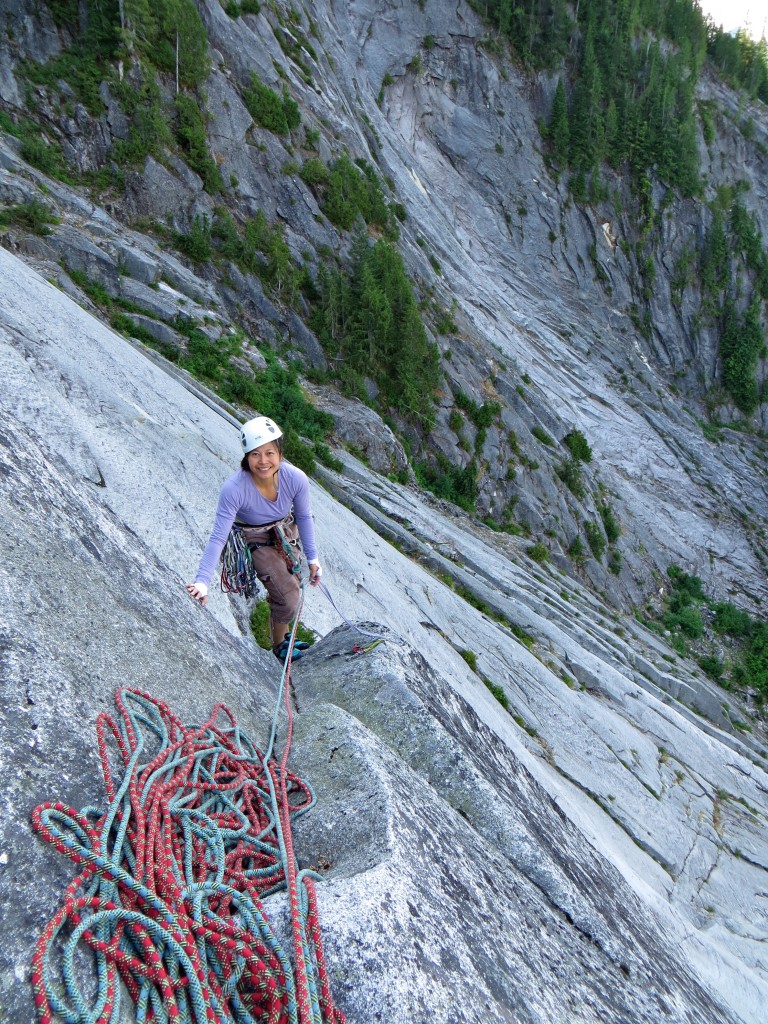
P3 belay ledge
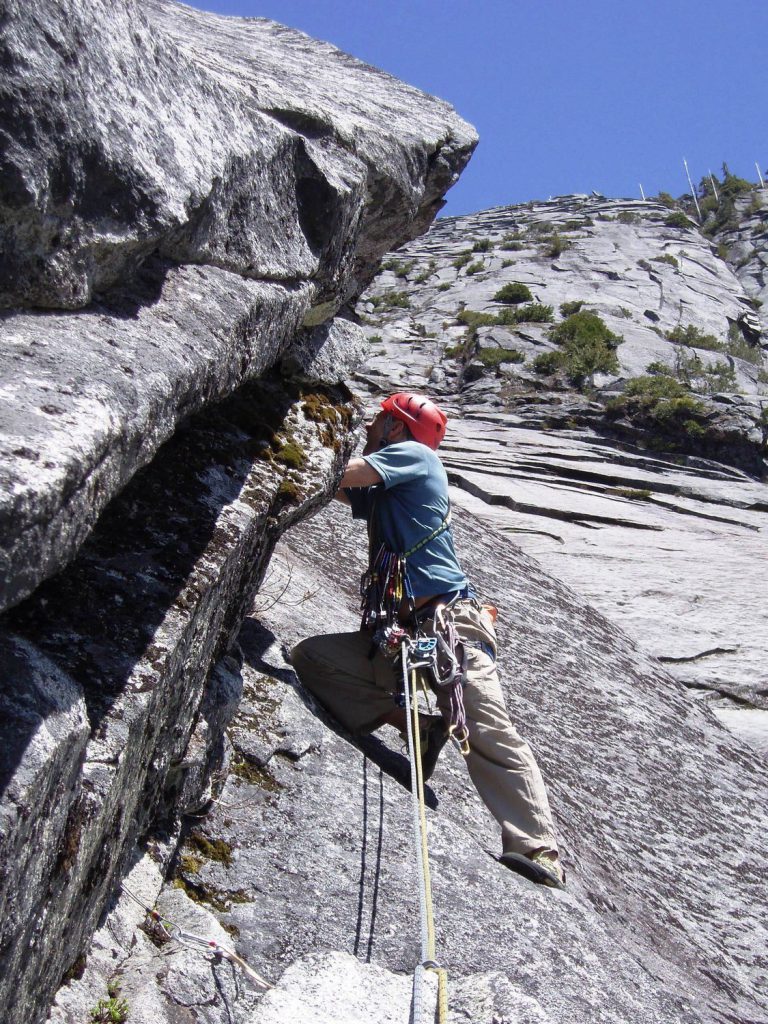
P4 – 5.8, 180′
Pass a steep spot above the belay and follow offwidths and wide, exfoliating cracks and flakes leftward and up to a treed ledge.
It begins with some crack and face climbing, then a traverse right into a big flake with good hand jams. This took me to a ledge where a wide and zig-zagging crack shoots up a huge slab. Hands, fingers, fists… It was all there with good gear up to a comfy belay ledge (http://www.alpinedave.com/darrington/exfoliation/west_butt.htm)
SummitPost – This excellent pitch is long and varied. Climb the 3″ crack then turn the corner to the left. Chimney up behind the flake then climb directly up the middle of the face via a series of angling crack and flake systems. This pitch is very continuous. For a belay you have a few options:
1. Bring 70 meter ropes and reach the nice ledge with the tree.
2. Do a hanging belay off crack systems at 60 meters.
3. Simulclimb for 30 feet until the leader reaches the nice ledge (what we did).
(230 feet)
Start of P4 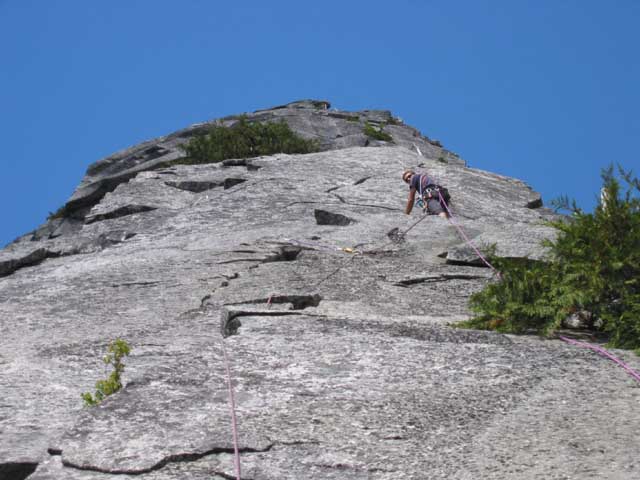
Also start of P4 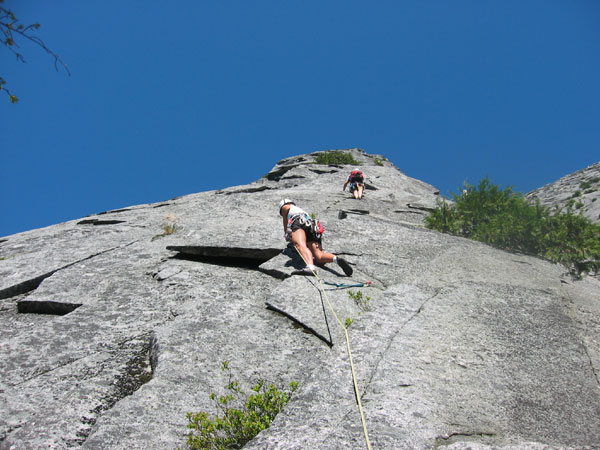
Starting up P4 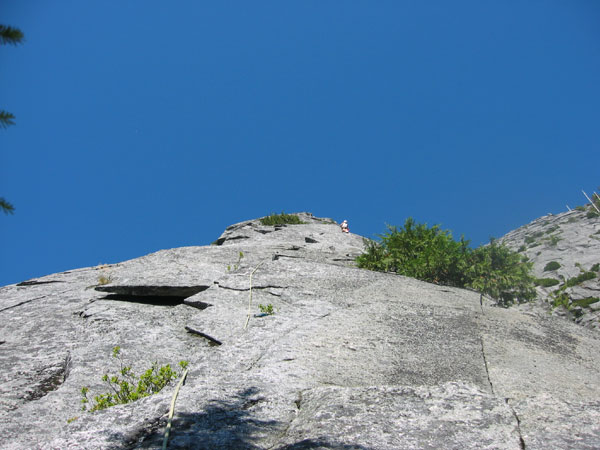
P4 is long! 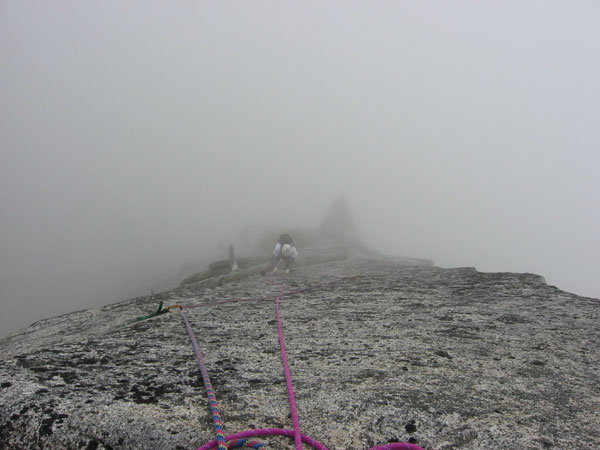
Looking down P4 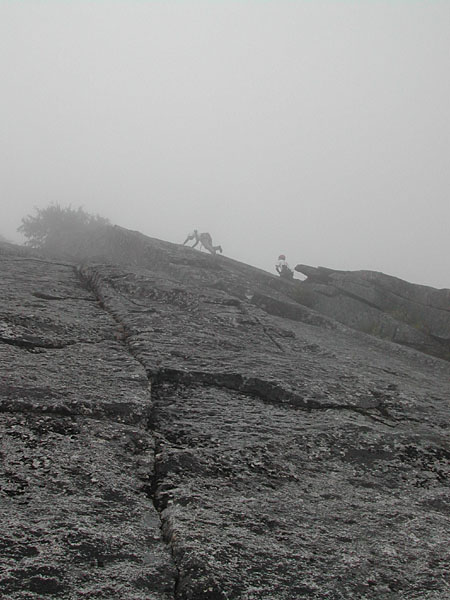
Climbers at P4 belay and starting P5
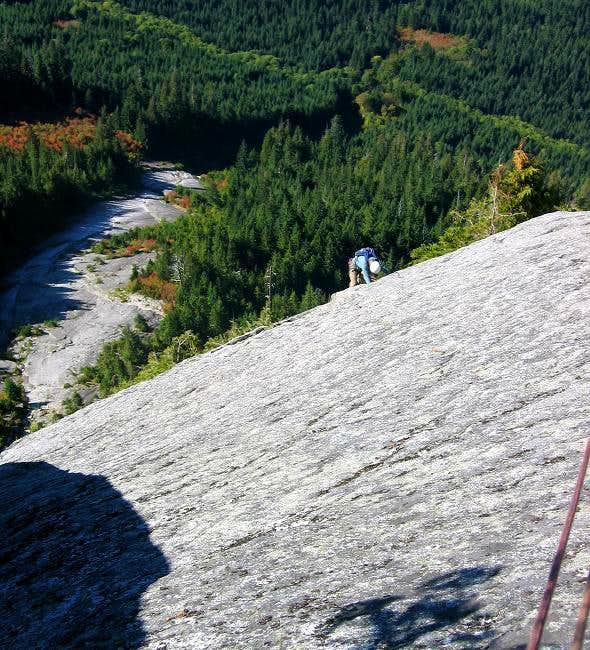
P5 – 5.5, 180′
Follow a long moderate slab and flakes pitch up left, then right, stepping up to a treed ledge.
SummitPost – Climbs slabs and corners up the buttress crest. Belay where feasible. 190 feet
Following the 5th pitch
P6 – 5.6, 200′
Work right into a shallow corner with a crack, before lower-angle terrain allows for runout climbing to the major ledge running all across the wall.
SummitPost – Finish climbing slabs and corners up the crest and belay at the big ledge in the trees. 100 feet
Clean and airy climbing on P6
Traverse on terrace
Traverse to climbers left over class 2 terrain with one short class 4 section until you can see around the corner. Keep traversing until the rock gets steeper. Look up about 20 feet above you and find a nice positive sloping ledge. Climb class 3+ rock up to the ledge. There is a good crack on the left and flake on the right for an anchor.
P7 – 5.7/5.8, 185′
Move left along Blueberry Terrace for 50-70m to where the route Jacob’s Ladder comes up. This is near where the terrace starts to rise up again, after sloping down and left. Climb up past a crack and a bolt at 10m, to a bolted anchor 30m above the terrace. Trend up and left into a shallow bowl which tops out to the north/left of the summit.
SummitPost – Climb up some cracks with occasional brush in them to gain the slab above. Use every opportunity for pro as protection is limited on this pitch, no bolts. Climb slab and cracks directly up the crest of the buttress. Belay points are limited. We found a good gear belay at about 185 feet out.
P7 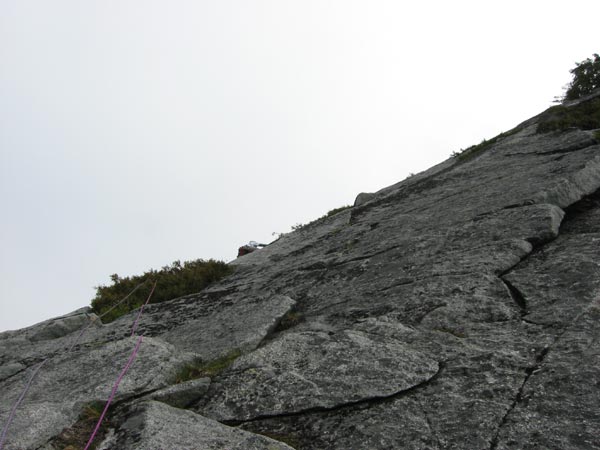
P7? 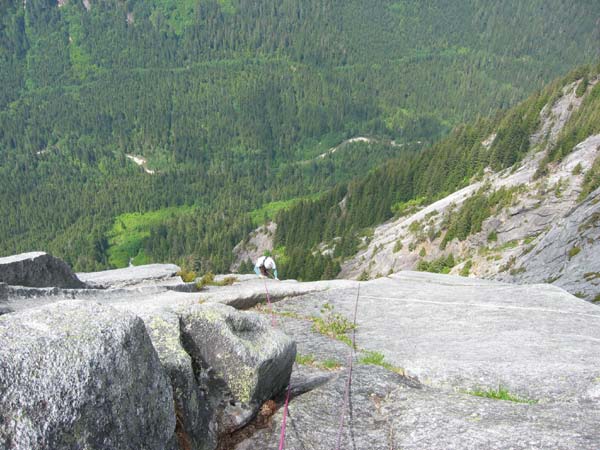
P8?
P8 – 5.6
Continue moving up the buttress crest until you can traverse off to the left towards the ridgeline. Belay where feasible.
P9 – Class 4 bushwack
Roped or unroped make your way up the north buttress crest finding a path through the bush. Gain the summit.
Rappels
10 rappels (single and double) off the south side of the summit then down in line with the Westward Ho route will get you to the ground (SummitPost).
The west side descents involve more rappelling and scrambling down steep slabs than the east side, but also less brush. The “West Slabs” descent is probably the most popular way off the dome, but it starts out with some messy rappels that many parties complain about. the old sling anchors on dying trees were replaced with chain rappel stations in the Fall of 2004, and the primarly remaining problem is the possibility of pulling or kicking a rock on yourself or your parther. From the summit, make a 1/2 rope rappel down and right to a chain station on a blocky ledge, and five or so short rappels follow, with the stations located ledges outside (right of) a shallow gully system leading to to a chain rappel station just off the right (north) side of a small knob above the cleaner and lower west slabs. With two ropes, some of these stations could easily be skipped but the danger of pulling rocks on your head or getting a rope stuck is probably less with the shorter rappels. From the station near the knob, another short rappel leads to a chain belay station down and right from the knob, then four clean rappels on Westward Ho (the route is described above). Scramble down the Granite Sidewalk, fifteen hundred feet of treachery (http://www.mattsea.com/Darr/dome.htm).
Coming down
1:12 hours from first pitch down to the pool
30 mins from pool to trailhead
Reports
Blueberry Buttress 2020
After bailing on Blueberry Buttress two years ago due to a loose flake, we’ve been wanting to get back up there. We heard the loose flake tumbled, and decided to go for Blueberry with a group of FIVE! Alexis, Gary, Liv, Cole, and myself. The road was in normal condition (no fallen tree anymore). Definitely…
No Sweat Arete 5/23/2020
Goodness was this a rough day! Location of climb on Mountain Project is totally wrong Cold, cloudy, windy, and a potential storm rolling in Ticks, ticks, and more ticks The first thing that went wrong was the approach. On Mountain Project, the crag’s location is set to be around the main crag wall. That also…