Superior, AZ
WARNING: This hike takes longer than expected.
Resources
- Off Road and Hiking Map (CalTopo Online, GPX, KML)
- Driving Directions (Google Maps)
Getting There
You’ll probably need 4WD or AWD to get to the trailhead, but 8″ of ground clearance is probably sufficient. There’s a hill that has lots of loose rocks which I had to throw my 2000 4Runner into 4WD to climb the hill without destroying the trail. This assumes that you take FR 315 from the North, by Oak Creek Campground. The South route of FR 315 is very difficult, and likely requires lockers, rock sliders, etc, and probably takes 3 hours of off roading! The North route only takes about 20 minutes.
The Hike
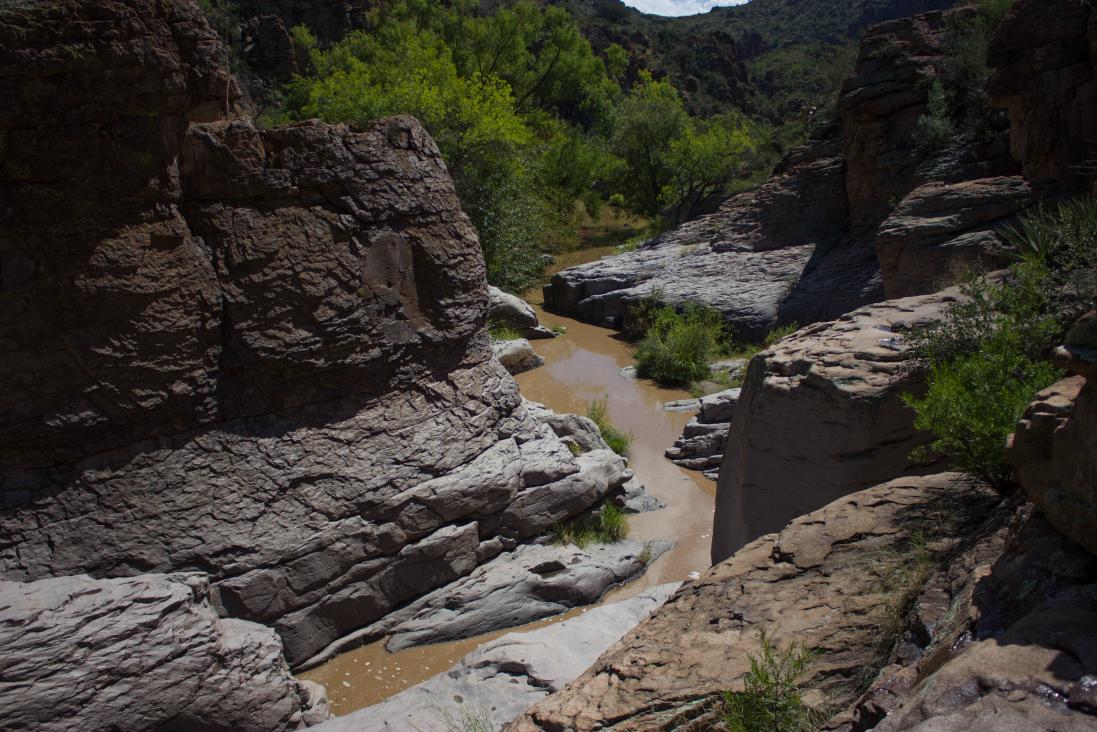
Even though the hike itself is only 2.2 miles, it takes MUCH LONGER than you would expect. You’ll be lucky to average 1 mph while you’re scrambling over rocks and navigating through overgrown spiny bushes. It took us probably 3 hours to reach the first pool.
The Pools
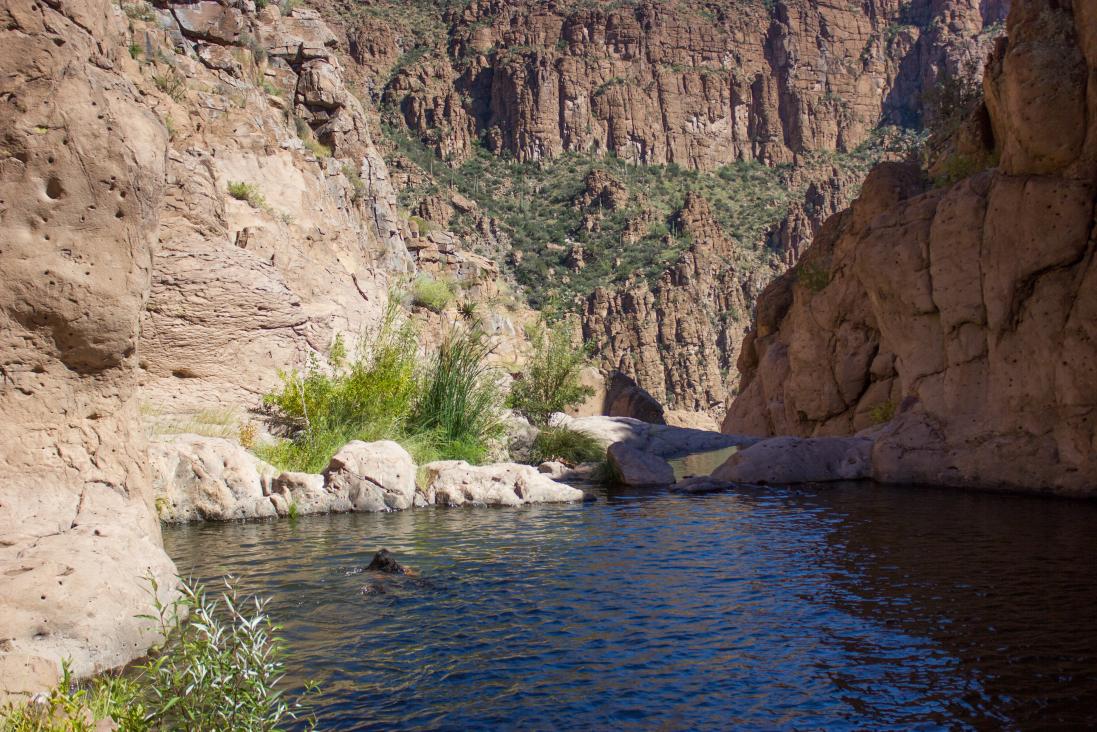
To visit all 5 pools, you might need rappelling gear. However, you can still visit some of them without any technical gear! The pools are breathtaking and worth the difficult journey.
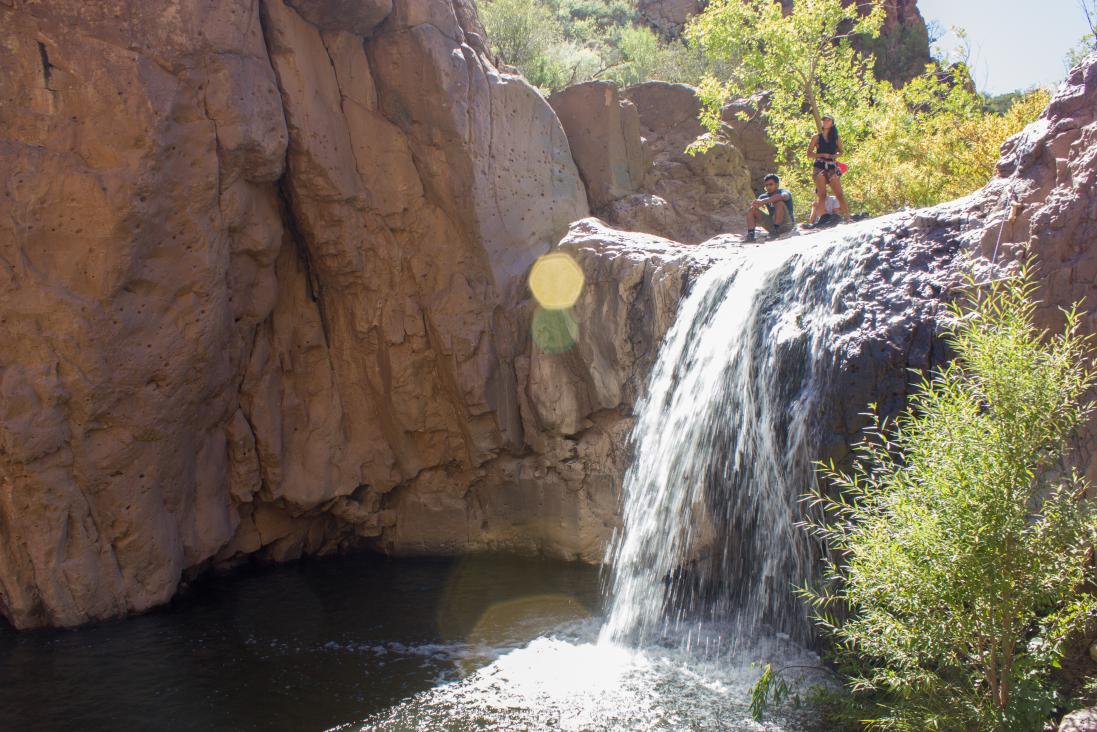
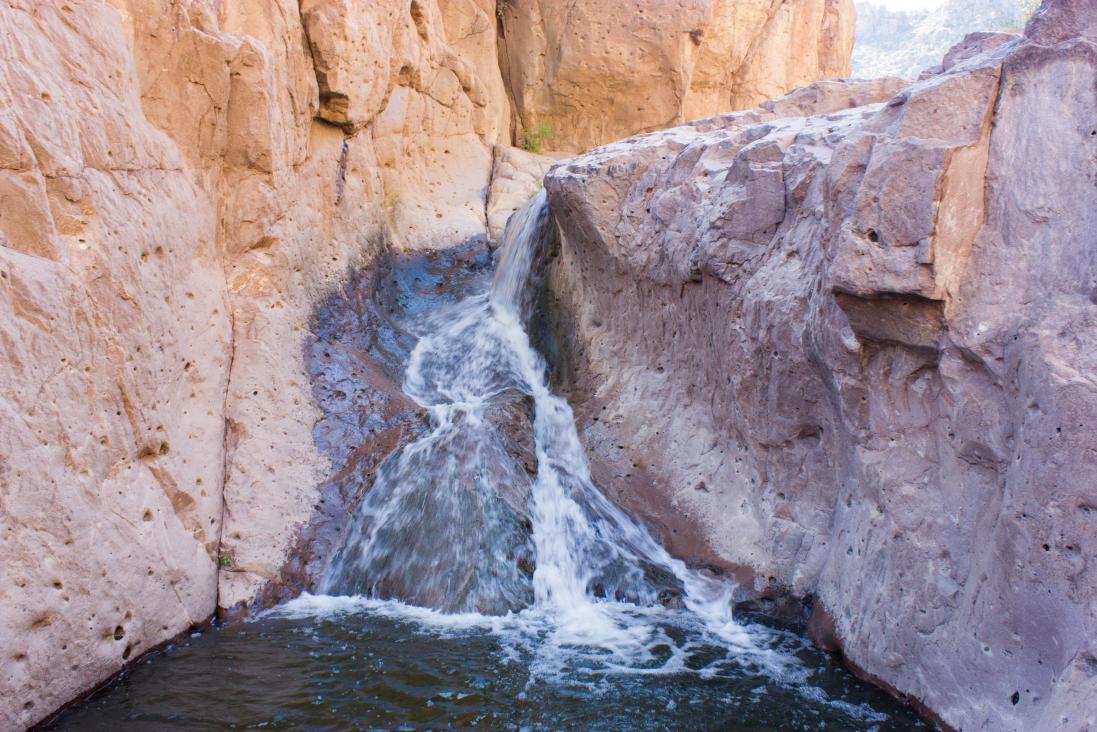
First Pool
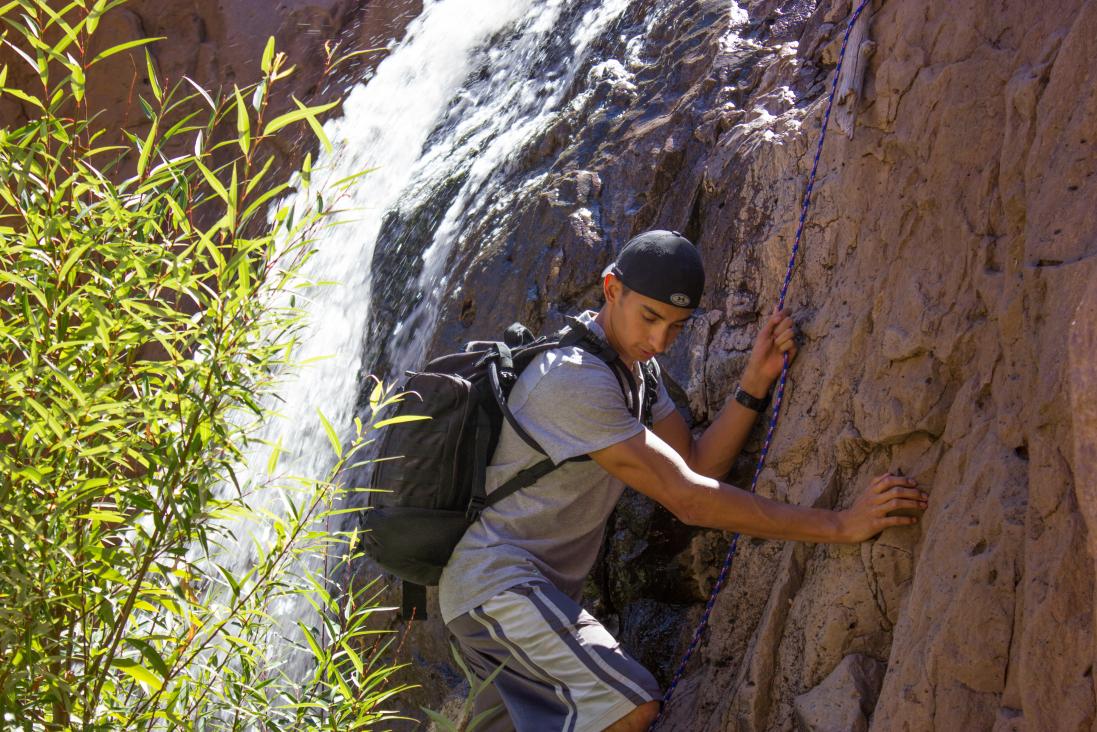
When you reach a 10-15 foot waterfall going into a large pool about 30 feet in diameter, you’ve reached the first pool! There’s a thin rope anchored at the top of the first pool that lets you climb down/up next to the waterfall. You also probably could jump into the pool, but I’d recommend checking depths first!
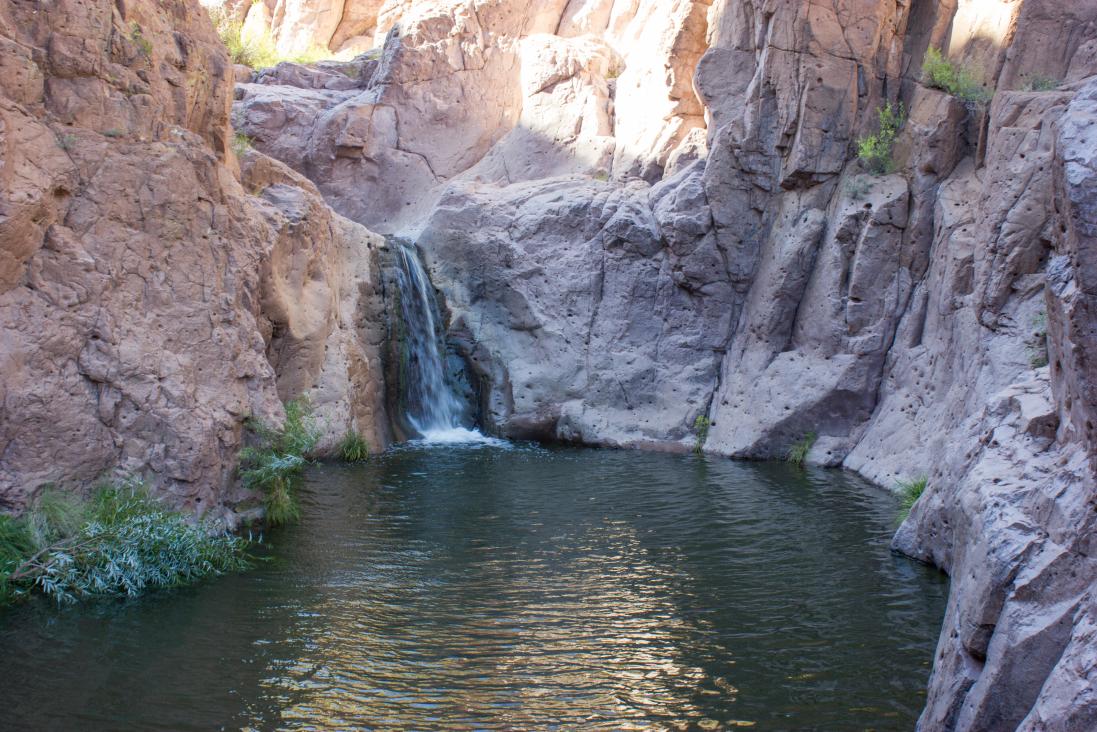
Second Pool
The second pool is quite small compared to the rest, but it has a neat looking “waterfall” that could be used as a slide. You can easily scramble down to the second pool, and scramble back up.
Third Pool
You can still go to the third pool without ropes. To descend, you can jump off near the waterfall (just make sure to jump far forward and away from the walls… when I jumped, I brushed my foot up against the bottom edge of the pool). You alternatively could rappel (there are bolts at the top). To get back up, you can scramble up the cliffs on the right side of the pool (when looking back). That’ll dump you out at the bottom of the first pool.
Fourth Pool
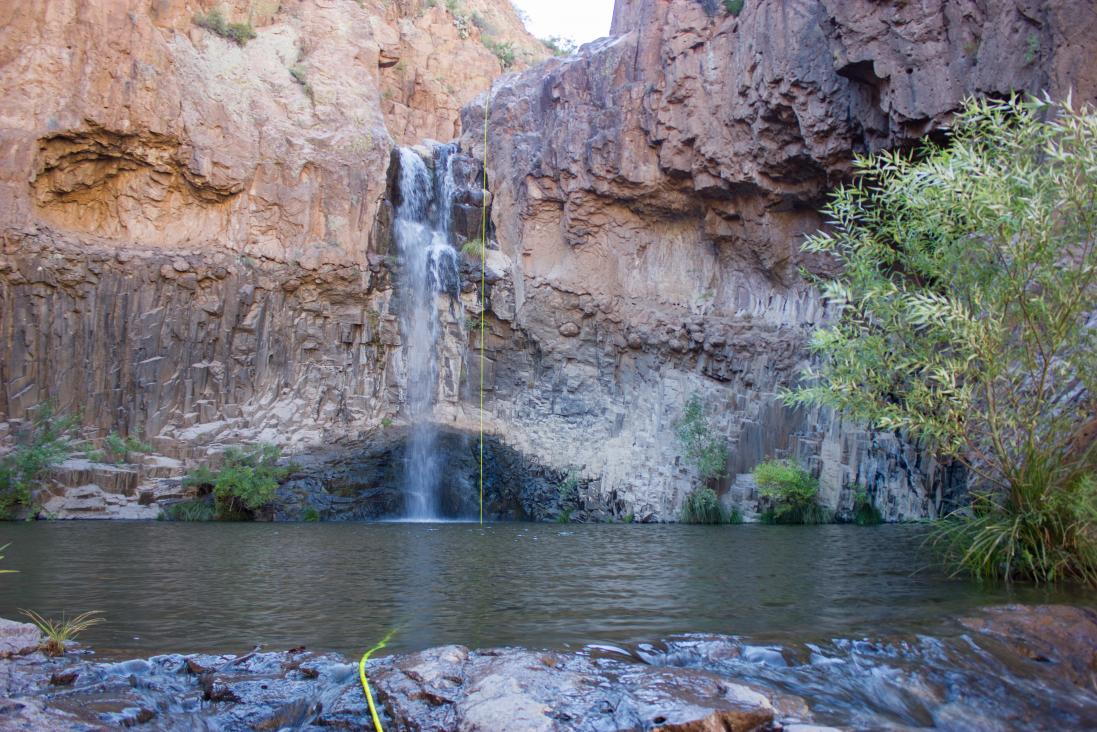
This is the most incredible pool. It is huge. It also requires rappelling unless you want to take a daring large jump off the cliff. It’s probably a 40-foot jump. I would do the jump if I knew it was deep enough!
Many people will do a double-rope rappel here, so they can take their rope down to the fifth pool, and then they scramble up a route that takes them back to the top of the fourth pool. However, I wired it for a single-rope rappel, since I was alone and wasn’t sure I would even continue to the fifth pool, and didn’t want to bet my life on the existence of the scrambling route.
There are two bolts that you can anchor to at the top of the fourth pool. The rappel will end up placing you right in the waterfall, which makes it quite interesting. I actually managed to flip myself upside down near the beginning of the rappel. I wouldn’t recommend trying this rappel for your first time. Combine this with the fact that you have to disconnect from the rope while swimming, and this makes it a difficult rappel!
Fifth Pool
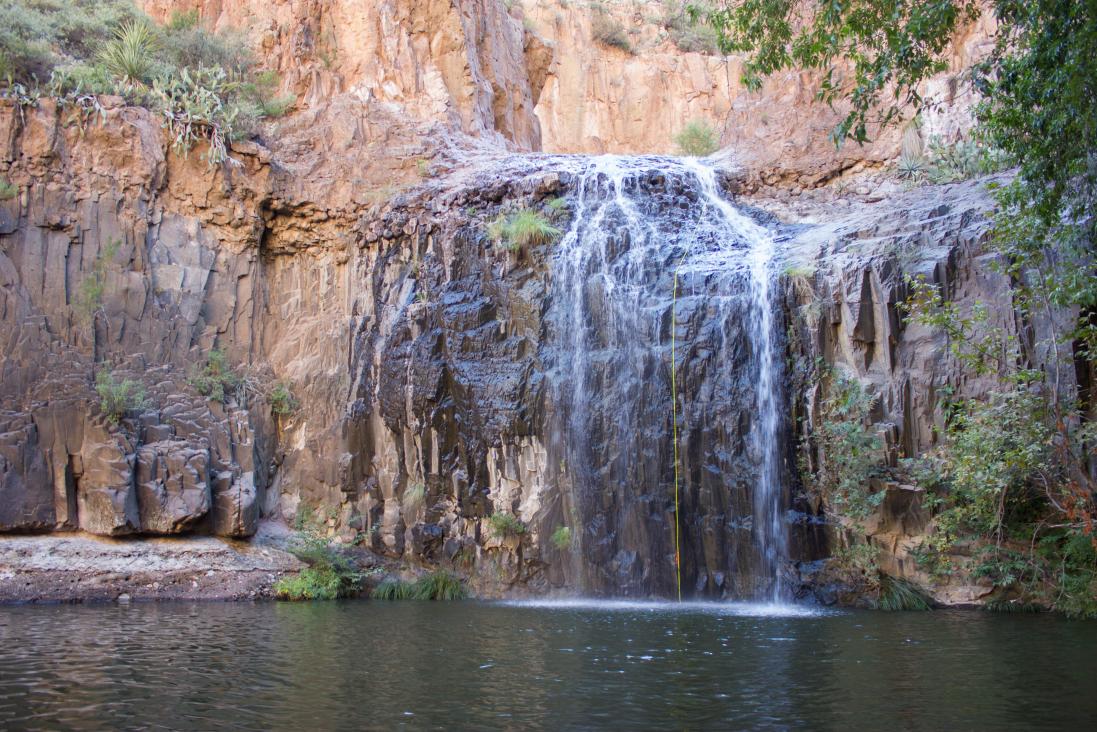
The fifth pool isn’t as high and large as the fourth, but it still is probably too high for most to feel comfortable jumping off of it. Plus, you should always check depths first! So rappelling is suggested once again.
For the anchor, there is a rock at the top of the waterfall by a small “tree” on the right. There were some slings when I was there, but I used my own slings for safety.
As I said previously, I did a single-rope rappel from the top of the fourth pool… to my surprise, I was actually able to continue my single-rope rappel all the way down to the fifth pool! I took the slack out of the rope, leaving it hanging diagonally over the fourth pool, and then anchored it again at the top of the fifth pool with my slings. My 200-foot rope was able to reach the bottom of the fifth pool all the way from the top of the fourth pool!
Getting Back Up
Hike Arizona’s report suggests that there’s a route you can scramble back up from the bottom of the fifth pool to the top of the fourth pool. From there, you can get back as I’ve already described. It appeared like this would be possible, but I didn’t try it out.
Instead, I simply ascended my single-rope setup back up both the fifth and fourth pool, collecting my slings at the top of the fifth pool.
Setting up prusiks while swimming in water is quite difficult… therefore, you absolutely need to be experienced if you plan on ascending back up the rope. I left my safety prusik from the rappel on the rope at the bottom of both rappels, allowing me to clip back into the prusik after I swam back to the rope, so I wouldn’t have to swim. Then, I simply had to setup my foot prusik, and I was ready to ascend.
Overall Impressions
In my opinion, Devil’s Canyon is worth visiting… but only once. The hike is painful enough that I wouldn’t go back again. There are plenty of spiny bushes that you have to walk through, and it takes much longer than expected.
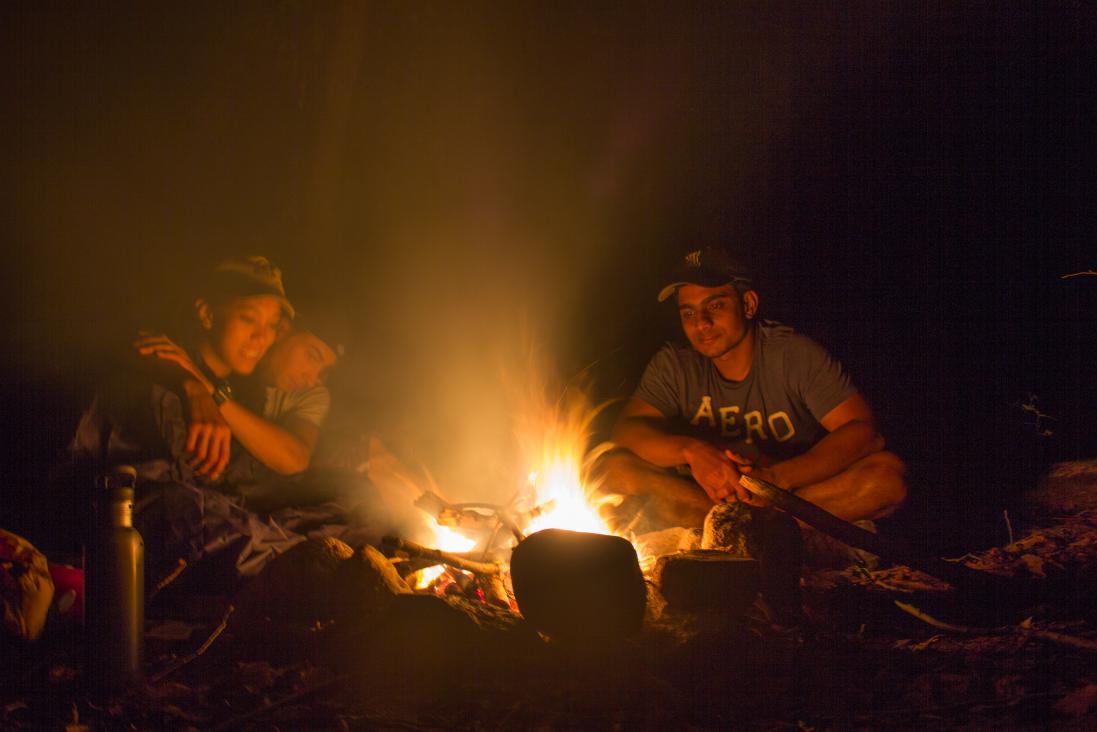
In fact, we actually ended up spending the night inside Devil’s Canyon since the trip took longer than expected, and we couldn’t find the exit in the dark. Rappelling down the pools ate up a lot of time, and by the time we started hiking back, it was already after 5:00 PM. We had lights, but we couldn’t spot the side canyon we entered from.
Our group decided to stop and spend the night instead of continuing searching for the exit. Luckily, we were able to make a fire, and the night wasn’t too cold. In the morning, we discovered we were only 5 minutes away from the side canyon! We actually walked pass the side canyon (which we thought we probably did), but who knows if we would have found it in the dark.
Itinerary
Day 1
7:10 AM
Meet at The Wall
10:00 AM – hike 2.2 miles
Start hiking
2:00 PM
Arrive at first pool
5:00 PM – hike 2.2 miles
Start hiking back
Day 2
11:00 AM
Back at The Wall